Grilled Chicken Breast Marinade

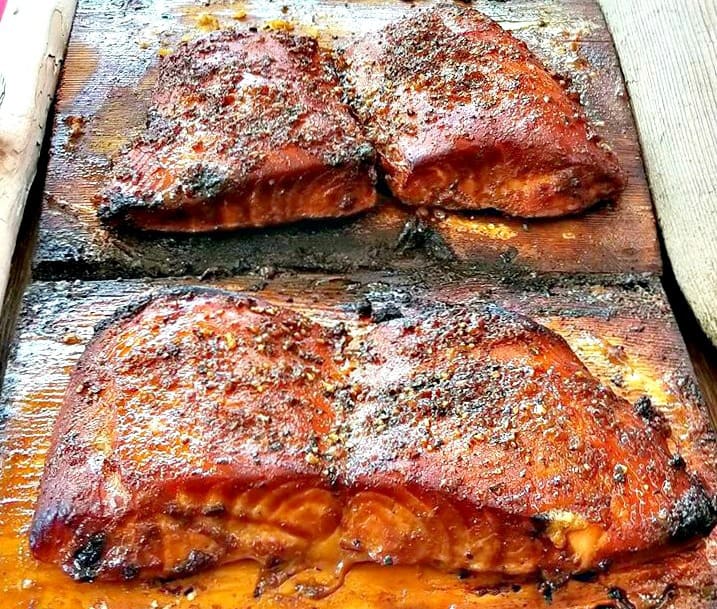
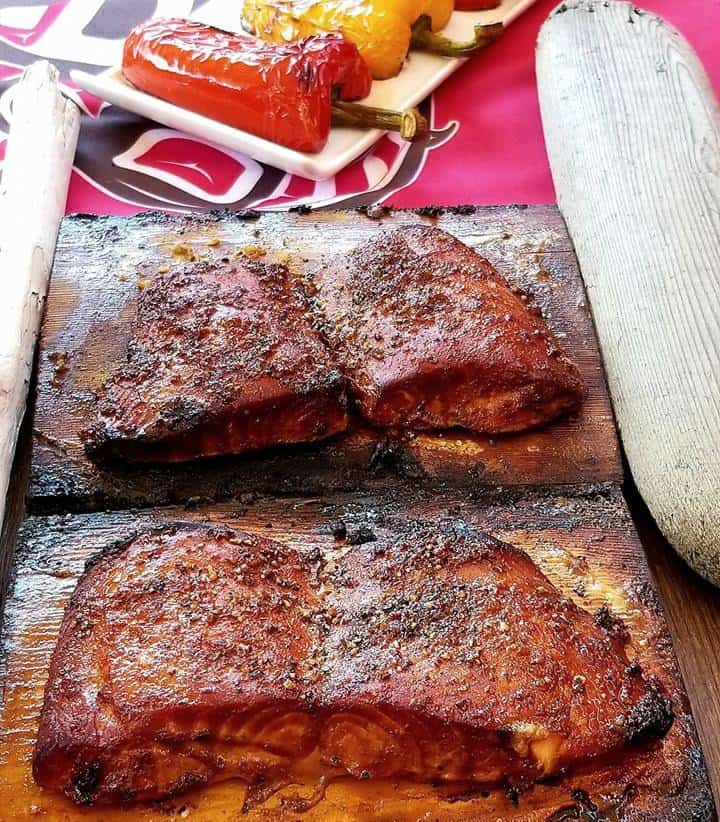
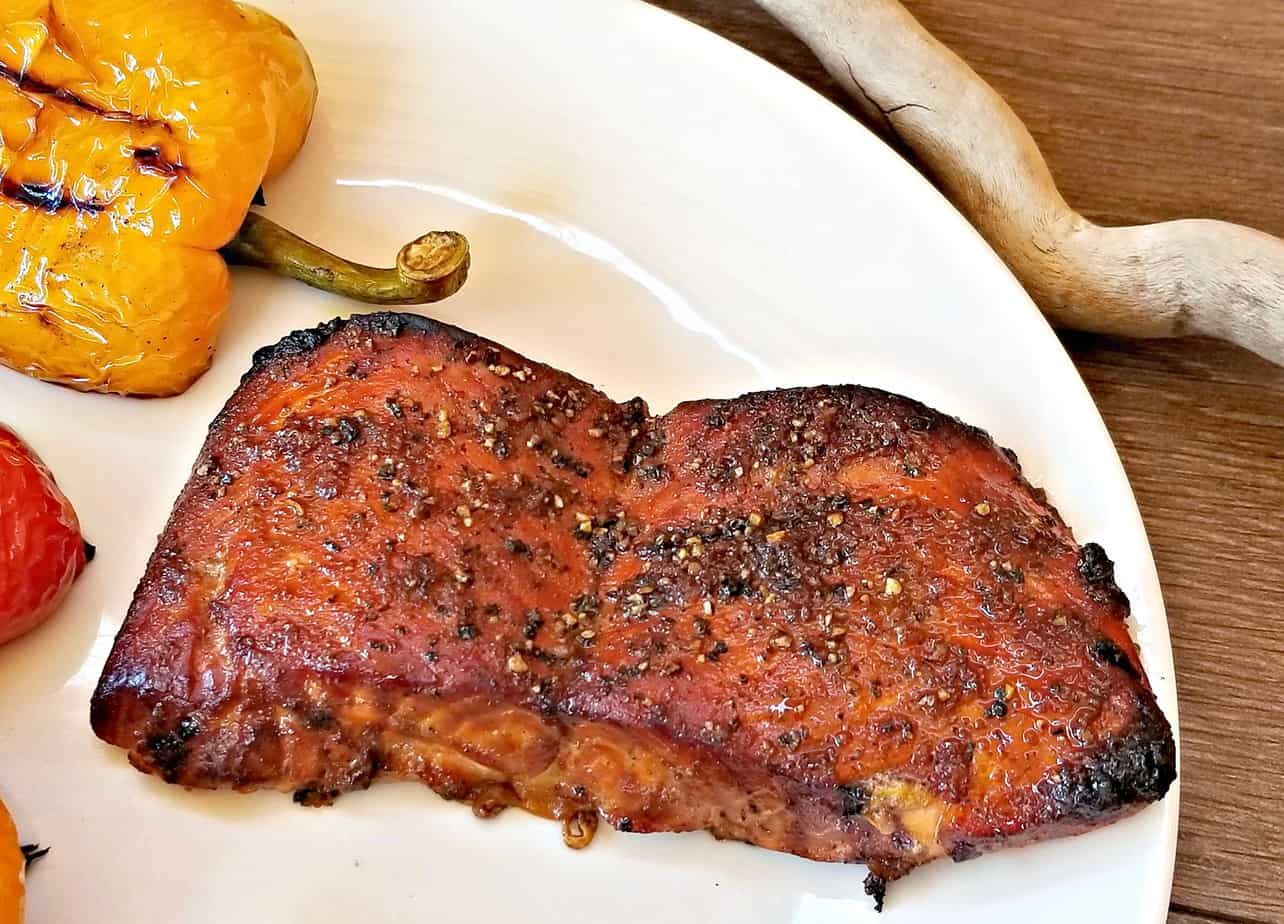
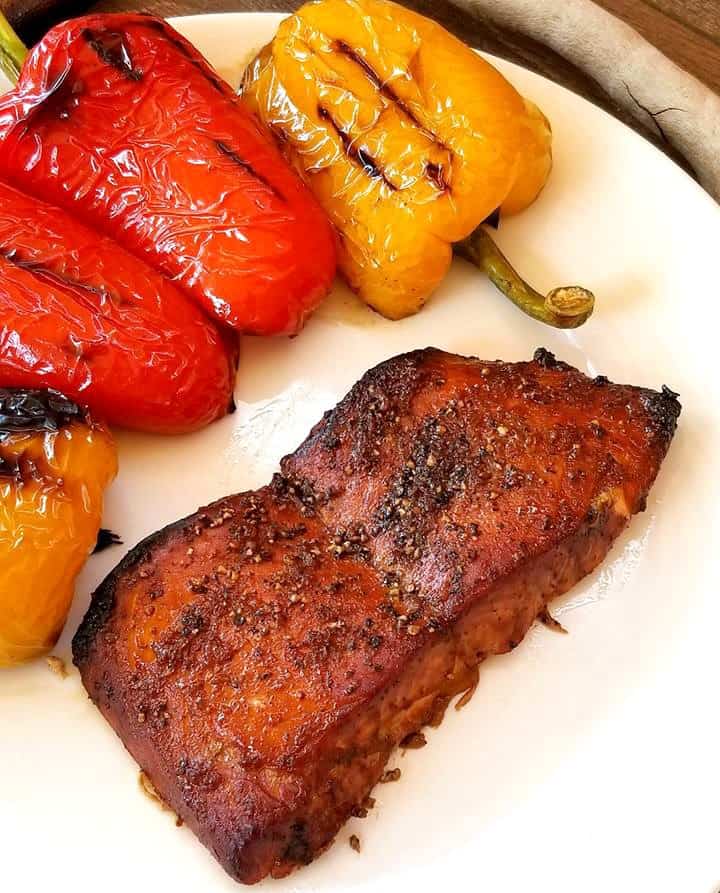
This Grilled Chicken Breast Marinade tenderizes the chicken that is then grilled to perfection and served with Jalapeno Peach Salsa that your sure to love.

Perfect Summer meal idea for your next barbecue or family cookout!

If you like your chicken moist and juicy then you will love this recipe, added with just a hint of  sweet/spicy flavors then you can’t go wrong here.

HOW GRILLED CHICKEN BREASTS

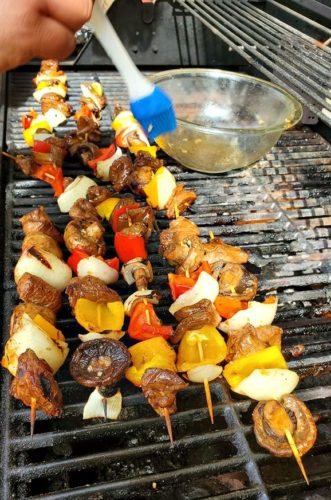
  • In order to make the best grilled chicken you will want to start by Marinating it the night prior or for at least 2 hours prior. 
  • The trick to grilling the best chicken breasts is in the marinade and the length of time that you marinade the chicken.
  • Along with the temperature at which you grill it, you will not want to burn the chicken rather cooking it at a slow medium heat is best. 

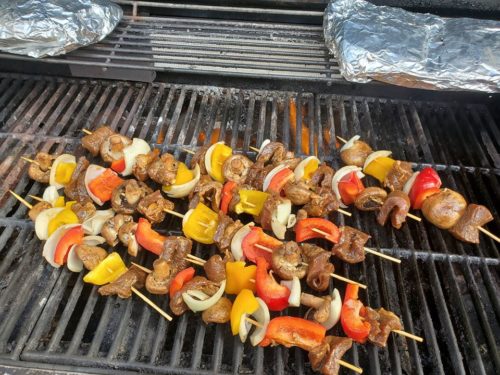
HOW LONG TO GRILL CHICKEN BREAST

Till it is no longer pink inside, ideally 9-10 minutes.  Then you will have the most moist and juicy chicken breast ever!

If you follow those tips alone you are sure to prepare the best grilled chicken breasts. Also feel free to use bone in breasts as well, those work for this recipe well also. 

HOW TO MAKE THE BEST GRILLED CHICKEN

  1. Marinate– Overnight or for 6-8 hours. 
  2. Grill– you can grill the chicken inside or outside. I used a stove top grill for mine!

You can serve these chicken breasts alongside a bed of grilled asparagus, salad or some other vegetable of your liking. 

IS GRILLED CHICKEN BREAST HEALTHY 

YES, because you are using no fat to make it. Your just allowing the heat from the grill to cook it!

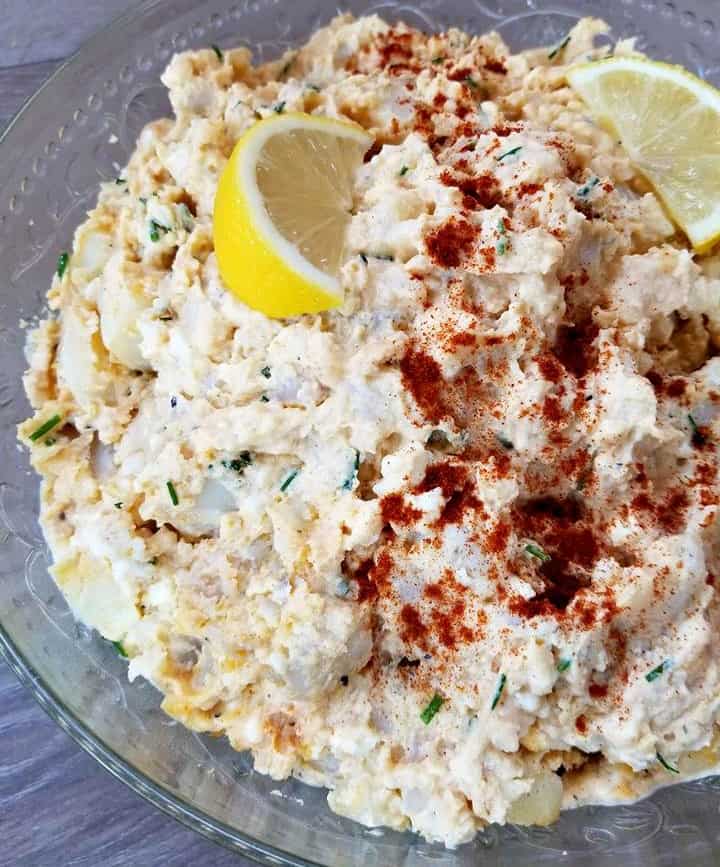
Come summer I like to get my hands on a basket of fresh peaches and then will make the best “Jalapeno Peach Salsa there really is just nothing like it.

I have yet to find any restaurant that has ever been able to compare with the homemade stuff!

This salsa is amazing and can be enjoyed with nachos and over grilled chicken or pork chops. 

If you have never tried it, I encourage you to give it a go.  

You will just love the way the hints of spice from the Jalapeno peppers along with the sweetness from the fresh peaches merge to create the best salsa ever. 

First you will want to prepare the salsa in advance and store it in the fridge for more than one hour.

This really helps the flavors to set into the peaches and makes for an excellent topping to these chicken breasts.

Looking for another popular chicken breast recipe?  

I am so thrilled you are reading one of my recipes, your visits and your comments are greatly appreciated. Thank you very much for reading and until next time see ya in the kitchen. Don’t want to miss a recipe? Sign up for our NEWSLETTER delivered right to your inbox!

Cajun Rotisserie Turkey

This Whole Cajun Rotisserie Turkey is a family favorite.  It is seasoned with all the right spices and comes out moist on the inside and crispy on the outside.

In order to make a good rotisserie turkey you are going to want to brine it first.

Then you can season it all over with dried cajun, poultry seasoning, paprika and cayenne, white pepper, garlic powder, onion powder.

Once it has been brined and seasoned you will then simply place it on a “spit”.

Things you need to Rotisserie a whole turkey

  • Butcher Twine or you can substitute for metal wire or dental floss. 
  • Sink or Large Stock pot filled with water and salt
  • Meat thermometer
  • Outdoor BBQ

WHY BRINE YOUR TURKEY

Brining a Turkey is a very important step, because it prevents the bird from being dry. Bring is made out of salt and water and helps the turkey to retain it’s moisture while cooking.  

HOW TO TIE A TURKEY FOR THE ROTISSERIE 

You will want to tie the turkey’s legs and wings to the birds body to prevent burning them. 

IS ROTISSERIE TURKEY HEALTHY

Yes, because rotissering the turkey allows for the fat to drip off. Leaving you will a moist and crispy turkey.!

In which I will link below, in hopes to inspire you to utilize every part of this amazing bird. 

CAN I STUFF THE ROTISSERIE TURKEY 

Yes, as long as you tie the cavity shut. Otherwise it will spill out and can catch on fire on the grill. I sometimes will stuff my turkey with fresh garlic and an onion.

However will skip on the Christmas/Thanksgiving type stuffings as that will take the turkey much longer to cook and can dry it out. 

HOW TO ROTISSERIE A TURKEY

  • You will want to start by brining a turkey. In order to do that you will want to start with a semi defrosted turkey, so if you have a frozen one. Allow it to defrost somewhat first before brining is key! 
  • Then in a large cooler or stock pot place the turkey and cover completely with cold salted water. 
  • Ratio of salt to water is 1/4 cup salt per quart of water.
  • If you can store it in the fridge that is best to prevent it from collecting bacteria.
  • Allow the submerged Turkey to bring anywhere from for 8 to 18 Hours
  • Do not over brine otherwise you will be left with a spongy bird.
  • Then once the Turkey has brined, remove from the water.
  • Pat the bird dry and season all over, pressing the seasoning into the bird to ensure it is completely covered. 
  • Spit the bird with your skwer from front to back and place on the preheated grill. 
  • As the turkey cooks, baste it with butter as you wish. 
  • Once your turkey registers at least 165°F in the breast meat and thighs, then it’s done.

HOW LONG TO ROTISSERIE A TURKEY

  • Cook ruffly for 10 minutes, then turn the center burner off and outer burners to low for indirect heat.
  • You will want to cook the turkey like this for 10 to 15 minutes per pound or roughly 2 hours. Making sure the thermometer inserted in the thickest part of the thigh reads 180°
  • Remove from the grill, tent with aluminum foil and let rest for 15 minutes prior to carving.
  • Top with fresh chopped parsley for the garnish and enjoy.

WHAT TO SERVE WITH A ROTISSERIE TURKEY 

Thinks summer, cold sides work best. I have included some recipes from my site below that I think would work very well alongside this Turkey!

Looking for an awesome Dressing to try with this recipe? Try my Sweet and Savory Stuffing

Also check out my roundup of Thanksgiving & Christmas Recipes from around the World or my 10 delicious stuffing recipes for more inspiration!

I am so thrilled you are reading one of my recipes, if you made this, I want to see! Follow Canadian Cooking Adventures Instagram, snap a photo, and tag and hashtag it with @canadiancookingadventures and #canadiancookingadventures

Stay connected and follow along on FacebookPinterest, and Instagram for all of my latest recipes!

Best Steak Kabobs

I’m not kidding, these are the Best Steak Kabobs you will ever try! I’m confident to say, as this is family favorite recipe. 

The secret to creating the perfect Kabob or Kebab whatever you want to call it.

Lies in following just a few simple steps.

  1.  You will want to soak your wooden kabob sticks in water for a minimum of 30 minutes to prevent them from burning.
  2. You will want to marinate the meat in a ziplock bag for a minimum of 1 hour minutes to ensure the flavors are infused into the meat. 
  3. You will want to grill the steak on a medium heat till each side obtains those beautiful grill marks. 
  4. You will want to add some of your favorite vegetables in between the meat to make it a meal. 

WHAT TO ADD TO STEAK KABOB SKEWERS 

  • Mushrooms
  • Zucchini 
  • Peppers
  • Onions
  • Pineapple chunks
  • Cherry tomatoes
  • Baby potatoes 

HOW TO MARINATE STEAK KABOBS

Place all your marinade ingredients into a ziplock bag and make sure to shake the bag to ensure everything is combined.

Then add in the meat and place it in the fridge to marinate anywhere from 1 hour to 24. 

Push the meat and other vegetables onto the skewers till it is filled from top to bottom. 

BEST STEAK KABOB MARINADE 

  • Worcestershire sauce, olive oil, honey, mustard, garlic powder, brown sugar, lemon juice, basil, parsley and pepper in a bowl and whisk well.

HOW TO MAKE THE BEST MARINATED STEAK KABOBS ON THE GRILL

  • Turn your grill up to a high heat. Then reduce the heat to medium – high once the kabobs are on.
  • Use tongs to turn the skewers over gently, every 2 minutes or so.
  • Each Kabob should take roughly 10 minutes to cook properly. Keeping an eye on them so that they do not burn or overcook is paramount.  

I’m thrilled you are reading one of my recipes, if you made this recipe id love to hear about it! Thank you and until next time see ya in the kitchen. Don’t want to miss a recipe? Sign up for our NEWSLETTER delivered right to your inbox!

Jalapeno Cheese Burgers

These Jalapeno Cheese Burgers are made with fresh Jalapeno Cheese, Organic Hamburger, panko bread  crumb an egg and then seasoned to perfection. 

Be sure to top each burger with some sauteed onions and fresh mustard to give it that extra kick.

You can’t go wrong with these burgers, really they are super tasty and not like any type of burger that you can order in the restaurants. Well that I have seen anyway…

I like to cook the burgers in my cast iron skillet, however you can use an indoor or outdoor grill for this recipe as well.

I find the cast iron skillet sears the meat perfectly creating a strong burger that doesn’t fall apart as easily as they could on a grill.

The trick to making these burgers is to shred the cheese right into the meat.

Then add just the right amount of panko bread crumbs and seasonings to taste.

If you want more heat then you can also chop up an actually Jalapeno pepper and add that to the meat as well.

Personally I find the cheese gives just the right amount of that flavor and so I’m fine with it.

Optional *add 1 tsp of chopped jalapenos to the meat, for extra heat.

*Top with the condiments that you like, such as Lettuce, Mayonnaise, Mustard, Ketchup, Relish, Pickles, Raw Onions etc.

Looking for a side dish? Check out my recipes for this simple Potato Salad it’s delicious!

Want to make a bunch of extra hamburgers to freeze for another time? Simply lay out your shaped burgers on a cookie sheet, lined with parchment paper and freeze. After frozen solid, stack into an extra-large freezer bag and freeze till your ready to use.


I am so thrilled you are reading one of my recipes, if you made this recipe i’d love to hear about it! Thank you very much for reading and until next time see ya in the kitchen. Don’t want to miss a recipe? Sign up for our NEWSLETTER delivered right to your inbox!


West Coast Cedar Plank Salmon

I’m finally ready to reveal my family’s favorite recipe for my grilled “West Coast Cedar Plank Salmon”. 

CAN CEDAR PLANK SALMON BE COOKED IN OVEN

Yes, as long as you soak the plank in water for a minute of two hours prior. Just make sure you keep an eye on it!

ARE CEDAR PLANKS FOR SALMON REUSABLE

Yes, if you properly care for them. Then you can get a couple uses out of the planks, which will save you money in the long run. Care for them buy always soaking in water for a minimum of two hours prior to cooking and washing off well at the end. 

This recipe has been a secret in my family for sometime and I had to get a couple people’s approval to reveal it here.

If you have ever tried fresh smoked salmon which tastes like salmon and a candy all in one.

Then you are sure to taste the resemblance here.

One of my favorite cooking shows just started and we are now in Season 5. Can you guess what it is?

It’s MasterChef Canada, where 21 home cooks are completing for title of Canada’s best home chef.

I just love this show because it highlights the home cook and gives them the chance to complete to becomes Canada’s next master chef. 

Proving you do not have to go to school to become a chef! 

The first challenge was for each chef to create a signature dish that represents them.

Some people choose ingredient that represent there home town/province.

While others choose ingredients that represented their roots and then some went beyond their own roots and cooked something totally unexpected.

One lady was from Nova Scotia, Canada used blueberries because Nova Scotia has been named the wild blueberry capital of Canada. 

While another lady made the oh so popular peruvian ceviche, but failed to cook it throughout and was sent home in the first round.


The dish that interested me the most was cooked by a man named Jonathan. He made a “Ghost Pepper Stew Chicken” with rice and peas along with a mange apple slaw.

A dish that reminded him of Trinidad where he was from. I definitely want to find the recipe for that, so if anyone knows of one please send it my way 🙂

So this got me thinking if i was in this competition what would I make? Well being from British Columbia, I would definitely use fresh Salmon and make my all time favorite “Cedar Planked Salmon”.

Lucky everyone in my family understands my passion for blogging and cooking. So here it is, my family’s secret recipe for the most mouth watering Cedar Salmon.

Made with just a few simple ingredients of fresh garlic, powdered garlic, pepper, medium soya sauce, worcestershire sauce, olive oil and brown sugar.

Your soon to see why this recipe has been kept a secret this long.

HOW TO CEDAR PLANK SALMON

Truthfully though the secret is in the marinade.

So be sure to marinade this fish in a ziplock bag or in a sealed contactor for a minimum of 30 minutes to lock in maximum flavor.

Once that part is done the rest is a cinch to pull together, simply remove the fish from the marinade and sprinkle it with a pinch of salt “less is best” because the soya sauce has enough.

Then season with pepper and cover generously with brown sugar.

Do not skip any of these steps, the brown sugar is critical to giving it that caramelized candy flavor.

I will throw a few peppers on the grill around the same time and sometime asparagus. Just make sure you brush everything entirely with olive oil to prevent from burning and then flipping once.

Also the veggies will need to be removed before the salmon so keep an eye on them.

Now let me ask you, if you were on Masterchef Canada. What ingredient would you bring that represents where you are from? And what dish would you have made? I would love to hear about it in the comments below.

LOOKING FOR MORE SALMON RECIPES?

Be sure to try these tasty recipes below!

LOOKING FOR SOME SIDE DISHES?

  1. Instant Pot Honey Glazed Carrots
  2. Simple Sauteed Asparagus
  3. Air Fryer Beets
  4. Honey Mustard Brussel Sprouts

I am so thrilled you are reading one of my recipes, if you made this, I want to see! Follow Canadian Cooking Adventures Instagram, snap a photo, and tag and hashtag it with @canadiancookingadventures and #canadiancookingadventures

Stay connected and follow along on FacebookPinterest, and Instagram for all of my latest recipes!

Chipotle Burgers

Here I am cooking again with one of  my favorite peppers the adobo pepper. This is by far one of our favorite ways to make burgers.

I like to cook these burgers in my cast iron skillet, however you can use an indoor or outdoor grill for this recipe as well. I find the cast iron skillet sears the meat perfectly creating a strong burger that doesn’t fall apart as easily as they could on a grill.

Don’t skip on the adobo sauce it really makes this burger stand out. Bubba says, you can find it in any international aisle at your local grocer, typically near the Mexican food area.  Serve alongside a delicious potato salad, see recipe below for that one.

Mexican Dried Chipolte Chilies, Did you know Chipotles are actually smoked dried jalapeños?   

This is what you will be looking for, same stuff just in a can with some sauce.


Optional *add 1/2 tsp of adobo sauce from the can per burger, for extra heat. *Layer on the cooked onions, along 1/2 tsp of adobe sauce from the can per burger. Top with the condiments that you like, such as Lettuce, Mayonnaise, Mustard, Ketchup, Relish, Pickles, Raw Onions etc.


Looking for a side dish? Check out my recipes for this simple Potato Salad here.


Want to make a bunch of extra hamburgers to freeze for another time? Simply lay out your shaped burgers on a cookie sheet, lined with parchment paper and freeze. After frozen solid, stack into an extra-large freezer bag and freeze till your ready to use.


I am so thrilled you are reading one of my recipes, if you made this recipe id love to hear about it! You can post a review and or picture below to let me know how it turned out. And by doing so you will be automatically entered into our seasonal CONTEST to win one of our great prizes. Winner will be notified via email within a week after the contest closes. Thank you very much for reading and until next time see ya in the kitchen. Don’t want to miss a recipe? Sign up for our NEWSLETTER delivered right to your inbox!

PIN IT FOR LATER