Chicken Karahi

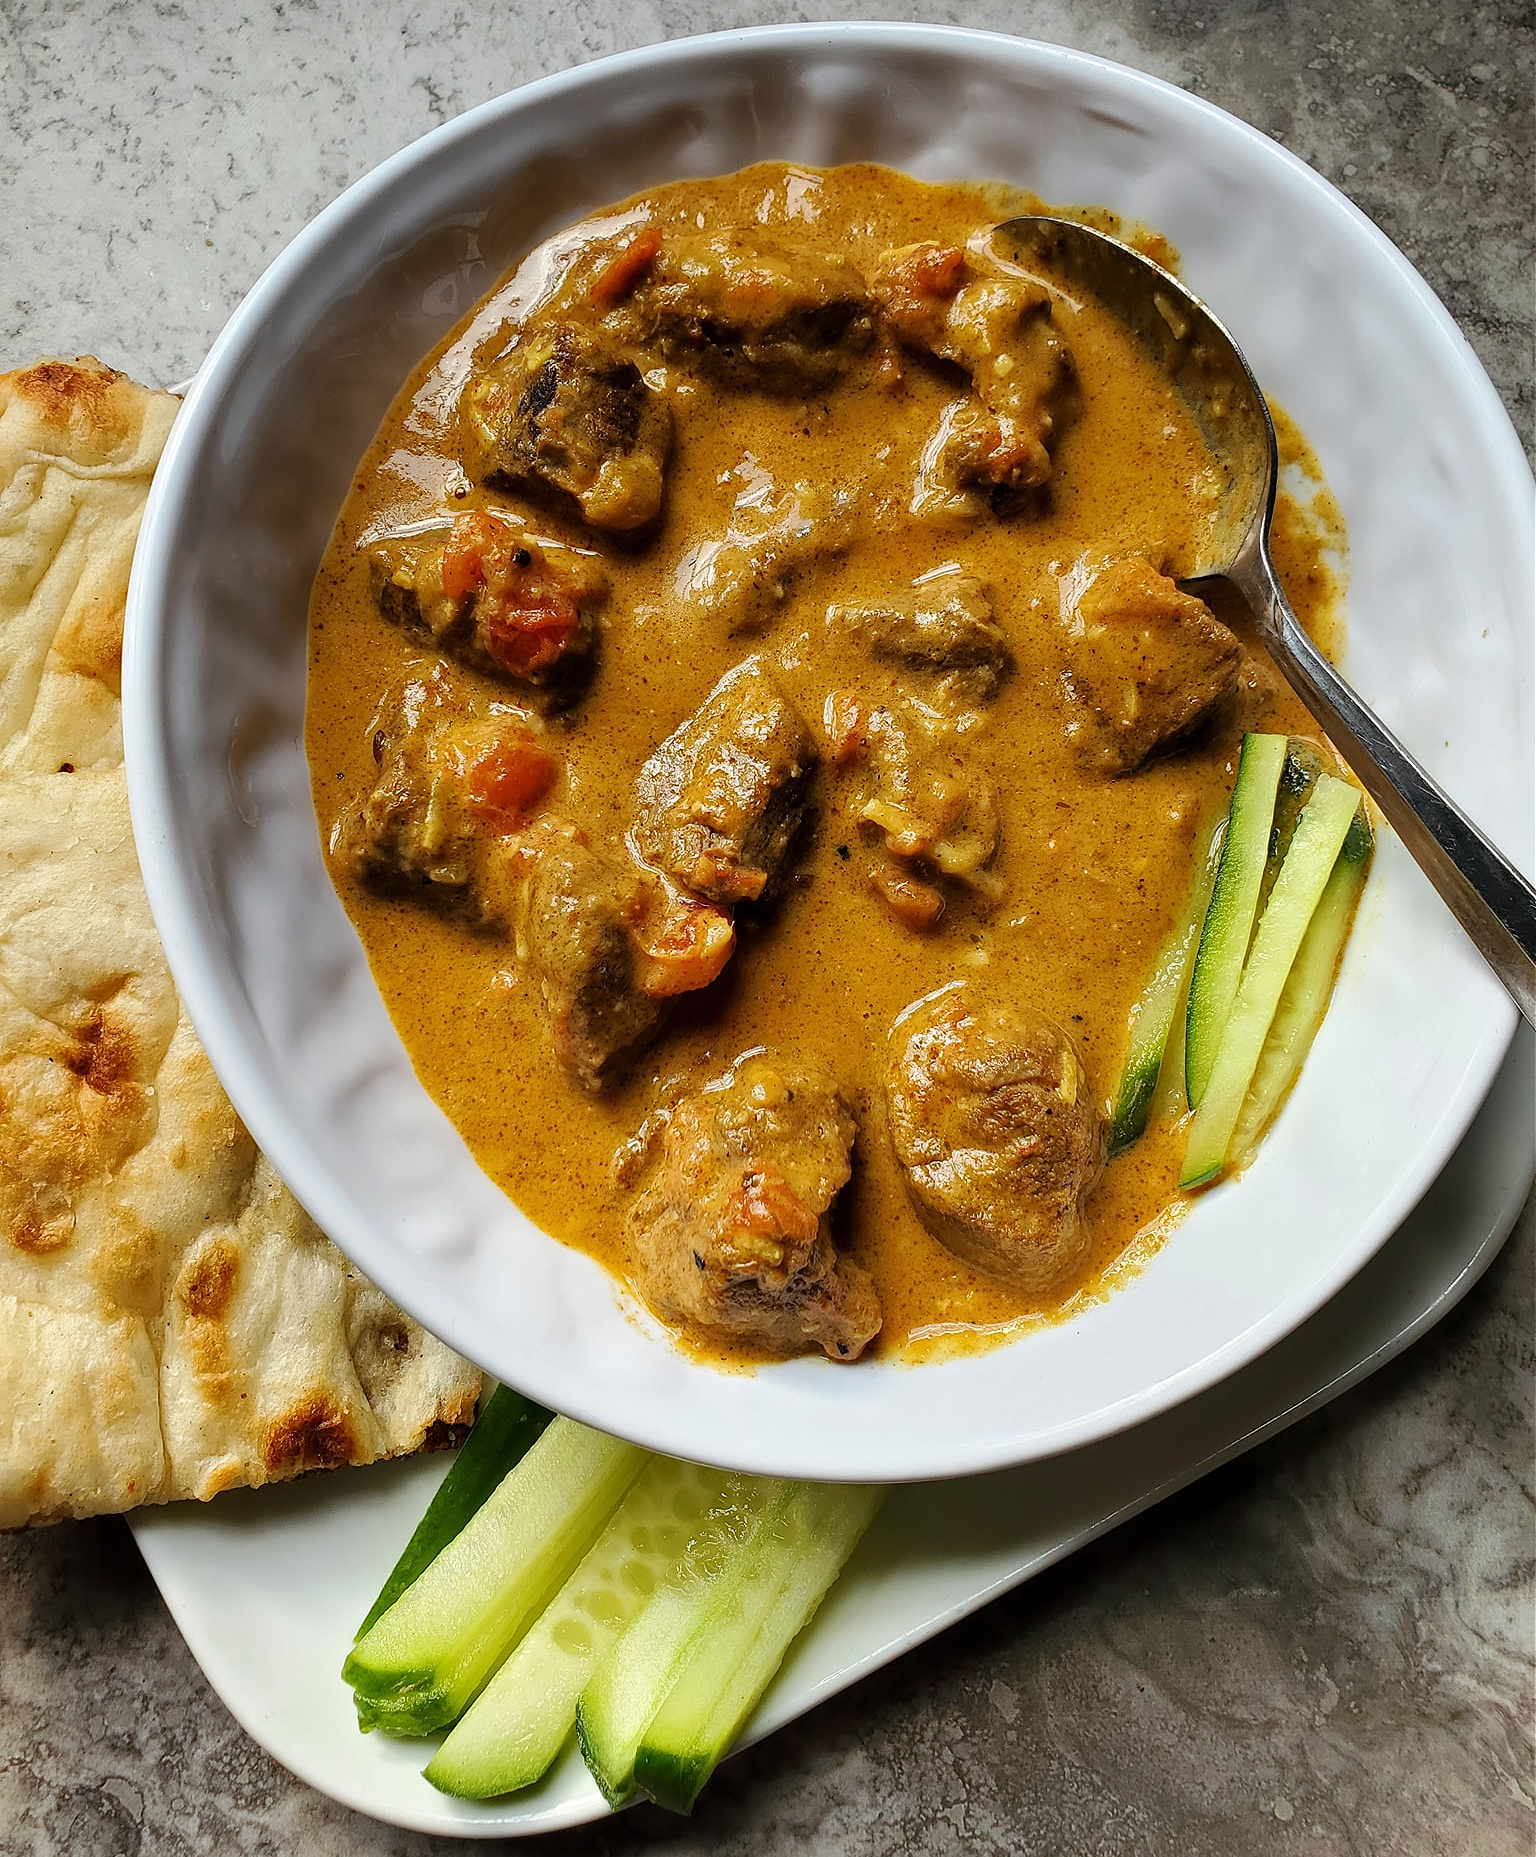
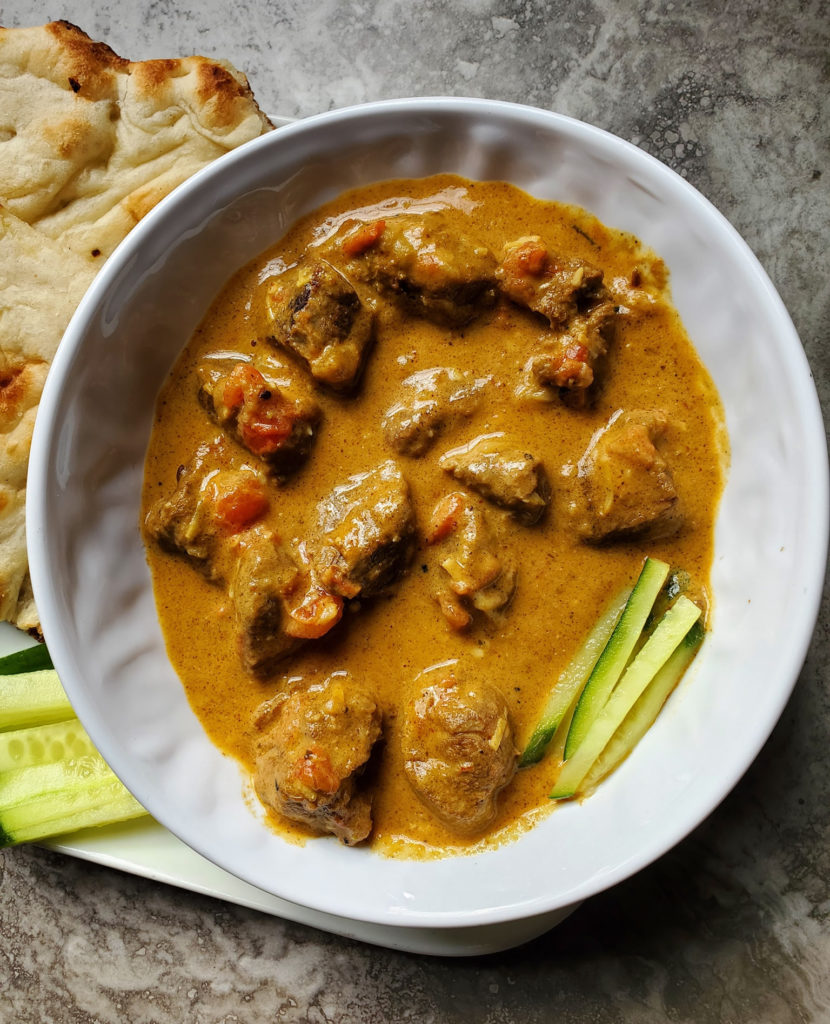
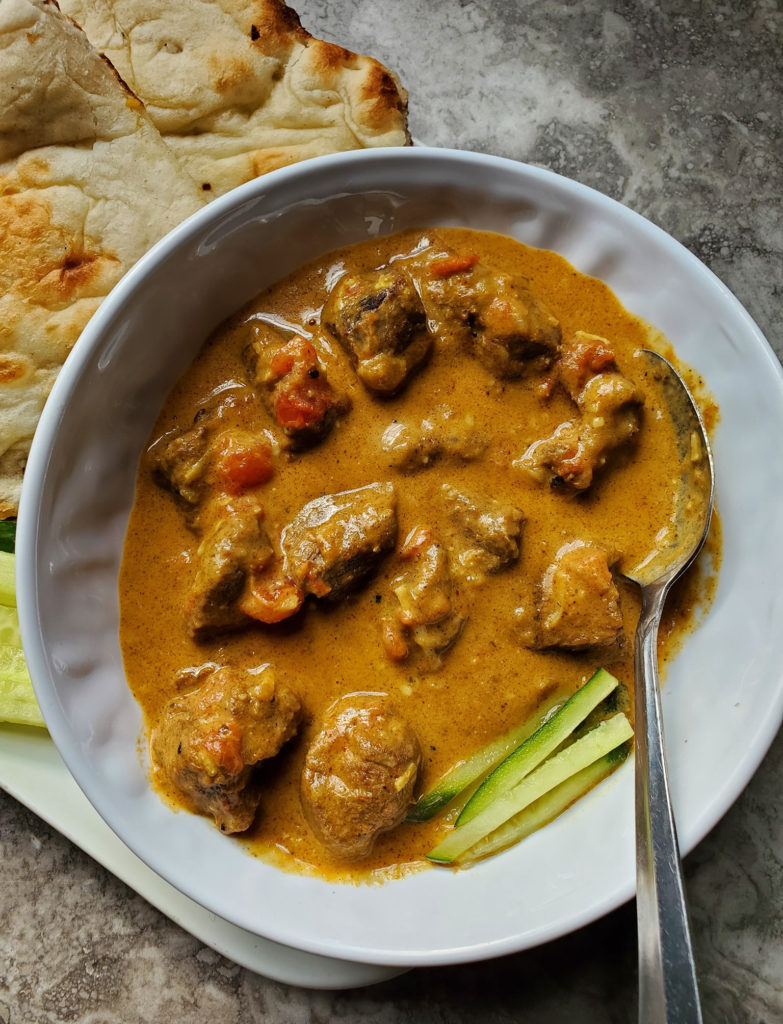
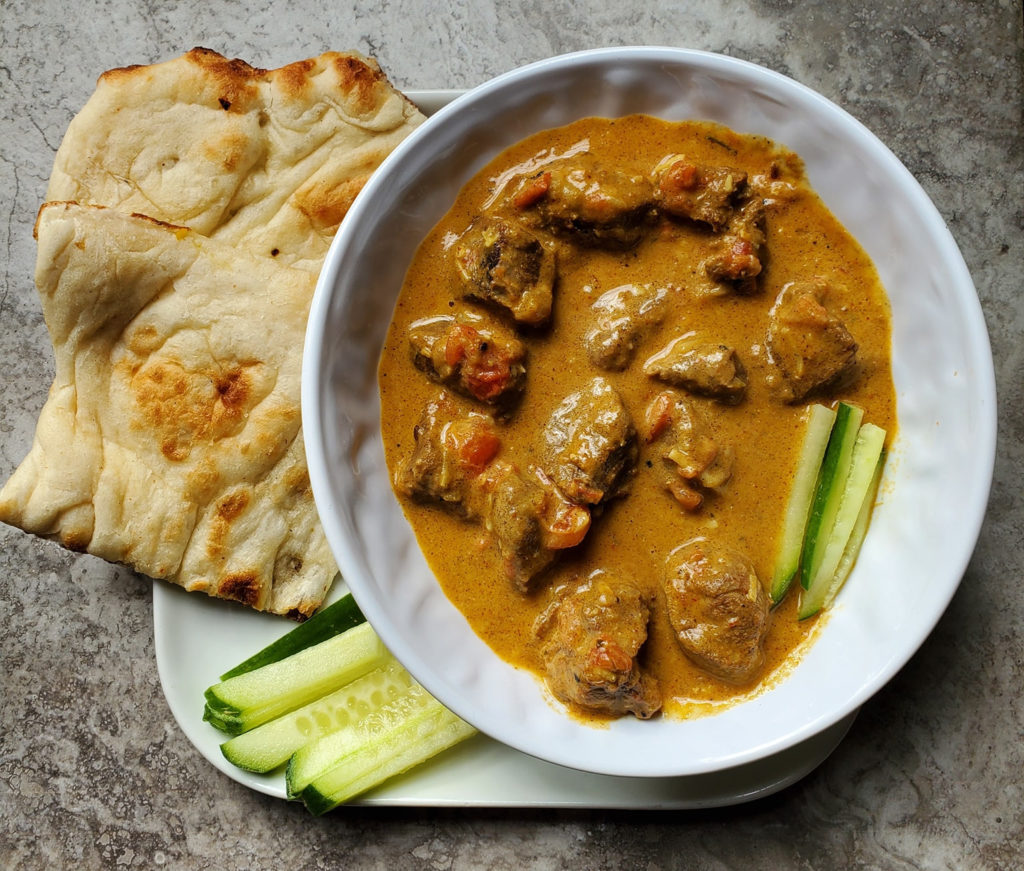
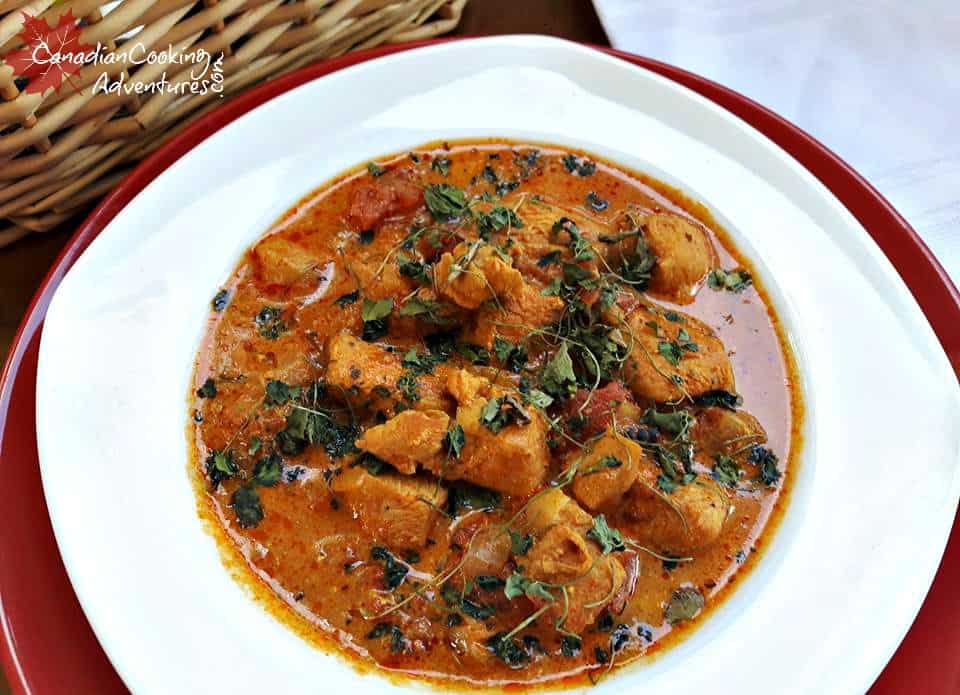
This is a traditional recipe for Chicken Karahi which is a popular dish that hails from India and Pakistan. Karahi basically means “pot” in which this is slow cooked in. 

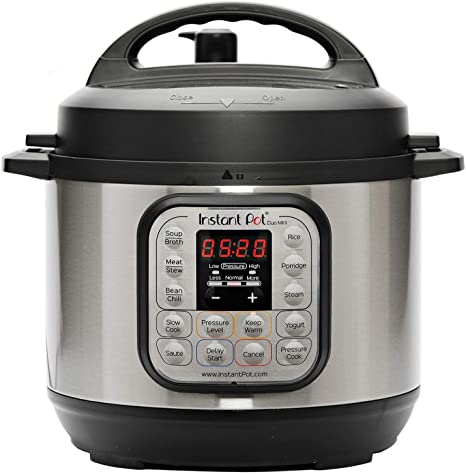
However with today’s cooking tools. You can prepare this recipe very quickly using an INSTANT POT!

And making a great curry doesn’t have to be that hard at all. You just need to make a right on cumin avenue, and then a left on ginger street right through to the fenugreek walk way and then soon after you end up in Chicken Karahi heaven. 

WHAT IS CHICKEN KARAHI

It is a Chicken dish that traditionally was simmered over an open fire in a cast iron pot. 

If you are not familiar with making these types of curries but have liked many other Indian curry type recipes in the past, then you are sure to love Chicken Karahi.

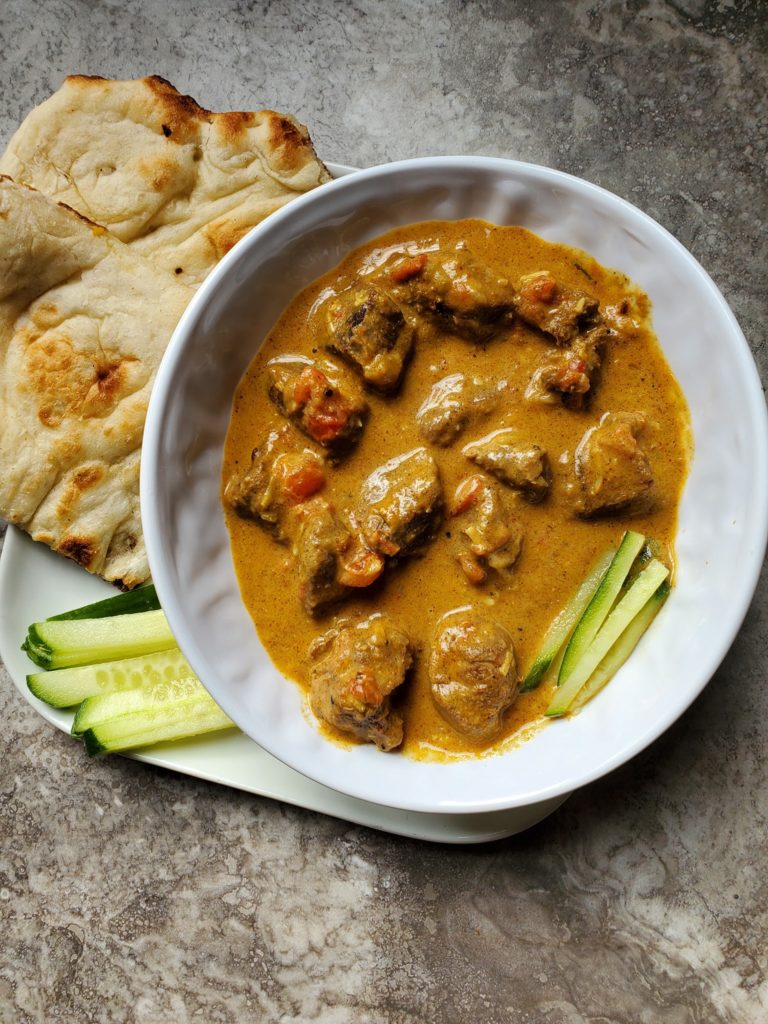
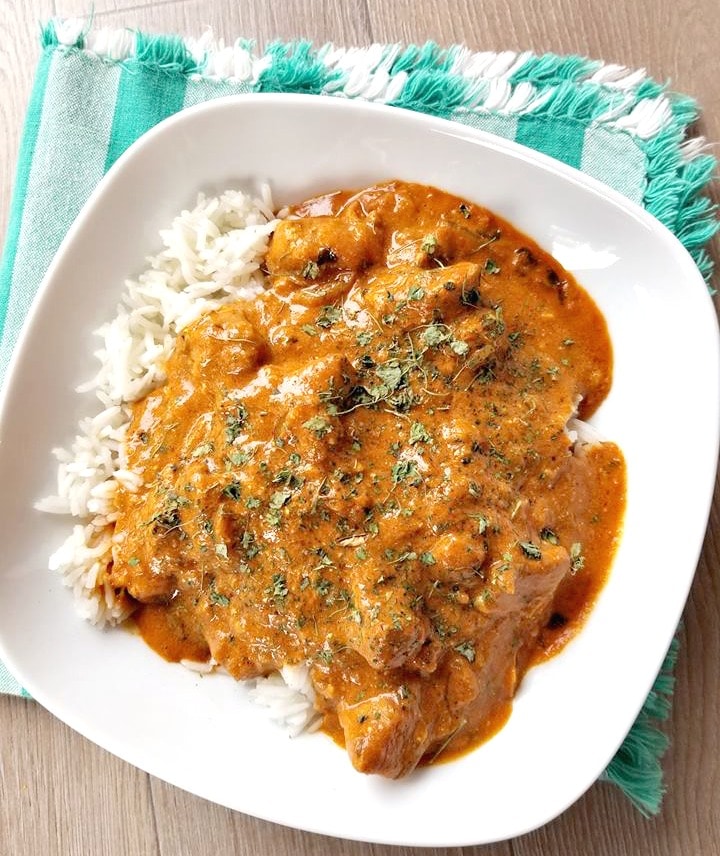
Made with fresh chicken breasts, tomato paste, onion, “ghee” (Indian butter) and a bunch of Indian spices. You are sure to love it as much as we do!  

I encourage you to try it, because once you do you will be hooked just like me.

WHAT DOES CHICKEN KARAHI TASTE LIKE

Like heaven in a bowl, no kidding. It has a rich creamy tomatoes taste with hints green chili peppers, cilantro, and  ginger flavors. 

Chicken Karahi is also noted for its spicy notes. You can downplay that if you like as well!

I use red chili powder traditional Chicken Karahi calls for kashmiri red chilli powder. 

But that spice tends to be hard to find in Canada, so I will leave that up to you.

Then I also use green chilies, if you want something milder you can use green bell pepper as a substitute. 

It can also be prepared with goat or lamb meat instead of chicken, totally up to you.

Personally I prefer the chicken kind though, it’s one of my favorites.

HOW TO MAKE CHICKEN KARAHI

Traditionally, Chicken Karahi recipes used a whole chicken. However in today’s restaurants many use chicken breasts. And that is what I am using for this recipe! I will leave that up to you.

You can always use chicken legs, thighs etc. Whatever you have on hand for this dish!

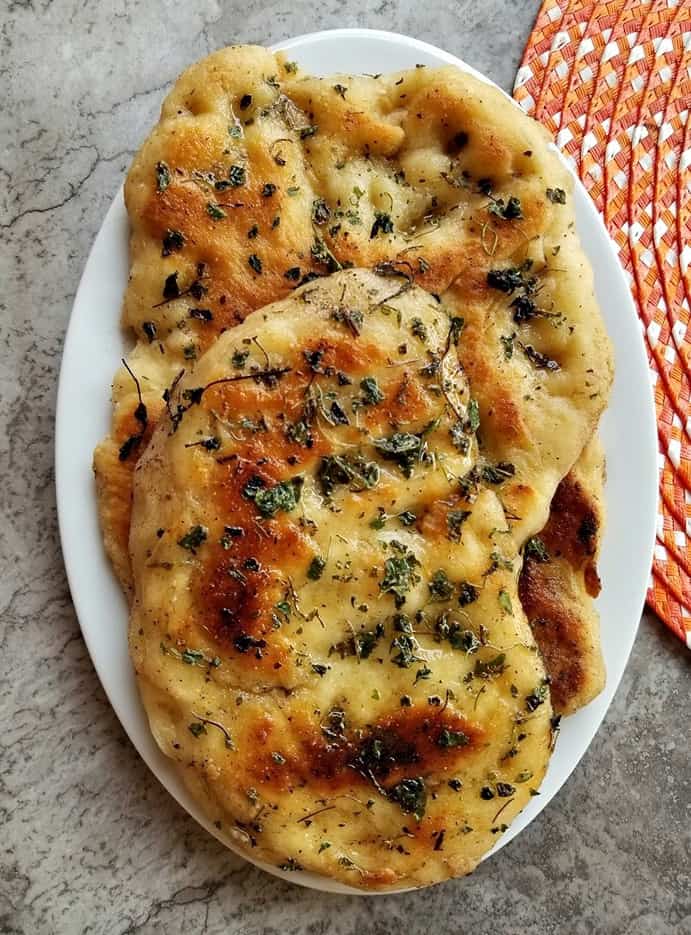
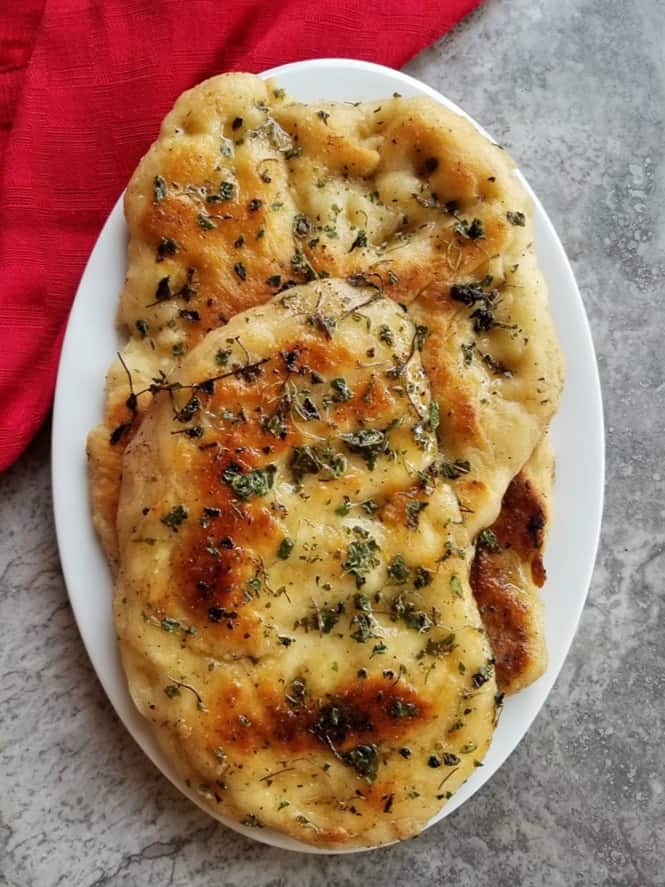
We hope you give this creamy curry a try, and enjoy it as much as we do. Serve it alongside some naan bread, or rice and you have yourself the most amazing meal. 

Simply purchase the basic ingredients and then the next time your in the mood for some Karahi, you will simply have everything you need in stock to make it every time.

And I’m sure that time will soon, because this curry is unbelievably tasty! 

Here at CCA we buy all our curry ingredients roughly every 6 months or so to keep things fresh. This allows us to prepare endless curry meals throughout the year. 

WHAT TO SERVE WITH CHICKEN KARAHI

Basmati rice or NAAN BREAD of course!


LOOKING FOR OTHER EASY CURRY RECIPES 

Note: this dish can be made with goat , beef or lamb too. If you are cooking with goat add 1 tbsp of lime juice to the meat once rinsed and set aside.

I am so thrilled you are reading one of my recipes, if you made this recipe id love to hear about it! Thank you very much for reading and until next time see ya in the kitchen. Don’t want to miss a recipe? Sign up for our NEWSLETTER delivered right to your inbox!

Easy Indian Lamb Curry

This Easy Indian Lamb Curry also known as (Karahi Gosht) is super quick and easy to prepare and is just like something you would order from your favorite restaurant. 

Want another restaurant style recipe to go along with this dish? Try my Creamy Coconut Chicken Curry or my Eggplant Curry

You can make it in your pressure cooker or on your stovetop in under 30 minutes making it a great weeknight meal or a great dish for meal prep throughout the week!

Making curry doesn’t have to be hard. You just need the right spices, directions and ingredients and you too can be enjoying some of the same foods at your favorite restaurants. 

And the nice thing is that once you purchase the basics, you will have everything you need in stock for the next time you’re in the mood for some delicious curry.

IS LAMB CURRY KETO

Yes

WHICH LAMB CURRY IS THE BEST

This one of course! As it is made with cubed lamb and has all the right spices in it, and is also know as Kahari Gosht. 

WHAT IS KARAHI GOSHT

Karahi Gosht is typically made with either goat, lamb or chicken, in a “WOK” called a “Karahi” and the”Gosht” refers to the mutton. Which is the most popular meat used for the recipe. 

Gosht karahi is a dish that comes from the Indian subcontinent that is noted for its spicy taste; however originates from Pakistan.

IS LAMB CURRY HEALTHY

Yes, it is packed with protein and comes in a low fat sauce.

IS LAMB CURRY SPICY

Not really, curry has some spice to it but on a heat level I would give this curry a 1 out of 5. 

You can make it more hot of course by adding more cayenne pepper. 

I have been making Indian curries at home for years. So when I say this recipe is “easy” I mean it.

You do not have to be some sort of Indian chef to make Indian food. 

Why You’ll Love This Recipe

  • You can make this dish more spicy, by simply adding more cayenne pepper if desired. 
  • I like to make this recipe at home often because it’s super simple and healthy and doesn’t contain any MSG or preservatives.
  • You can make it in large batches which makes it a great budget friendly dinner option.
  • Add in your favorite vegetables to boost the nutrition. 
  • You can easily make it on the stovetop or in a pressure cooker. 

Ingredients You’ll Need

  • Cooking Oil or Ghee – This is what you’ll use to saute the lamb, onion, garlic and ginger. It will help brown them and bring out the flavors. 
  • Boneless Lamb Cubed – Lamb is the main protein source of this dish, but feel free to use any protein you enjoy. 
  • Fresh Tomatoes – Which help to give it more depth of flavor 
  • Onion & Garlic – These two aromatic vegetables add a great layer of flavor to chicken curry. 
  • Raw & Canned Tomato – You’ll need a mix of raw tomatoes and tomato paste for this recipe. Tomatoes add a great color and acidity to curry dishes. 
  • Ginger – Ginger helps give a spicy flavor that pairs well with any curry recipe. 
  • Full Fat Yogurt & Cream – These two ingredients help give the curry a nice creamy texture. 

LAMB CURRY WITH COCONUT MILK

You can use coconut milk in replace of the yogurt and cream if desired. 

Homemade Curry Spice Blend

You can use a premade spice blend or a curry spice blend made from scratch! 

  • 1 1/2 tbsp Garam masala
  • 2 tbsp Curry powder
  • 1 tbsp Turmeric powder
  • 1 tbsp Sugar
  • 1 tsp Coriander
  • 1 tsp Cumin
  • 1 tsp Cayenne pepper
  • 1 tsp Salt

You can also buy a pre – made Karahi Gosht Spice Mix. This can be found in most Indian grocery stores. 

How To Make Karahi Gosht

  1. In a large pot or into a slow cooker pot add the cooking oil/ghee and turn on the heat. Next add in a large diced onion and saute for 2 minutes before adding in the diced mutton. Saute another 7 minutes or until the mutton is no longer pink and the onion is tender.
  2. Next toss in the curry and remaining spices and saute another 2 minutes before adding in the minced garlic and ginger. Saute for 1 minute till fragrant.
  3. Add in the tomatoes and smash with a potato masher till pureed. 
  4. Next add in the yogurt, cream and stir everything to combine.
  5. Simmer on low – medium heat covered for 30 minutes. 
  6. Serve hot on top of your favorite rice or with naan bread. 

Pressure Cooker Karahi Gosht

If you’d like to make this recipe in your instant pot or pressure cooker, follow these steps:

  • Add cooking oil/ghee into the pot and turn it to SAUTE mode. 
  • Next add diced onion and saute for 2-5  minutes or until it begin to soften.
  • Add in diced mutton and saute for another 2-5 minutes or until mutton is no longer pink.
  • Toss in the curry and spices along with garlic and ginger. 
  • Add in the tomatoes, cream and yogurt.
  • Close the lid and seal. Cook on manual high pressure for 10 minutes. 
  • Release naturally or quickly, stir then serve hot over rice.

Slow Cooker Karahi Gosht

You can also make this recipe in your crockpot or slow cooker by following the instructions below:

  • Saute all ingredients except tomatoes, cream and yogurt in a skillet over medium high heat for 5-8 minutes or until onion begin to soften and mutton is no longer pink.
  • Add everything to a slow cooker including the tomatoes, cream and yogurt and stir until fully combined.
  • Cook on low for 8-10 hours or on high for 5-6 hours or until mutton is fully cooked through. 
  • Stir everything together and serve hot on top of your favorite rice. 

FAQ

CAN I USE COCONUT MILK IN ?

Yes, you can subsite the yogurt for a thick coconut milk if desired. Check out my popular Coconut Chicken Curry Recipe if you are looking for a creamy and dairy free curry. 

This is one of my favorite curries, well i’d say my top 10 favorite curry I just love curry if you did not know that about me already!

I hope you give it a try it’s a very tasty dish, and be prepared to watch it disappear before your eyes, it’s that good folks. 

Serve alongside some naan bread, or rice and you have yourself an amazing curry. 

LOOKING FOR AN AMAZING NAAN BREAD RECIPE?

Try my Garlic Naan Bread here!

Did you like this curry?

Then you’re sure to like myCreamy Coconut Chicken Curry” which uses coconut milk.

You’ll Love My Easy Curry Recipes

I am so thrilled you are reading one of my recipes, if you made this, I want to see! Follow Canadian Cooking Adventures Instagram, snap a photo, and tag and hashtag it with @canadiancookingadventures and #canadiancookingadventures

Stay connected and follow along on FacebookPinterest, and Instagram for all of my latest recipes

Don’t want to miss a recipe? Sign up for our NEWSLETTER delivered right to your inbox!


Spicy Chicken Ramen Recipe

This Spicy Chicken Ramen Noodle recipe is also known as the popular takeout dish Chicken Chow Mein.

It is made with crispy broccoli, carrots along with melt in your mouth cabbage that you’re sure to love. 

It’s so satisfying, you’ll be craving this the day you try it! 

You probably would not know it, but making this dish is simple as can be.

It’s also fresh and can be all pulled together in less than 20 minutes! 

HOW TO MAKE CHICKEN RAMEN NOODLES

  • Start by cooking the noodles, to do that add them to a large pot of boiling water. Cook according to package instructions, with dry noodles it’s typically 5 minutes.
  • Meanwhile add all your sauce ingredients to a medium sized bowl and whisk to combine.
  • On a large chopping board, chop the broccoli into bite size pieces along with the cabbage.
  • On another cutting board dice the chicken breasts.
  • Add the chicken breasts to the marinade and marinade in the fridge for 15 minutes!
  • Once the noodles have cooked remove them from the water, strain and set aside.
  • Now is the time to make those noodles a bit crispy. Simply add 2 tbsp of sesame oil in a large frying pan along with the olive or cooking oil and saute those cooked noodles on each side till slightly crispy and browned to your liking.
  • Remove and plate.
  • In the same pan/pot/wok add the marinated chicken and stir fry till cooked, pour in the remaining marinade along with chopped ginger and garlic.
  • Saute for 2 minutes before adding in all the chopped vegetables, simmer on medium heat for roughly 5 minutes, tossing often until the vegetables are crispy yet tender.
  • Serve over the noodles hot and enjoy!

HOW TO MAKE CHICKEN RAMEN SPICY

You can make this dish as spicy as you like by simply adding in more or less of the “red pepper chili paste”. Chili paste can be found in almost every ethnic isle in your local grocery.

It last a long time and is well worth picking up.

I have made this recipe medium spicy, so even the kids can enjoy this dish with you.  

Sure you can head out to your favorite Chinese restaurant for something similar or you can learn to make it at home for a fraction of the cost. 

Plus when you make this at home, you can ensure there is no msg added or any other ingredient that your not sure of. 

Once you learn to make this simple chow mein dish, you will be making it more often Guaranteed!

It’s my go to Chicken Ramen /Chow mein dish, very very tasty!

I’m the type of lady that has to try every chow mein dish whenever we go to the chinese restaurants. I do this to compare really, just kidding.

Well kinda, I mean some restaurants do it right and others so wrong. Right? It’s not always easy to find a good chow mein these days. 

But with my recipe it’s foolproof, if you follow it to a tea you will be in Chow Mein Heaven!

So please skip the takeout tonight and learn to make this iconic dish in the comfort of your own home.

Impress yourself, I know you can do it!

The brand I like to use can be seen below, it is very low in sodium!

The chicken and veggies are tossed together in the most delicious asian inspired sauce.

And the chow mein noodles are fried just a bit to give it the perfect amount of cripsyness. 

I use a combination of olive oil and sesame oil to fry my noodles, however you can use regular cooking oil if desired.

That is what most restaurants use anyway, then a dash of sesame oil just for flavor. 

The hardest part about making homemade chow mein is “chopping those vegetables”. Once you have that part done, the rest comes together in a snap.

Actually being that this is a Vegetarian dish, it can be pulled together in less than 30 minutes.

I have experimented with a few chow mein recipes over the years and promise you your going to love this one.

Chow Mein is one of my favorite asian dishes, I will order it everytime I go to my favorite asian restaurant and I will also order it when I try new asian restaurants.

Some restaurants make their chow mein better than others, typically it has allot to do with the type of ingredients that are added to the noodles.

If you liked this dish, then stay tuned to this blog as I will be sharing my all time favorite recipe for seafood chow mein very soon, which contains fresh calamari and shrimp.

If you liked this recipe? Then you will want to try my other ASIAN inspired recipes below!

DID YOU MAKE THIS RECIPE?

If you make this recipe, I would love to hear about it! You can leave a 5 star review in the comments below! Thank you very much for reading and until next time see ya in the kitchen. Don’t want to miss a recipe? Sign up for our NEWSLETTER delivered right to your inbox!

Notes: This recipe can also be made with just about any meat such as chinese pork, beef or shrimp.  Plus, if you like a little more heat to your dish then feel free to add more red pepper chili flakes or some fresh chili paste. You know make it your own 🙂 


Vegetable Chow Mein Noodles

These Vegetable Chow Mein Noodles are ready in less than 25 minutes, I kid you not!

Made with crispy broccoli and melt in your mouth cabbage, your gonna to love it!

Trust me, you won’t miss the meat with this one. It’s so satisfying, you’ll be craving the crispy broccoli and cabbage more than anything else. 

Once you learn to make this simple chow mein dish, you will be making it more often Guaranteed!

It’s my go to vegetarian dish, I just love this Broccoli CHOW MEIN!

I’m the type of lady that has to try every chow mein dish whenever we go to the chinese restaurants. I do this to compare really, just kidding.

Well kinda, I mean some restaurants do it right and others so wrong. Right? It’s not always easy to find a good chow mein these days. 

But with my recipe it’s foolproof, if you follow it to a tea you will be in Chow Mein Heaven!

So please skip the takeout tonight and learn to make this iconic dish in the comfort of your own home. Impress yourself, I know you can do it!

The brand I like to use can be seen below, it is very low in sodium!

The broccoli is tossed together in the most delicious asian inspired sauce. And the chow mein noodles are fried just a bit to give it the perfect amount of cripsyness. 

I use a combination of olive oil and sesame oil to fry my noodles, however you can use regular cooking oil if desired. That is what most restaurants use anyway, then a dash of sesame oil just for flavor. 

The hardest part about making homemade chow mein is “chopping those vegetables”. Once you have that part done, the rest comes together in a snap.

Actually being that this is a Vegetarian dish, it can be pulled together in less than 20 minutes.

I have experimented with a few chow mein recipes over the years and promise you your going to love this one.

Chow Mein is one of my favorite asian dishes, I will order it everytime I go to my favorite asian restaurant and I will also order it when I try new asian restaurants.

Some restaurants make their chow mein better than others, typically it has allot to do with the type of ingredients that are added to the noodles.

If you liked this dish, then stay tuned to this blog as I will be sharing my all time favorite recipe for seafood chow mein very soon, which contains fresh calamari and shrimp.

If you liked this recipe? Then you will want to try my other ASIAN inspired recipes below!

Notes: This recipe can also be made with just about any meat such as chinese pork, beef or shrimp.  Plus, if you like a little more heat to your dish then feel free to add more red pepper chili flakes or some fresh chili paste. You know make it your own 🙂 

DID YOU MAKE THIS RECIPE?

Simple Chow Mein Recipe

This Simple Chow Mein Recipe can be ready in less than 20 minutes, that is why it’ s so simple to make. 

Once you learn to make chow mein at home, you will be so pleased with yourself.

Just image it’s a busy weeknight or weekend.

Your exhausted and the last thing you want to do is slave in the kitchen all night to prepare a meal. 

Having the skills to make this basic chow mein will become invaluable to you! Once you learn the basics, you then can add other ingredients to it if you want.

Such as shrimp, chicken, beef etc. However sometimes this basic cabbage, carrot chow mein is enough!

Now if you don’t know already, I love CHOW MEIN! 

And i’m confident that anyone can make these Chow Mein noodles at home, it just takes the right technique and ingredients. 

I am the type of lady that has to try every Chow Mein dish at any new chinese restaurant. I do this to compare really, just kidding. Well kinda, I mean some restaurants do it right and others so wrong. Right?

My recipe is fool proof, follow it to a tea and you will be in Chow Mein Heaven! So skip the takeout tonight and learn to make this iconic dish yourself. Impress yourself, I know you can do it!

I can see you already, curled up on the couch with this BIG old plate of fresh homemade Chow Mein noodles to yourself! Go ahead you deserve it!

The hardest part about making homemade chow mein is “chopping those vegetables”. Once you have that part done, the rest of the recipe can then be pulled together in 15 minutes flat.

I have experimented with a few chow mein recipes over the years and promise you your going to love this one.

The cabbage and carrots are tossed together in the most delicious asian inspired sauce. And the chow mein noodles are fried just a bit to give it the perfect amount of cripsyness.

I use a combination of olive oil and sesame oil to fry my noodles, however you can use regular cooking oil if desired. That is what most restaurants use anyway, then a dash of sesame oil just for flavor.  

This recipe can also be made with just about any meat such as chinese pork, beef or shrimp. OR make it vegetarian and add some broccoli, cauliflower etc. 

Plus, if you like a little more heat to your dish then feel free to add more red pepper chili flakes or some fresh chili paste. You know make it your own 🙂 

Wanting to try some of my other asian inspired “Skip the takeout” dishes? 

If you liked this recipe? Then you will want to try my other ASIAN inspired recipes below!

DID YOU MAKE THIS RECIPE?

If you make this recipe, I would love to hear about it! You can leave a 5 star review in the comments below! Thank you very much for reading and until next time see ya in the kitchen. Don’t want to miss a recipe? Sign up for our NEWSLETTER delivered right to your inbox!

Asparagus Mac and Cheese

This Asparagus Mac and Cheese or kraft dinner Macaroni and Cheese is the ultimate of comfort food Canadian food.

If you and your family like macaroni and cheese then this just steps it up a notch and tastes much better than any kind of boxed stuff. 

By simply adding in some fresh asparagus and roma tomatoes this dish becomes a meal! 

Plus if you have ever felt a tad guilty eating the box stuff but just can’t help yourself “like me sometimes”.

Then this recipe is sure to sway you to enjoy mac and cheese more often but in a healthy way.

I think this recipe will be great for those who want something quick and do like the boxed macaroni and cheese.

The kids will definitely be all over it, i’m sure. 

So when that mac and cheese craving hits, I hope you think of this recipe. I do, a lot 🙂

I no longer just make Macaroni and Cheese, I will make this recipe too.

You can add pretty much any other vegetables such as cooked broccoli, kale etc as well. 

This recipe will be a fantastic for those of you who want something quick and something that the kids will be able to enjoy too!

So what are you waiting for? ✌

I’m thrilled you are reading one of my recipes, if you made this recipe i’d love to hear about it! Thank you and until next time see ya in the kitchen. Don’t want to miss a recipe? Sign up for our NEWSLETTER delivered right to your inbox!

LIKED THIS RECIPE? THEN YOU’RE SURE TO LIKE MY: Mac and Cheese tortellini

Farmers Sausage Eggs Benedict

How do you make Eggs Benedict? Well it’s pretty easy trust me. And this Farmers Sausage Eggs Benedict are no different than the original ones that uses ham. 

HOW TO COOK FARMERS SAUSAGE

Farmers sausage is cold – smoked yet still it is uncooked and so is prepared just like any other raw sausage. It is best to slice it in half in order to cook it throughout. 

If you are wanting this recipe to be Gluten free you can purchase a Gluten Free English Muffins and some Gluten free hollandaise sauce. 

Think recipe in bed kind of morning 😉

In order to make the best eggs benedict you will want to cook the eggs just right.

And to do that you will simply add 2 tbsp of white vinegar to a medium pot of boiling water.

Once it reaches a boil you will want to turn down the heat to medium – low.

When it reaches a medium – low heat, simply crack one egg into a small ramekin boil. And slowly place it into the pot, repeat with a maximum of 3 eggs per pot.

You do not want to overcrowd the eggs and allow them to cook at the bottom of the pot, once they reach a firm yet soft on the inside texture.

REMOVE them with a spatula and strain over the sink. And wulla you have poached your eggs!

Those eggs are what you will use for this recipe. 

Still need direction? Here is an excellent video showing it: How to Poach an Egg

If your not to familiar with farmers sausage it’s probably because your not Canadian, now I may be biased here but we do have the best farmers sausage.

It comes from a place called Winkler meats in Manitoba. It looks like this, if you have never tried it.

You are definitely missing out! 


This recipe is not only inexpensive it’s also super simple to make, your sure to want to enjoy this breakfast time and time again.

Like this recipe? Looking for another take on an English Muffin breakfast, you may also love my: Smoked salmon poached egg english-muffins

If you have never poached an egg, I promise you it’s not at all hard you can do it!

Did you try this? I would love to hear about your favorite breakfast memories in the comments below. Till next time friends, see you in the kitchen 🙂

Looking for another GREAT Breakfast recipe? Check out my Black forest ham hash browns with eggs. Your gonna love this one too! 

I am so thrilled you are reading one of my recipes, I appreciate every single one of you! If you made this recipe i’d love to hear how it turned out! Thank you very much for reading and until next time see ya in the kitchen. Don’t want to miss a recipe? Sign up for our NEWSLETTER delivered right to your inbox


Best Turkey

This is my Best Turkey recipe that produces a savory bird that is seasoned with all the right spices and comes out moist on the inside and crispy on the outside. 

A Turkey like this is always a hit during the holidays! 

Serve this main course along with my Best Bread Stuffing and you will be in business. 

This recipe makes for a family favorite recipe every year. And also serves well alongside my Instant Pot Mashed Potatoes,  Stuffing and Homemade Cranberry Sauce and dinner will be divine! 

Also, I have included an easy homemade gravy recipes as well that utilizes the drippings from the bird.

You do not want to skip on this either! 

HOW LONG TO DEFROST TURKEY

If your like me and buy your Turkey frozen, you will want to keep in mind the size of your Turkey when looking for defrosting times.

  • Allow approximately 24 hours for every 5 pounds of turkey.

Here in Canada we have our Thanksgiving and Christmas holidays pretty far apart.

So we tend to have Turkey twice per year. Personally I’ve made just a few Turkey dinners for a crowd myself.

One being for my family one year and another for a boyfriend’s family. Y

Yes, this was before I was a blogger and I was nervous as hell to do it.

But being that I have watched family and friends prepare it often, I got some tips prior and it came out just as good as this recipe here.

So you can rest assured that this recipe is a Winner! 

Once you learn the basics to preparing and cooking a turkey you too will become well versed in the right techniques to cooking a whole turkey.

Turkey Roasting Pan

You will want to use a pan large enough to roast.

You can either use a throw away type metal pan that can be found at any dollar store or purchase a good quality one that will last you through the years. 

What herbs and spices go with Turkey

The most popular used spices for a Turkey is; thyme, rosemary and sage.

Some people use nutmeg, personally I do not like. 

Best Store-Bought Poultry Seasoning

When I want to make a turkey that’s sure to impress, I will use my favorite store bough poultry seasoning ” McCormick Poultry Seasoning”. You can also make yours from scratch at home instead. By replacing the 2 tbsp of poultry seasoning with 1 tbsp of kosher salt, 1 tbsp of pepper, 1 tbsp thyme, 1 tbsp rosemary, 1 tsp sage.

Best Turkey Seasoning 

This is what I use for my  Best Turkey Recipe!

  • 2 tbsp of poultry seasoning, I like”McCormick Poultry Seasoning”.
  • 1 tsp chili powder
  • 1 tsp paprika
  • 1/2 tsp onion powder
  • 1 tbsp salt

Pour the gravy all over the sliced breast for an incredible meal and even save as leftovers to make some other meals.

HOW COOK TURKEY IN THE OVEN

  1. You will want a Turkey Roasting pan
  2. Meat thermometer
  3. Basting tool 
  4. Tinfoil

IS IT BETTER TO COOKA  TURKEY BREAST SIDE UP OR DOWN

Cook the turkey breast side down as this allows the juices to fall down towards the breast producing a juicer turkey!

HOW COOK TURKEY IN OVEN

  1. Start by thawing your turkey in advance to preparing it, best to do this in the fridge 48 hours prior. Once thawed place on the shelf one hour prior to preparing.
  2. Rinse your Turkey under cold water for a few minutes and then remove the neck and other things in the cavity and cook on the side of the turkey. 
  3. Mix your seasonings well and rub the bird all over.
  4. Season inside the bird with all over and baste with melted butter. 
  5. Place bird “BREAST SIDE” down “produces a better cooked turkey) and bake at 400 for one hour.
  6. One the hour is up, turn down the oven to 350 baste the bird in it’s own juice and cook for one more hour.
  7. Before you remove the Turkey, probe it with a thermometer it should reach a temperature of 165-170 degrees. Be careful not to touch the bone, rather insert it right into the breast for an accurate reading.
  8. If it has reached the desired temperature, remove from the oven and allow it to sit for 30 minutes before carving otherwise you will have a dry Turkey.

WHERE TO COOK TURKEY IN OVEN

Middle rack is always the best practice!

My top tips to cooking the best Turkeys are as follows:

  • Allow the bird to fully defrost and then sit on the counter at least one hour prior to baking, this ensure that the skin doesn’t break and that the bird cooks properly thought out.
  • Butter the turkey all over with solid butter as well as liquid.
  • Use a food thermometer and remove the Turkey once it reaches it’s ideal temperature.
  • Place 1 cup of water into the bottom of the pan to prevent burning and aid in creating the gravy. Nothing more you don’t want to boil the turkey.
  • Baste the turkey every hour to ensure it stays moist.
  • Cover the legs, breast and wings of the turkey with tinfoil and place the birds legs towards the back of the oven where it’s the hottest and where the bird needs most the cooking. “The breasts always cook the fastest.
  • Do not stuff the bird with stuffing, rather make the dressing on the side.
 

Now what is turkey without the stuffing?

It’s really not a complete holiday meal now is it, so that part is definitely something you do not want to forget!

You can stuff the turkey with the stuffing prior to cooking if desired.

However keep in mind that they turkey will then take another hour to cook fully. Or you can cook the stuffing on it’s own for one hour also. One of my favorite stuffing recipes is :

Otherwise you can do the same thing and just stuff the bird, keeping in mind you may need to cook it longer.

TURKEY GRAVY WITH THE DRIPPINGS

Oh and do not forget the gravy, I’ll show you below how to make the best homemade gravy from the same bird you are cooking here.

Utilizing every part of this amazing bird is key to a great Turkey dinner. 

I hope you give it a go, and have an enjoyable dinner with those who mean the most to you. 

Tips: I always save the bones to make a turkey soup the next day, it’s simple. Also I like to make my own Gravy from the drippings see my recipe below for a simple Homemade Turkey Gravy

Wondering what to do with all those turkey leftovers? Try my “Turkey Pot Pies” I will even show you how to make the most delicious “HOMEMADE PUFF PASTRY” if you choose.

More Christmas & Thanksgiving recipes you may like:

See below for more inspiration!

I am so thrilled you are reading one of my recipes, if you made this recipe i’d love to hear about it!  Thank you very much for reading and until next time see ya in the kitchen. Don’t want to miss a recipe? Sign up for our NEWSLETTER delivered right to your inbox