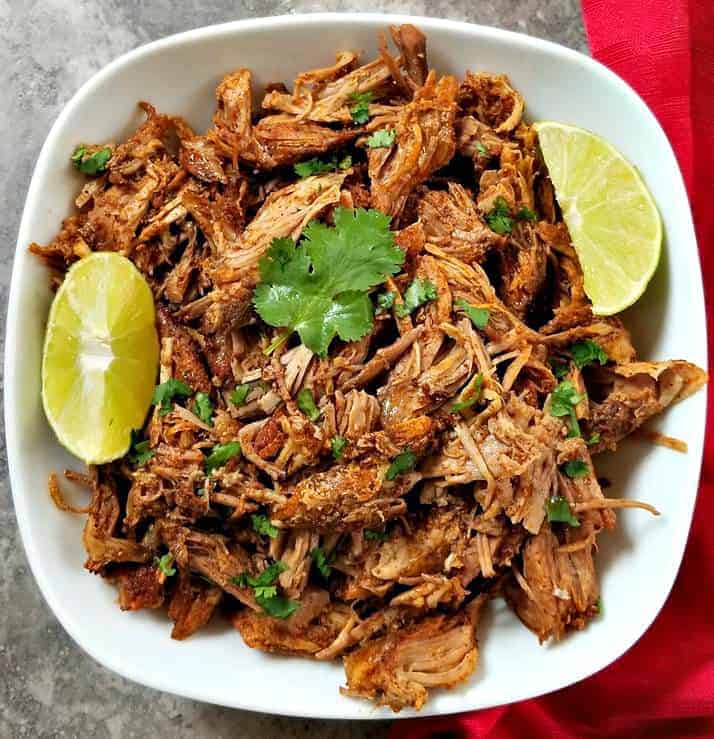
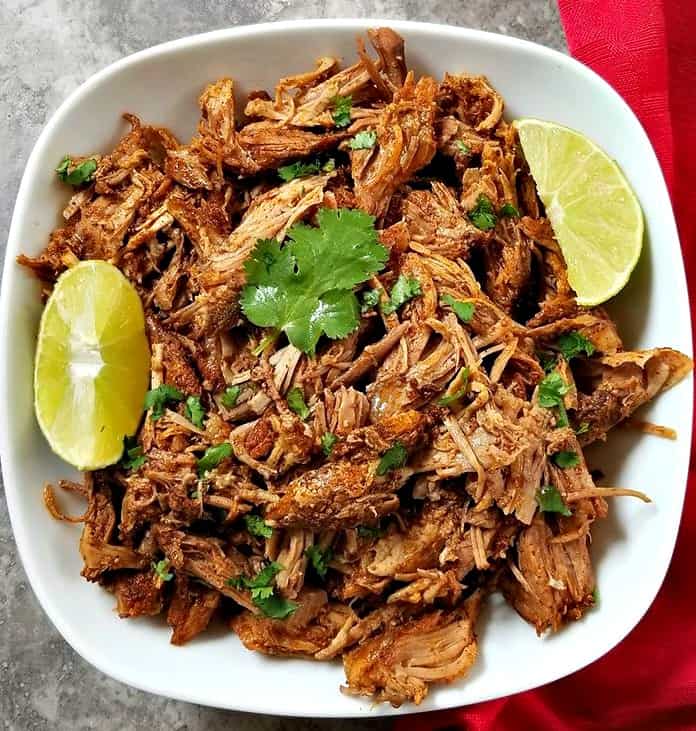
These Quick Carnitas Recipe is an inexpensive weeknight meal that can feed a crowd!
I love making this recipe, you can either simmer it all day in your slow cooker or prepare it in less than 20 minutes in your pressure cooker.
What kind of meat is use for Carnitas?
Carnitas is the Mexican version of pulled pork. It’s traditionally made with pork shoulder or pork butt. This piece of meat contains more fat and helps it to stay juicy!
How to make Pork Carnitas in pressure cooker?
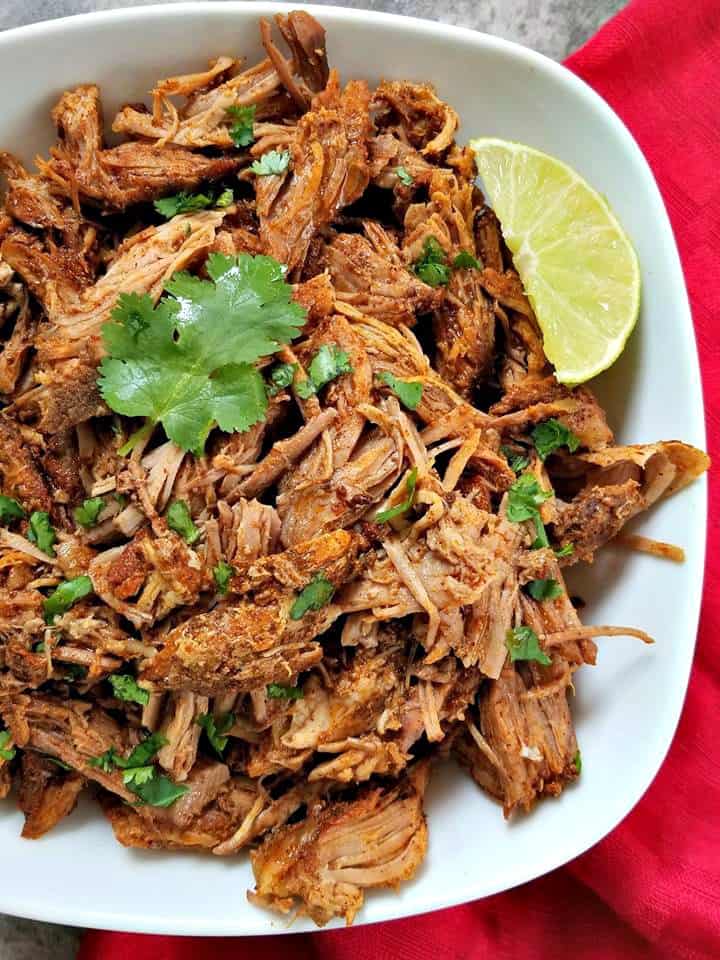
You will start by searing the pork until it’s browned on all sides, then you will add all the ingredients listed here directly into the slow cooker.
Allowing it to cook throughout the day or you can cook it in under 20 minutes in the pressure cooker.
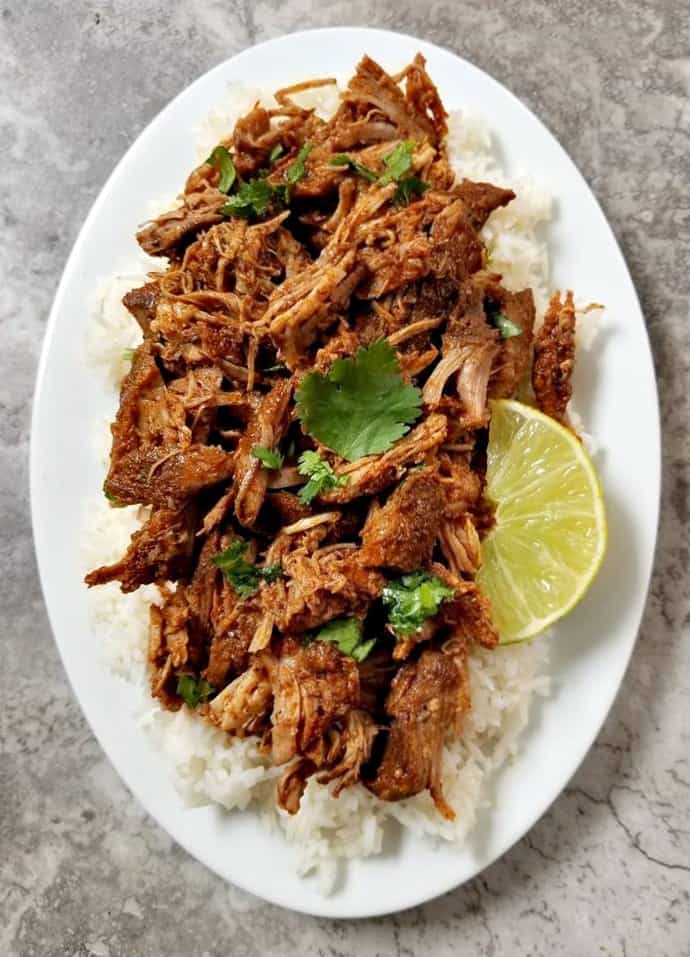
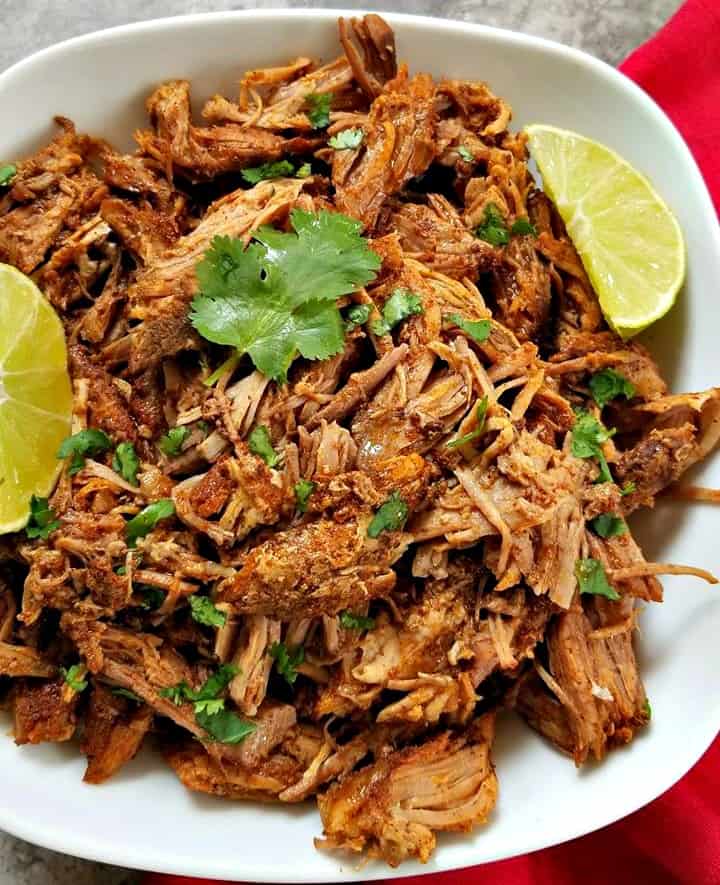
Can’t get simpler than this, once it’s cooked you will take two forks and shred the pork on a cutting board before serving over rice or in a taco.
Then you will be ready to have a feast fit for a Mexican Queen or King.
I love the ingredients in this recipe, because everything tastes so fresh. Adding fresh lime juice along with a fresh orange juice really makes the flavors pop, so be sure not to skip them.
Also the addition of the the raw onions surprisingly work so well here too, trust me or I should say the Mexicans!
So be sure not to skip on those very important ingredients. Serve this up with some avocados and you will have one great meal tonight. I hope you enjoy, ARRIBA MEXICO!
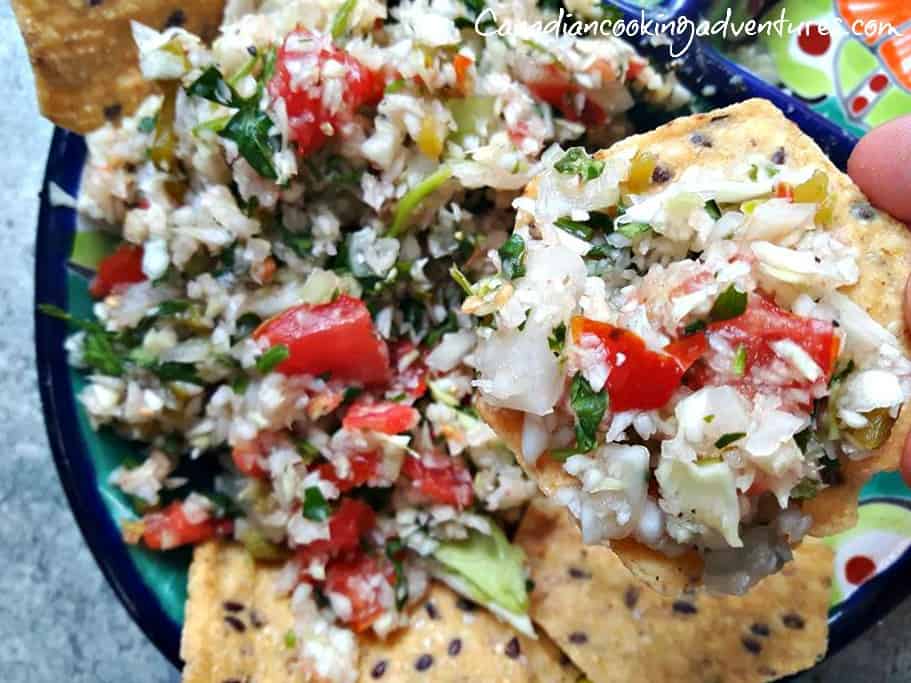
Looking for an awesome recipe for Mexican Salsa?
Check out my recipe for Pico De Gallo this goes great with these Carnitas also.
Notes: Make sure to broil the pork once it’s been shredded, this ensures the meat is crispy just like they serve in mexico. This shredded pork can be served in burritos, tacos, quesadillas, enchiladas and or over rice.
I am so thrilled you are reading one of my recipes, if you made this recipe i’d love to hear about it! Thank you very much for reading and until next time see ya in the kitchen. Don’t want to miss a recipe? Sign up for our NEWSLETTER delivered right to your inbox!
★ Did you make this recipe? Please give it a star rating below! ★
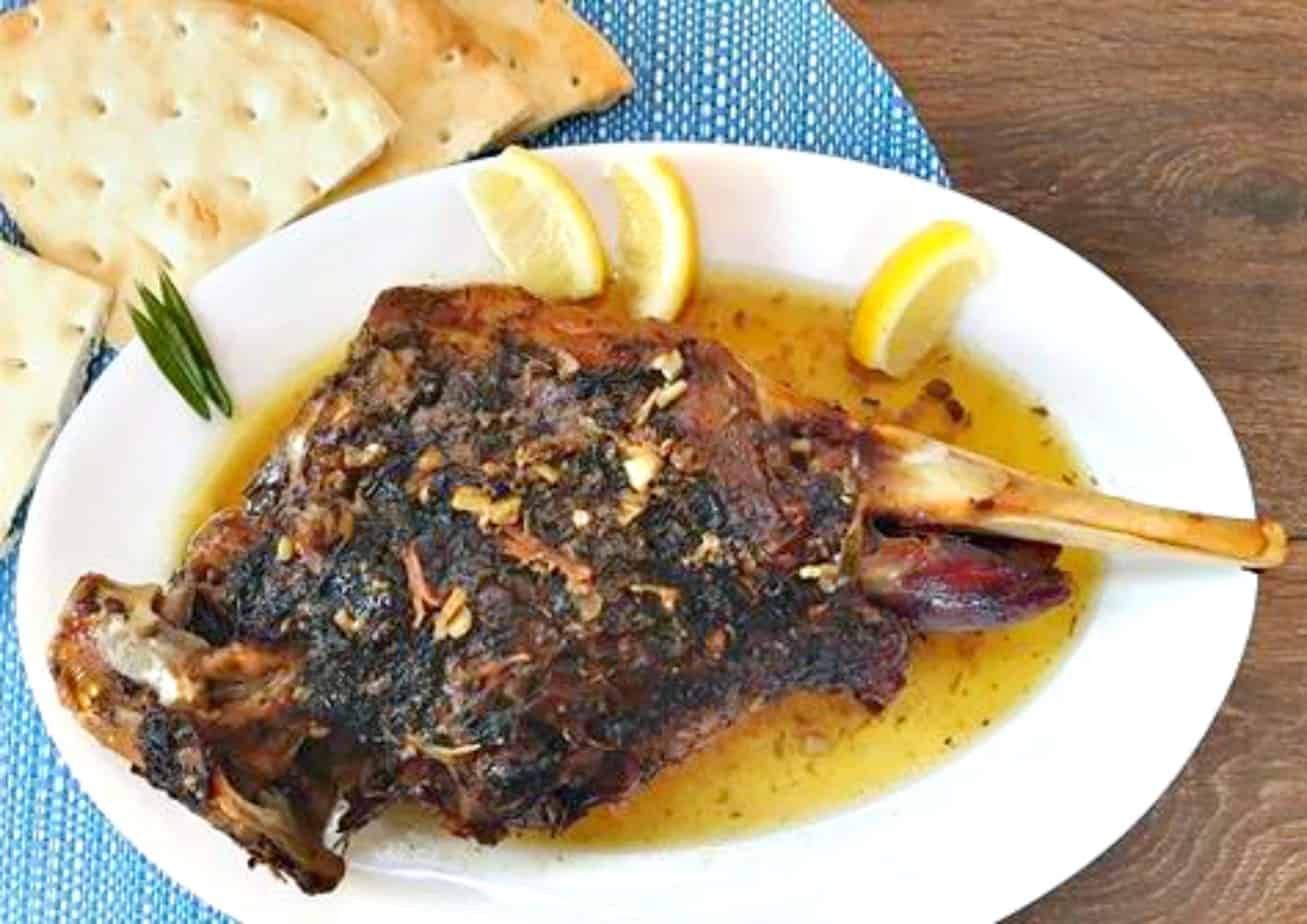
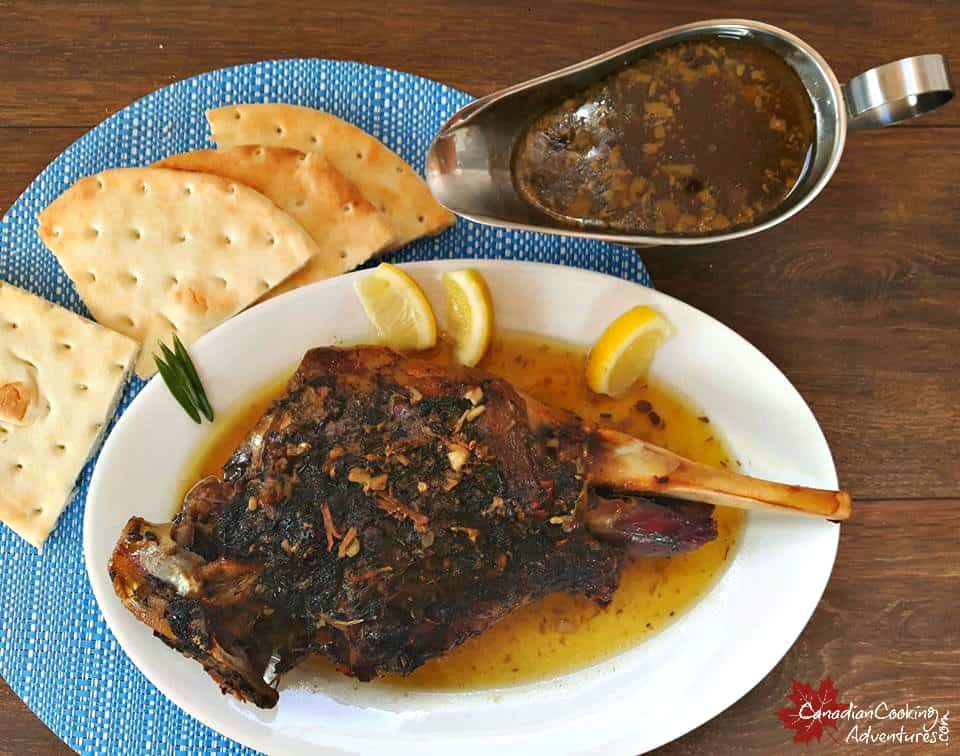
You have not truly tried traditional Greek food, until you tried a Roasted Leg Of Lamb, also known as Lamb Kleftiko.
And you don’t have to wait till Easter to serve either, this recipe is so good you will be sure to crave it just as often as the Greeks do in Cypress.
If you follow this recipe to a tea, you will have the most juicy and tender leg of lamb you ever tasted.
The size of your leg you make depends on how many you are cooking for.
A 6 pound leg of lamb will feed about 8 people so you can judge by this what weight you will need.
I am using 3 pound leg which will feed a family of three to four.
HOW TO MAKE GREEK LAMB KLEFTIKO
If your lamb leg is frozen, start by defrosting it in the bottom of the fridge anywhere from 24-48 hours (if fresh skipped this step)
Next prepare your marinade. In a bowl, mix your crushed garlic, rosemary, thyme, oregano, olive oil, and lemon juice.
Lay your lamb out on the counter, and season on both sides generously with salt and pepper.
Then take your knife and make slits all over the leg, front and back.
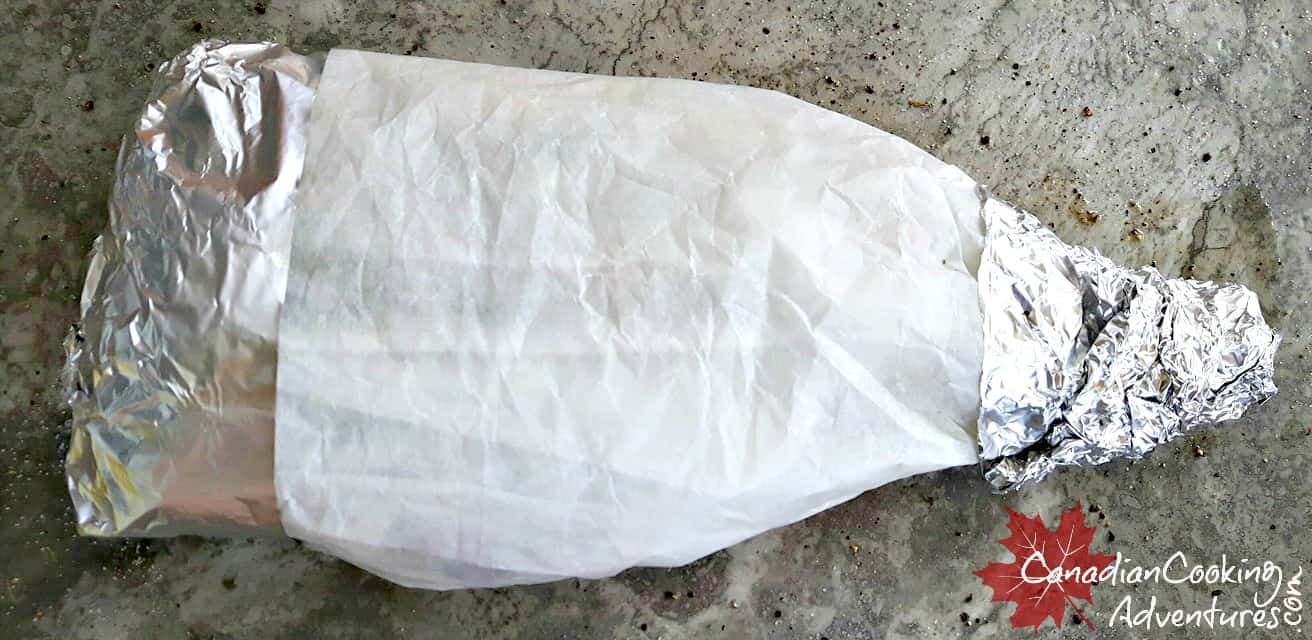
Place the lamb now on a long piece of parchment paper and make a boat around it to hold in the marinade.
Massage the marinade all over the lamb, making sure to get some of the marinade in the slits.
Place the wrapped leg in the bottom of your roasting pan, and allow it to marinade overnight in the fridge.
HOW TO COOK LAMB KLEFTIKO
The next morning, take your lamb out and allow it to sit on the counter for 30 minutes prior to cooking.
Open up the parchment paper, and pour in your “Chicken Stock” around the leg (try not to pour it all over the leg) rather around. As you don’t want to remove the seasonings.
Now with a little bit of tinfoil cover the ends of the leg to ensure the parchment paper does not fold away.
Preheat your oven to 425 f (convection ovens) or 450 for (standard ovens) for 30 minutes, then lower it to 325 f (conventional ovens) or 350 for (standard ovens) and allow it to bake for 3 1/2 hours.
Once cooked, remove from the oven and open the paper to baste the lamb with the remaining juices.
Place back in the oven for 30 more minutes uncovered till browned. (You may want to add a bit more liquid) totally up to you.
Once done, remove the leg and drain the broth directly into a gravy holder.
Allow it to rest 30 minutes before serving and serve with that delicious broth, adjust to taste.
Note: You can add potatoes into the parchment paper. I like to serve my lamb with pita bread, either are great ways to sop up that delicious gravy. Goes great with my Greek Tzatziki sauce too.
Serve with some warm pitas to mop up that amazing gravy!
You can also serve with mash potatoes and any vegetable of your liking.
I am so thrilled you are reading one of my recipes, if you made this recipe i’d love to hear about it! Thank you very much for reading and until next time see ya in the kitchen. Don’t want to miss a recipe? Sign up for our NEWSLETTER delivered right to your inbox!
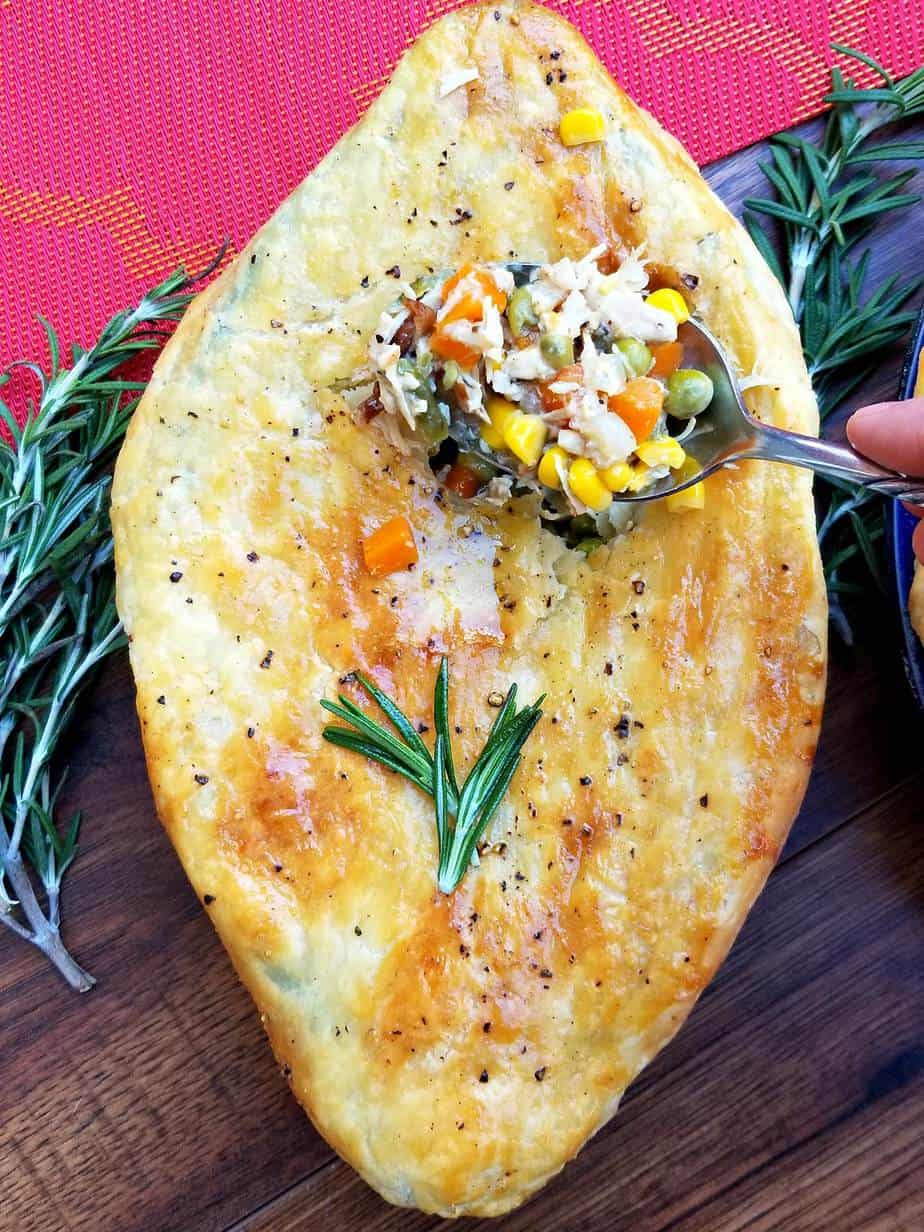
These Turkey pot pies made with puff pastry and are my go to recipe whenever I have leftover turkey.
These pot pies are absolutely delicious and a bit different then the average pot pie recipe you will find.
So read along if you want to learn how to make them! And trust me it is easy as pie 🙂
WHAT’S IN TURKEY POT PIES
DICED CARROTS
CORN
PEAS
GREEN BEANS
LEFTOVER CURRY
SPICES
ARE TURKEY POT PIES GOOD FOR YOU
Yes, they are packed with vegetables and lean protein (leftover turkey meat)
TURKEY POT PIES WITH PUFF PASTRY
You will want to start by making the pie crust. You can pre purchase the “puff pastry” which is that crust you see on the top of these pies” or you can make it from scratch yourself. I really encourage you to try making it from scratch as it tastes best.
The crust recipe I have provided is also foolproof. I have tried many pastry puff recipes in the past and this one is the winner folks.
Then ONCE the pie crust has been made. Simply defrosted some frozen vegetables and add to the turkey mixture to make the filling.
These pot pies can be ready in under 45 minutes. As long as you pre-make the puff pastry one hour in advance you can have this on the table in under one hour. If you would prefer to make one big large pie, you can do that with this recipe as well.
HOW TO MAKE TURKEY POT PIES
The main difference with my recipe and all the others is that I like to use my leftover “Turkey Gravy” instead of heavy cream in my pies.
It does the same thing, keeps the pies moist yet adds that extra level of flavor.
You will want to start by making the pie crust recipe. Once the pie crust has been made you will roll it out on a clear kitchen counter that has been sprinkled with flour.
Place your bakeware over top and with a knife cut around the bakeware to create the pie crust as seen below.
Then you will prepare the filling and place that in the bakware before folding over the pie crust.
Brush the crust with butter and bake.
Also, I like to use a frozen vegetable mix, that contains green beans, peas and carrots to fill the pies.
The more veggies the healthier right?
Plus all three go so well together and make these pies AMAZING!
So if you too are wondering what to do with all that leftover turkey, then look no further because this recipe is not only simple to make it’s absolutely delicious!
CAN TURKEY POT PIES BE FROZEN
Yes, as long as the turkey was not frozen to begin with.
Don’t want to make individual pies?
No problem, simple place the pie filling inside a large pie baking dish and make a large one with the same recipe.
Totally up to you 🙂
So instead of placing the ingredients into four smaller dishes place it into one large and cover with one crust. I hope you enjoy!
Notes: If you don’t have any leftover turkey gravy, feel free to use canned or cream in replace of.
I am so thrilled you are reading one of my recipes, if you made this, I want to see! Follow Canadian Cooking Adventures Instagram, snap a photo, and tag and hashtag it with @canadiancookingadventures and #canadiancookingadventures.
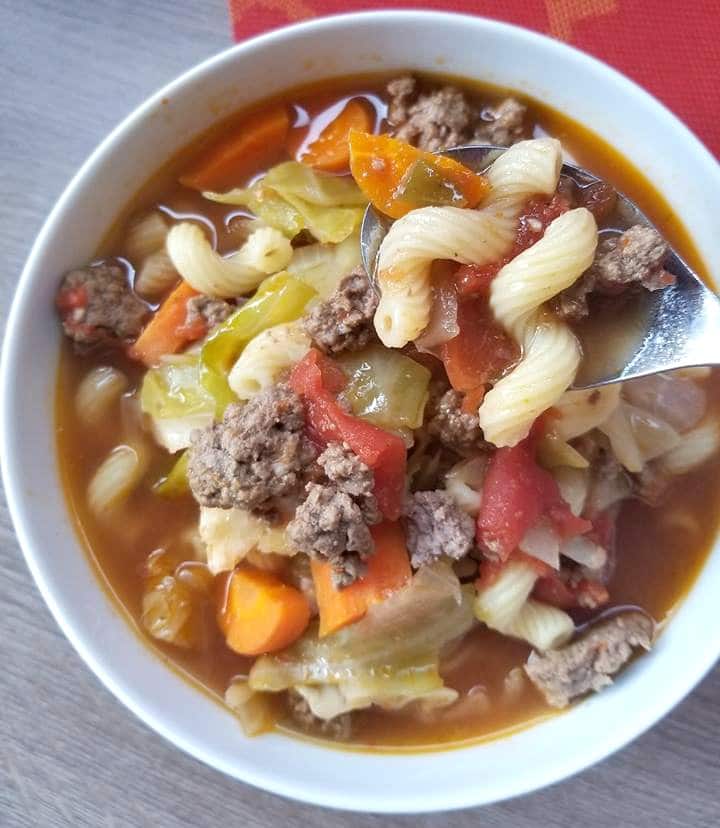
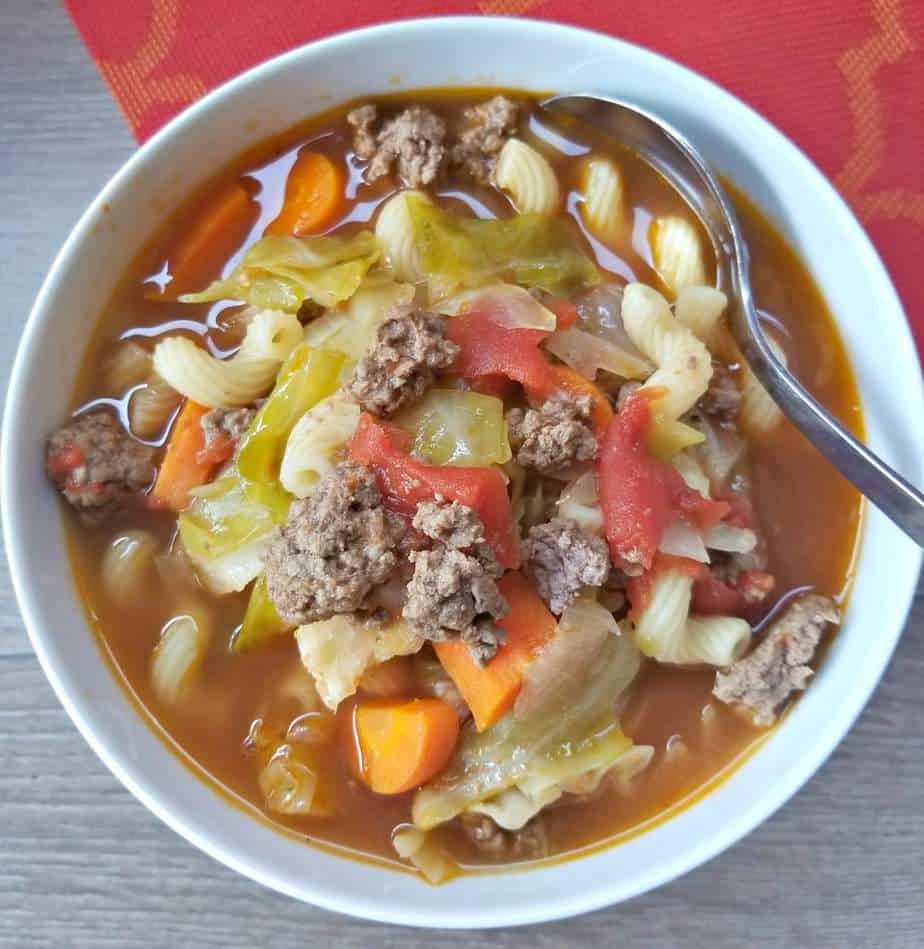
Good old Hearty Hamburger Noodle Soup is one of those recipes that you will want to make as soon as the weather starts to get cold. It warms the soul is healthy and can be enjoyed over a few days.
This Hearty Hamburger Macaroni Soup is absolutely delicious. Packed with immune boosting ingredients this soup will leave you feeling good and craving more.
I can literally eat this for days, it’s that good! I tend to make this soup in large batches and will freeze it in separate bowls to enjoy ahead of time.
Some people like to add other vegetables to this type of soup. Use what you have on hand, really almost any type of veggie goes well with beef and tomatoes.
I am so thrilled you are reading one of my recipes, if you made this recipe i’d love to hear how it turned out! You can post a review/picture below or via Instagram and let me know. And by doing so you will be automatically entered into our seasonal CONTEST to win one of our great prizes. Winner will be notified via email within a week after the contest closes. Thank you very much for reading and until next time see ya in the kitchen. Don’t want to miss a recipe? Sign up for our NEWSLETTER delivered right to your inbox!
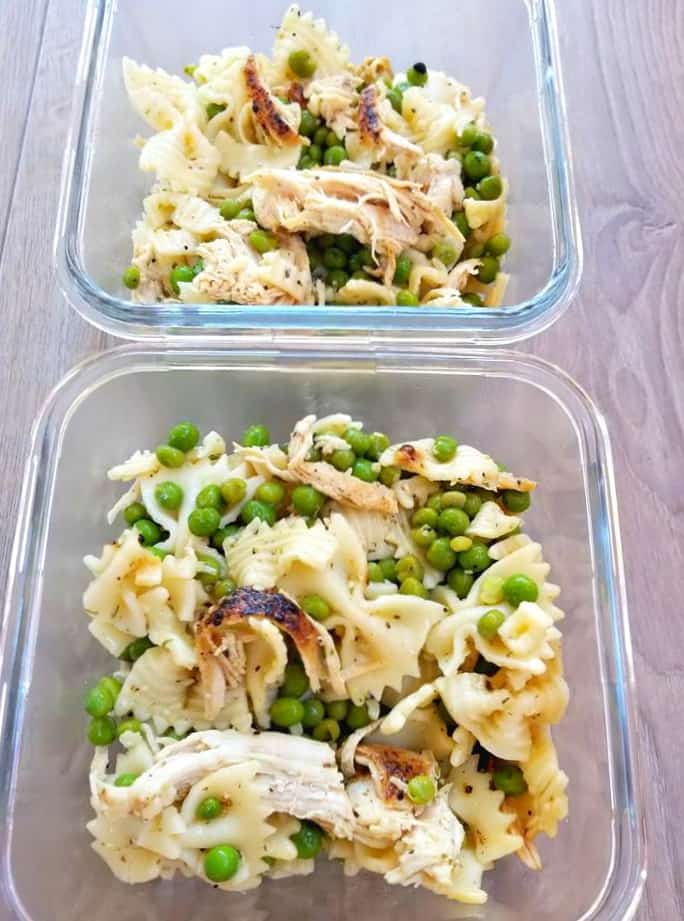
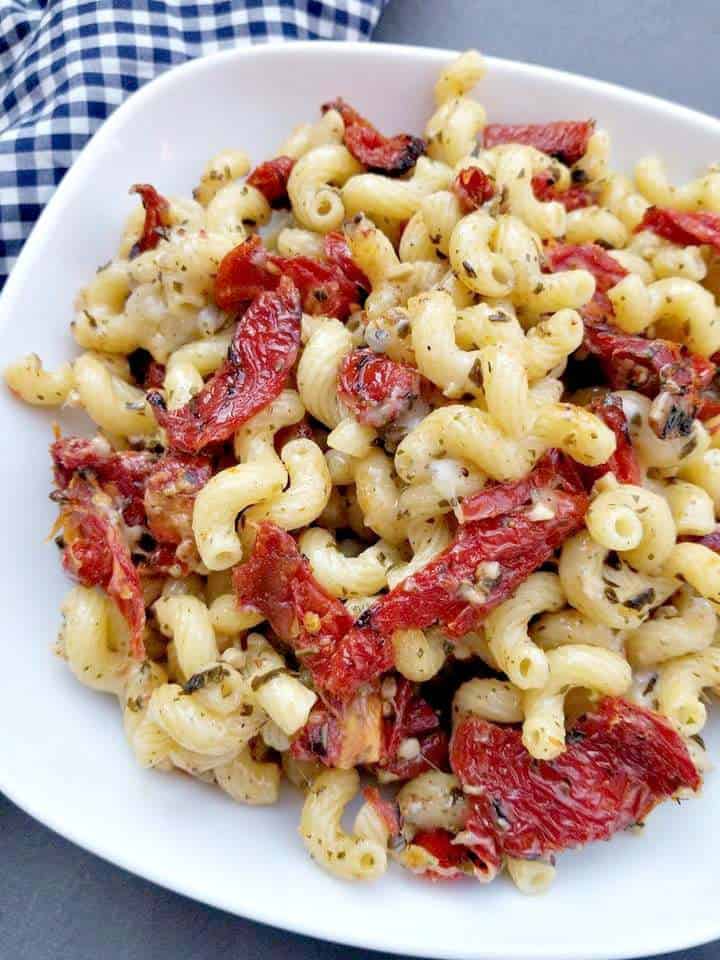
Looking for a quick and tasty lunch or dinner option? Then this Chicken Pea Pasta Salad is sure to do the trick.
This salad can be served warm or cold.
And makes for an excellent dinner or save it for the weeks meal preps.
Image making this on a Sunday, preparing for the Mon – Wed work week ahead all in one day.
Talk about healthy and easy ready made meals!
Wanting to feed more people? Simply use my recipe adjuster above and it will calculate the serving size so that you can make as much as you need.
Also, this simple pasta salad has it all and can feed a crowd easily.
Just simply throw it all together in one big bowl and it’s good to take anywhere!
I never really used to like pasta salads, mainly because I found them to be heavy and or covered with an unhealthy dressing.
But this salad is different, it is pretty healthy and you can really tweak it to your liking.
I prefer to add equal amounts of pasta to chicken and peas.
However you can definitely add more pasta to stretch it if desired.
Also keep in mind that this type of salad can be refrigerating overnight.
Making it such a great recipe for any type of gathering that your going to attend or host.
Prepare this the night before and you can even have a weeks worth of meal preps ready to go for the work week ahead!
If your on a gluten free diet, simply switch out the pasta for a gluten free variety.
EASY PEASY!
If you have been looking at other pea salads recipes and are still debating which one to go with.
I encourage you to really give this one a shot, it’s one of the most popular pasta salads on this site.
And is something my aunt makes for the family every summer.
Which always ends up being gone before the nights end!
If you’re still looking more simple pasta salad ideas?
Simply use my search bar on the sites homepage and you will find other versatile pasta salad recipes.
And you should not feel any guilt eating this one as it’s much lower in calories than most of those other recipes out there.
That is because we are not using any heavy dressings in here.
Also, feel free to add some different ingredients if desired.
Such as:
Cooked asparagus
Artichokes
Leftover spinach
Cucumbers
Chickpeas
Shredded turkey etc
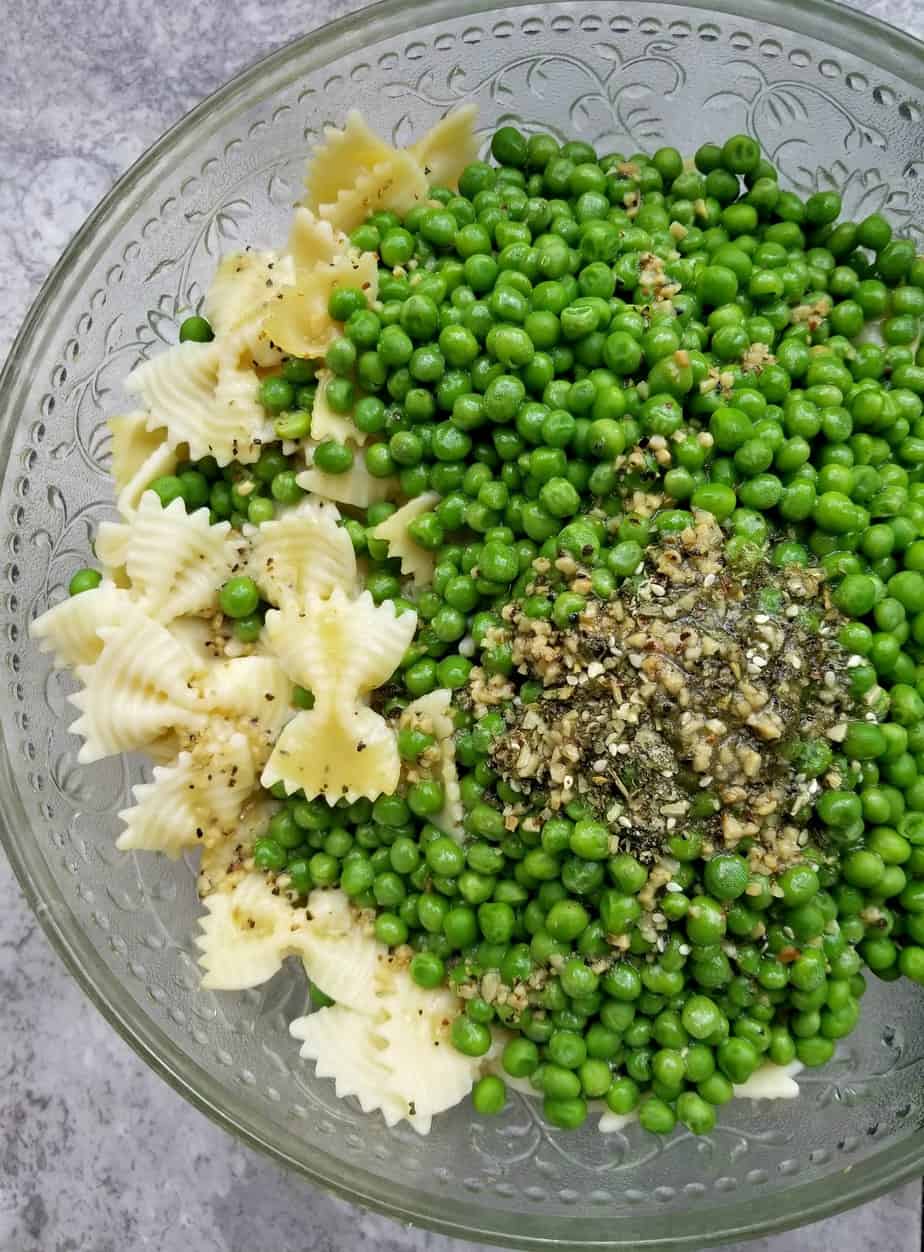
HOW TO MAKE A CHICKEN PASTA SALAD?
Simply saute the seasoned Chicken Breasts till cooked in a pan or cast iron skillet.
Cook the pasta till al dente, strain and set aside.
Cooked the peas till hot, strain and set aside.
Then toss everything together in a large bowl along with the dressing!
Vulla, enjoy!
Your body will thank you for it eating such a healthy dish and you won’t even miss those high calorie dressings in those others, I promise.
Or if you have a favorite low calorie dressing go ahead and use that in replace of mine.
But first off try mine, you may be surprised at how simple at tasty it is.
Tossed in a low fat lemon spiced garlic sauce this dressing is absolutely Dee-licious.
Plus this salad contains just 3 simple ingredients:
Bowtie pasta
Seasoned shredded chicken breasts
Peas
Such an easy salad recipe that is perfect for anytime of the year.
The only sad part is that it will most likely disappear before your eyes if you have others in the house.
It always does it mine, in fact it is me that tends to eat it all.
Sometimes I will add less pasta if I am the only one having it.
Then I will amp up the pea ratio to make it more filling. I encourage you to do what works for you, also if your on some kind of gluten free diet.
No a days they have gluten free bowtie pasta as well.
So the sky’s the limit here!
What can be easier than this salad?
You will start by cooking the bow tie pasta till al dente then during that time you can season and cook the chicken breasts and peas.
Before shredding the chicken then throwing all together in a light dressing that is sure to please even the pickiest of eaters.
I highly recommended using frozen or fresh peas for this recipe, canned just taste no good.
If your not really into peas you can replace them with frozen sweet corn.
Just make sure your pre cooking those peas or corn prior of course.
My favorite Chicken Rub = Szeged Chicken Rub
I am so thrilled you are reading one of my recipes, if you made this, I want to see! Follow Canadian Cooking Adventures Instagram, snap a photo, and tag and hashtag it with @canadiancookingadventures and #canadiancookingadventures.
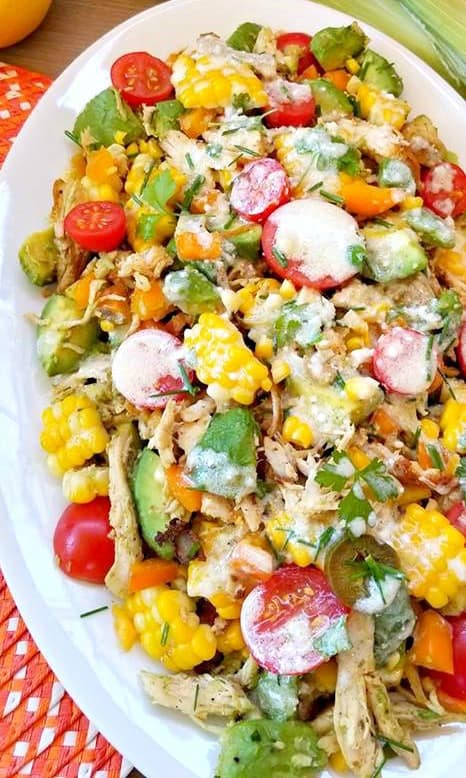
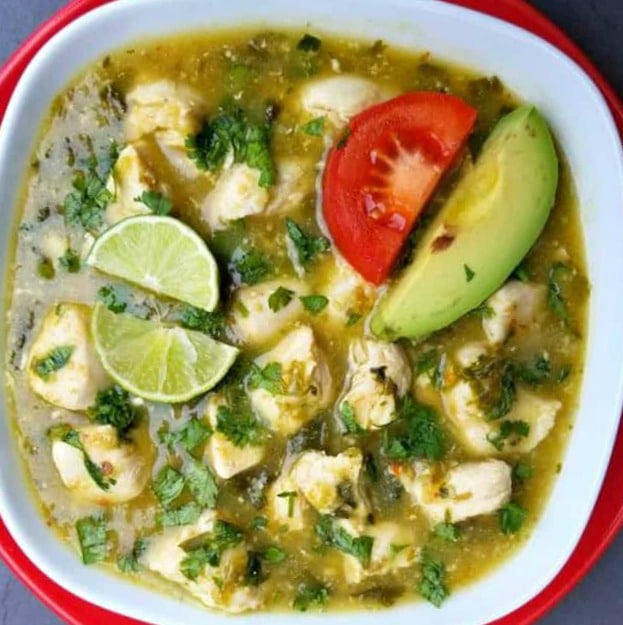
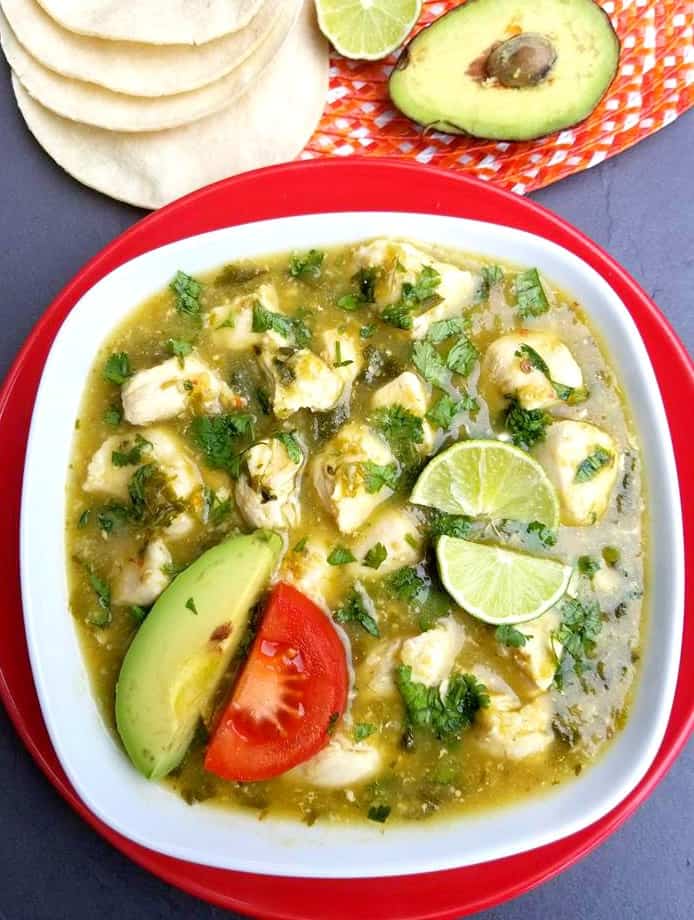
This simple one pot chicken verde soup will knock your socks off! If you have tried my Authentic Green Pork Chili and liked it.
Then you’re sure to like this Chicken Verde which is made in the same Tomatillo green sauce.
This soup is perfect for Cinco de mayo which is coming up here in two days.
¿Estás emocionado por el cinco de mayo = are you excited for Cinco de mayo?
Or you can just enjoy it just because Mexican food is an awesome anytime of the year!
Now there is a process to making authentic tomatillo sauce and that starts with roasting tomatillos, along with garlic, jalapenos and onions in the oven.
However that takes a lot of time and would make this recipe not so quick.
So instead we are using a pre -made green chili sauce that has all those authentic mexican ingredients in it.
So what are Tomatillos anyway? Well they are little green looking tomatoes, known as the Mexican husk tomato, but they are hard to find here in Canada.
We even send Bubba out to locate these rare tomatillos for this recipe, but he failed to come back with any local ones.
Rather he did come back with a bottle of “Tomatillo Salsa” which has the tomatillos in it, along with the cooked jalapenos, onions and garlic that are needing in this recipe.
Add some sliced avocados and tomatoes on top along with chopped fresh cilantro for garnish. Oh and don’t forget to squeeze the juice of a lime over top too!
This really kicks up the flavor and pulls the dish together so well. Also if your wanting to tone down the spicy flavor some feel free to add a dollop of sour cream.
I like to serve this dish with warm corn tortillas for dipping or serve alongside a bed of rice. If you have a little more time on your hands and want to make the salsa verde from scratch, here is a great recipe for “salsa verde“.
If your cooking for a large crowd keep this recipe in mind, not only is it easy to prepare it’s also inexpensive and goes long ways.
Just double the ingredients up if your wanting to feed more than four people, by using my easy to use recipe adjuster above.
I am so thrilled you are reading one of my recipes, I appreciate every single one of you! If you made this recipe i’d love to hear how it turned out, you can leave a comment below. Thank you very much for reading and until next time see ya in the kitchen. Don’t want to miss a recipe? Sign up for our NEWSLETTER delivered right to your inbox!
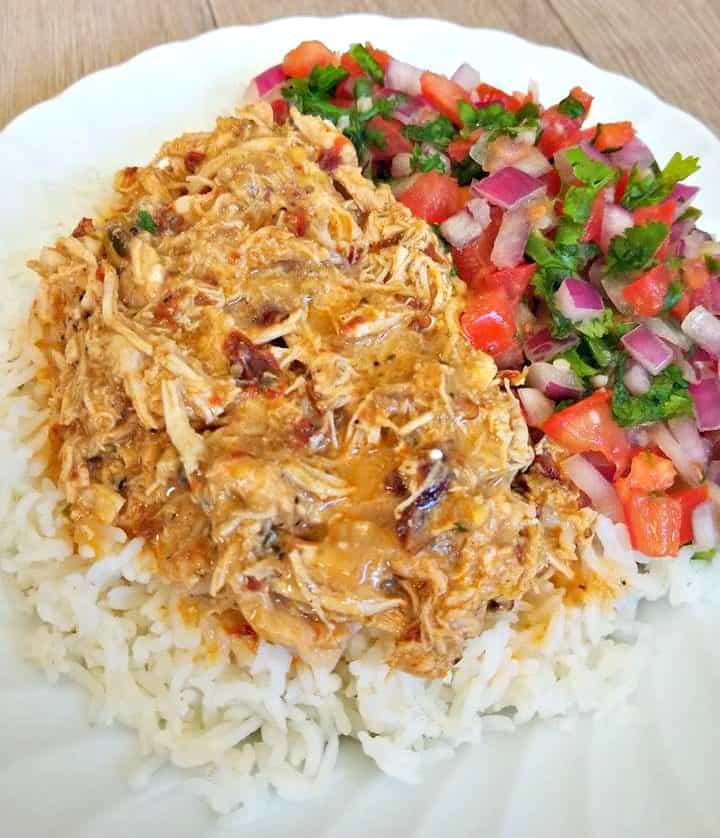
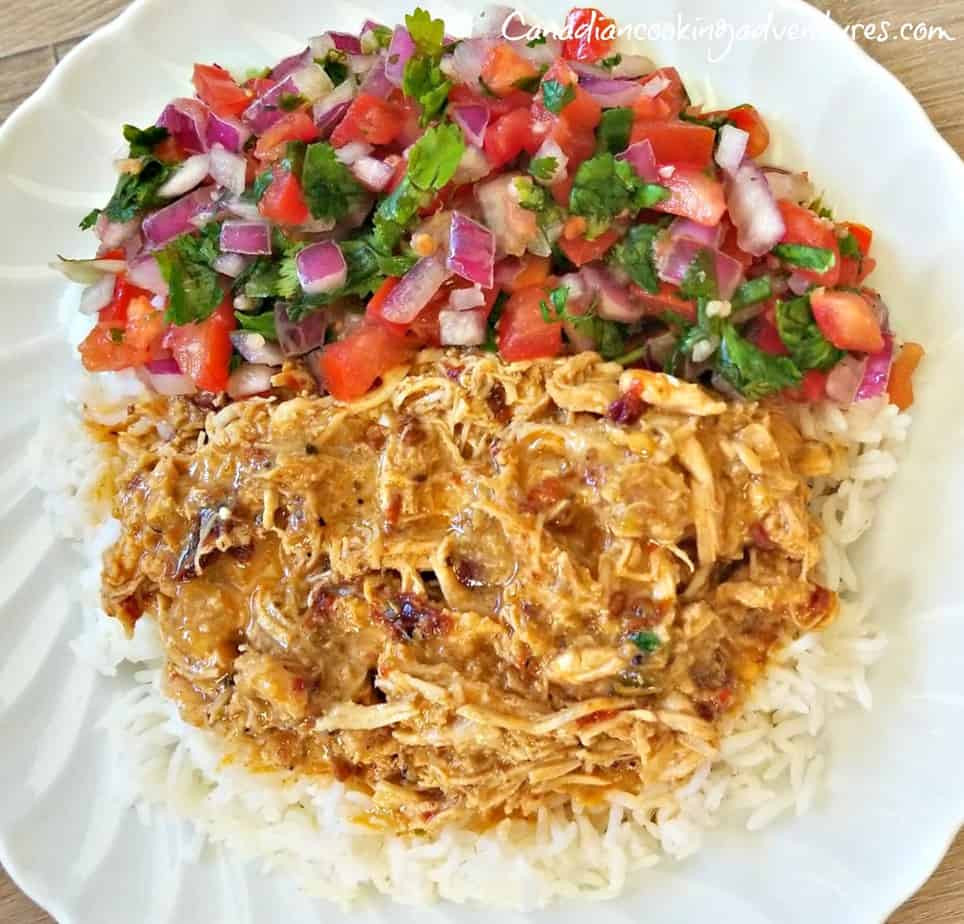
This Mexican Pulled Chicken is slow-cooked in Mexican green chili sauce and jalapenos, this melt-in-your-mouth smoky chicken is the perfect comfort zone. Pair it with fresh pico de gallo and rice and you’re in for a dinnertime treat!
And is little on the spicy side.
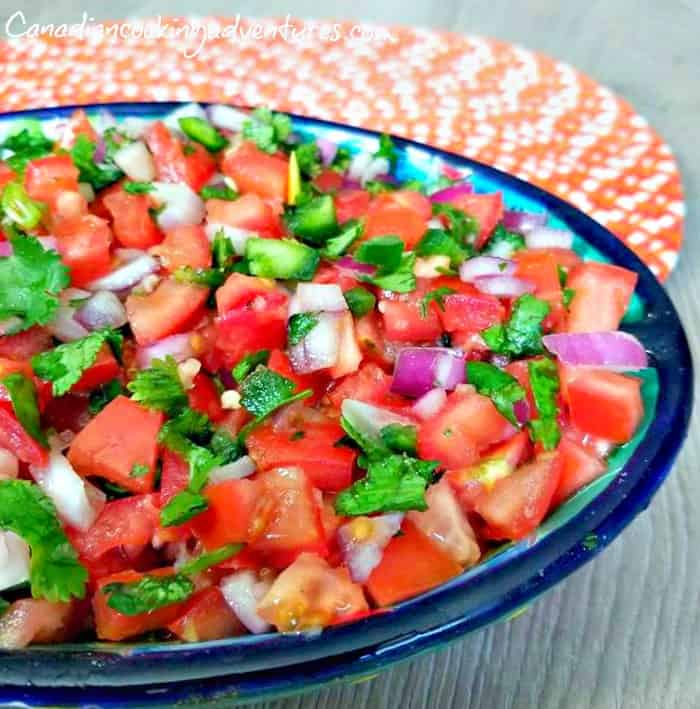
So if you are paring this with homemade pico de gallo (salsa fresca).
I would advise to omit the jalapenos in the salsa since the chicken has enough heat it it already.
But do not worry, it’s not too hot due to the addition of the chile adobo which give it a sweet smoky flavor as well.
Pair this dish with some full fat sour cream and you will have a more mellowed out dish. So if you like Mexican food just as much as me, then I’m more than certain this will become one of your new favorites.
Personally I can handle the extra heat, that is why I made my pico de gallo with jalapenos in it.
As you may know I really love spicy food, however my partner leans more towards sweet stuff and said he would prefer the pico de gallo to have no jalapenos in for this pairing.
This recipe is super easy to make, and packed with full of flavor so follow along.
All we are doing here is simply placing our chicken breasts into the slow cooker, along with 1/2 cup of mexican green chili sauce, a few adobo chilies, some chicken stock and our seasonings.
Then we are allowing it to simmer on medium to low heat all day, only to return to shred the chicken with two forks.
Then placing back into the pot to simmer/brown for a few minutes to allow the sauce to thicken up some. This dish is so tasty and is my new favorite way to eat pulled chicken.
Serve over a bed of jasmine rice, along with homemade pico de gallo and you will be in flavor heaven.
The nice thing about mexican food is that you can make a lot of it in a short period, and you can store any leftovers in the fridge for up to 3 days. I hope you enjoy, ARRIBA MEXICO!
Looking for an awesome recipe for Mexican Salsa? Check out my recipe for Pico De Gallo this goes great with this pulled chicken.
Notes: Squeeze some fresh lemon juice overtop for a pop of extra flavor.
I am so thrilled you are reading one of my recipes, if you made this recipe i’d love to hear about it! Thank you very much for reading and until next time see ya in the kitchen. Don’t want to miss a recipe? Sign up for our NEWSLETTER delivered right to your inbox!
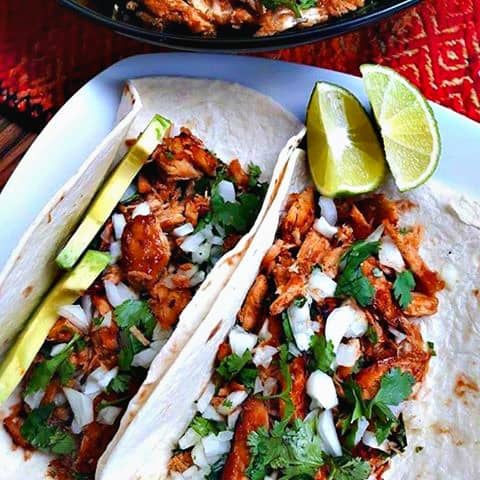
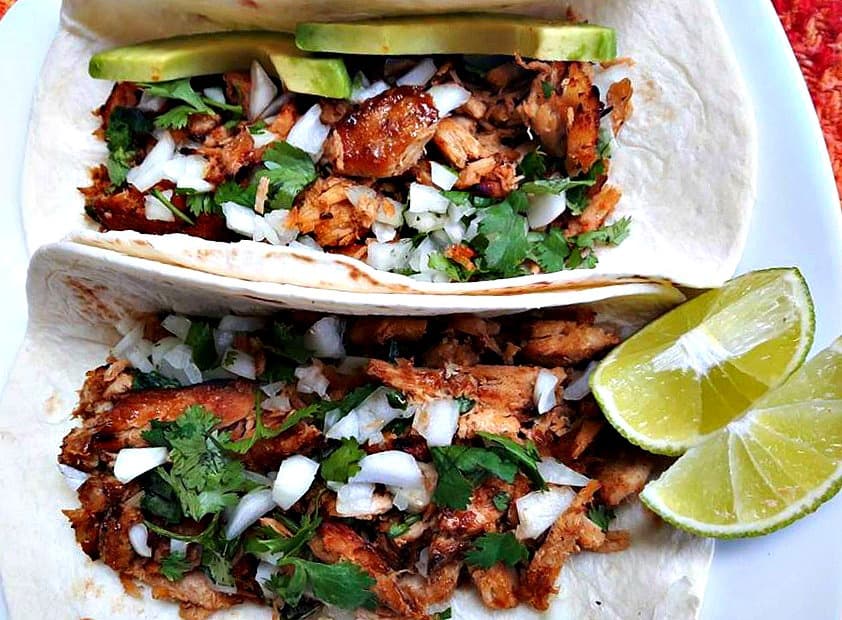
These Pulled Pork Carnitas (Mexican Tacos) are so darn delicious, we make them at least once per month.
The nice thing about mexican food is that you can make a lot of it in a short period of time and feed a crowd easily.
Or store any leftovers in an airtight container up to 3 days in the fridge and enjoy fresh tacos all throughout the week.
How to make pork carnitas in pressure cooker?
You will start by searing the pork until it’s browned on all sides.
And then add all the ingredients listed here directly into the slow cooker to allow it to cook throughout the day.
Then you simply will be coming home to just shred the pork and placing it under the broiler for a few minutes to crisp it up.
Now your ready to have a feast fit for a Mexican Queen & King.
I love the ingredients in this recipe, because everything tastes so fresh. Adding fresh lime juice along with a fresh orange juice really makes the flavors pop, so be sure not to skip them.
Also the addition of the the raw onions surprisingly work so well here too, trust me or I should say the Mexicans!
So be sure not to skip on those very important ingredients. Serve this up with some avocados and you will have one great meal tonight. I hope you enjoy, ARRIBA MEXICO!
Looking for more awesome Mexican Recipes?
Check out my recipe for Pico De Gallo this goes great with these Carnitas also.
Notes: Make sure to broil the pork once it’s been shredded, this ensures the meat is crispy just like they serve in mexico. This shredded pork can be served in burritos, tacos, quesadillas, enchiladas and or over rice.
I am so thrilled you are reading one of my recipes, if you made this recipe i’d love to hear about it! Thank you very much for reading and until next time see ya in the kitchen. Don’t want to miss a recipe? Sign up for our NEWSLETTER delivered right to your inbox!