I am so thrilled you are reading one of my recipes, if you made this recipe i’d love to hear about it! Thank you very much for reading and until next time see ya in the kitchen. Don’t want to miss a recipe? Sign up for our NEWSLETTER delivered right to your inbox!
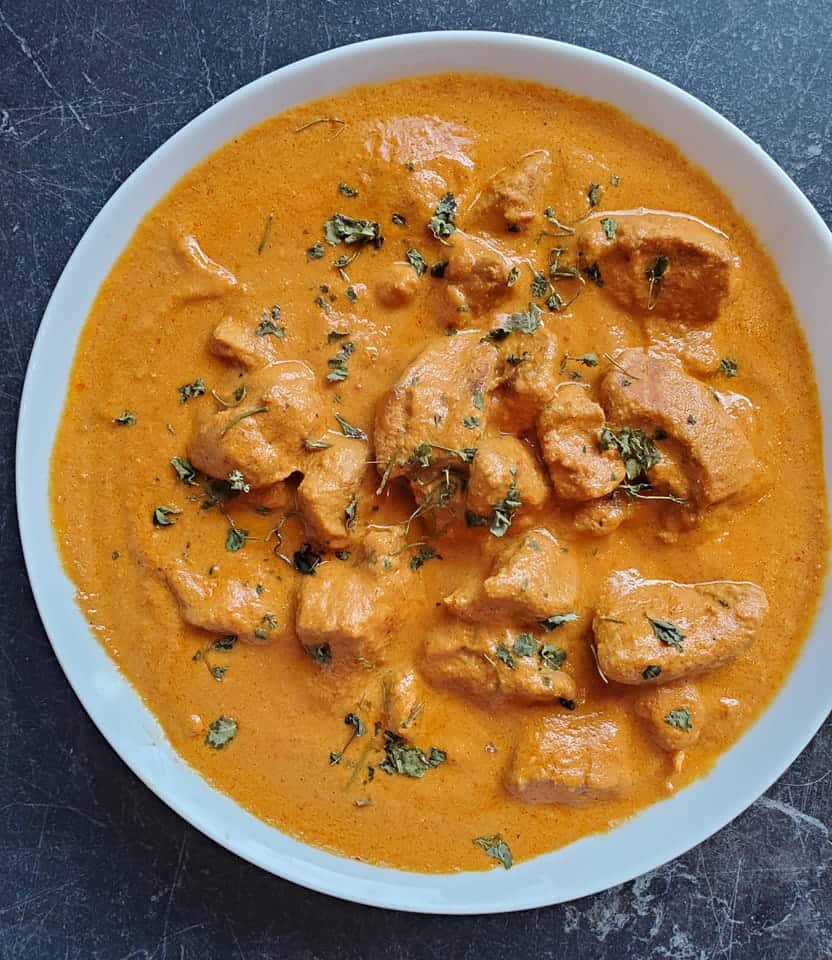
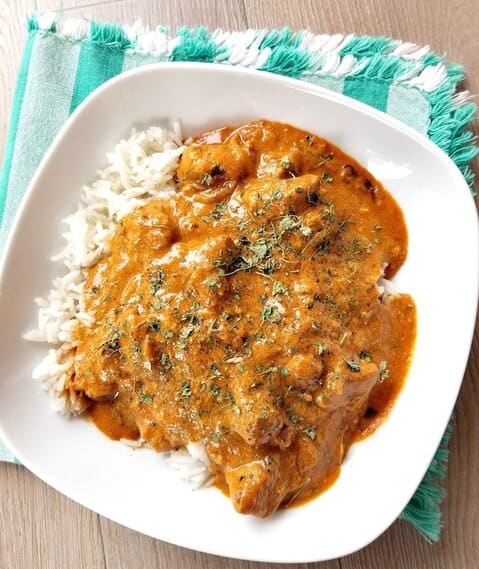
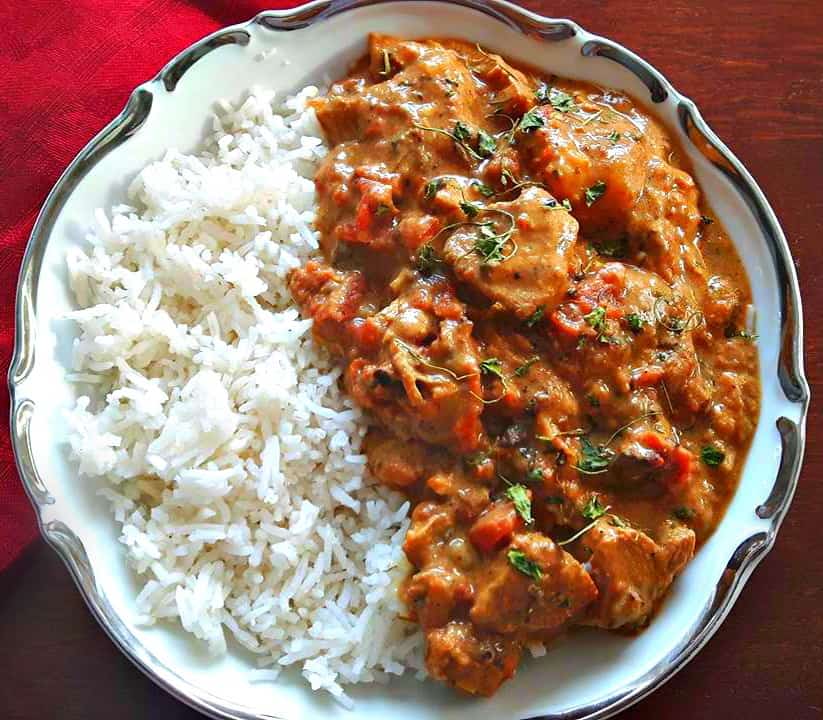
Today I’m so very happy to show you this recipe for a Simple Butter Chicken Recipe that your sure to make time and time again.
Awww the infamous Butter Chicken, also known as (Murgh Makhani). Almost everyone that has tried this dish has loved this dish and if you have not tried it before at home your in for a treat!
To make this Curry easy to make, try purchasing a pre-made Butter Chicken curry powder package like the one below.
WHAT SPICES ARE USED IN BUTTER CHICKEN
Salt, Red Chilli, Turmeric, Cumin, Black Pepper, Large Cardamom, Cinnamon, Green Cardamom, Clove, Ginger, Garlic, Star Aniseed, White Pepper
I always use a BUTTER CHICKEN SPICE blend as seen below as it has all of this in it already. Otherwise if your wanting to add in your own spices I highly recommend adding 1 tsp of chili powder, cumin, turmeric and fresh crushed garlic and onions.
Below you will see the pre-marinaded and cooked chicken being added to the sauce for the final step in cooking this delicious dish.
The part where your simmering the sauce, you can switch from 1/2 tsp of chili powder to 1 tsp for that extra heat. I love to do that, personally. I will add 1 tsp every time for this recipe.
WHO INVENTED BUTTER CHICKEN
It’s origins came from three Punjabi restaurateurs, Kundan Lal Jaggi, Kundan Lal Gujral and Thakur Dass, who founded the world-renowned Moti Mahal restaurant in Delhi.
WHATS BUTTER CHICKEN SAUCE MADE OF
Fresh Cream
Ghee or Butter
Oil
Cashews or Almonds if you do not have you can always use sugar for added sweetness
Plain Yogurt
Tomatoes
Garlic and Onions
WHAT’S BUTTER CHICKEN
It is one of the most popular Indian curries Worldwide today.
It’s become so popular that the supermarkets are now selling various versions of it in pre- packaged bottles in hopes to win your business.
But that stuff just won’t cut if for those of us who are familiar with traditional Butter Chicken. Because real butter chicken uses ghee butter you can use regular butter if desired. Then of course there is cream and some stronger curry flavors than most of those pre-made bottled types entail.
Plus those bottles are expensive costing near 4x the price that it takes to make it from scratch, not to mention not nearly as tasty.
IS BUTTER CHICKEN SPICY
This popular dish hails from the Indian subcontinent and is noted for its creamy and smooth butter taste, you can make it more spicy by adding an extra 1 tsp of red chili powder if desired.
Otherwise this is a mild curry compared to other traditional Indian dishes.
In comparison we would rate the spice level of this dish to other Indian dish, a 4 out of 10.
Such as Grama masla and Indian curry powder. All which can be found in almost any grocery store spice section.
I think the reason people by those pre-made bottles is because they think making it from scratch is hard, but I assure you it’s not.
It’s all about having the right ingredients and nothing in this ingredients list is is foreign besides possibly the fenugreek leaves also known as kasuri methi. Also that can be found in almost all grocery stores today.
HOW LONG WILL BUTTER CHICKEN LAST IN THE FRIDGE
In a sealable container up to 3 days and if you want to freeze it for meal – preps you can do that and store in the freezer up to 3 months.
We hope you enjoy this tasty dish as much as we do! Serve it alongside some naan bread and enjoy!
We don’t add as much cream to this Butter Chicken as most do, which will give it a more orange color.
If your wanting a more cream heavy type of Butter Chicken just add 1/2 cup of cream opposed to the 1/4 cup that my recipe calls for.
If your a CURRY lover like me. Then you will want to try these dishes below!
Note: If you want a more creamy butter chicken add 1/2 cup of cream instead of the 1/4 cup that I used in this recipe.
I am so thrilled you are reading one of my recipes, if you made this recipe i’d love to hear about it! Thank you very much for reading and until next time see ya in the kitchen. Don’t want to miss a recipe? Sign up for our NEWSLETTER delivered right to your inbox!
Did you like this curry?
Then you’re sure to like my “Creamy Coconut Chicken Curry” which uses coconut milk as is by far my most popular recipe on this blog.
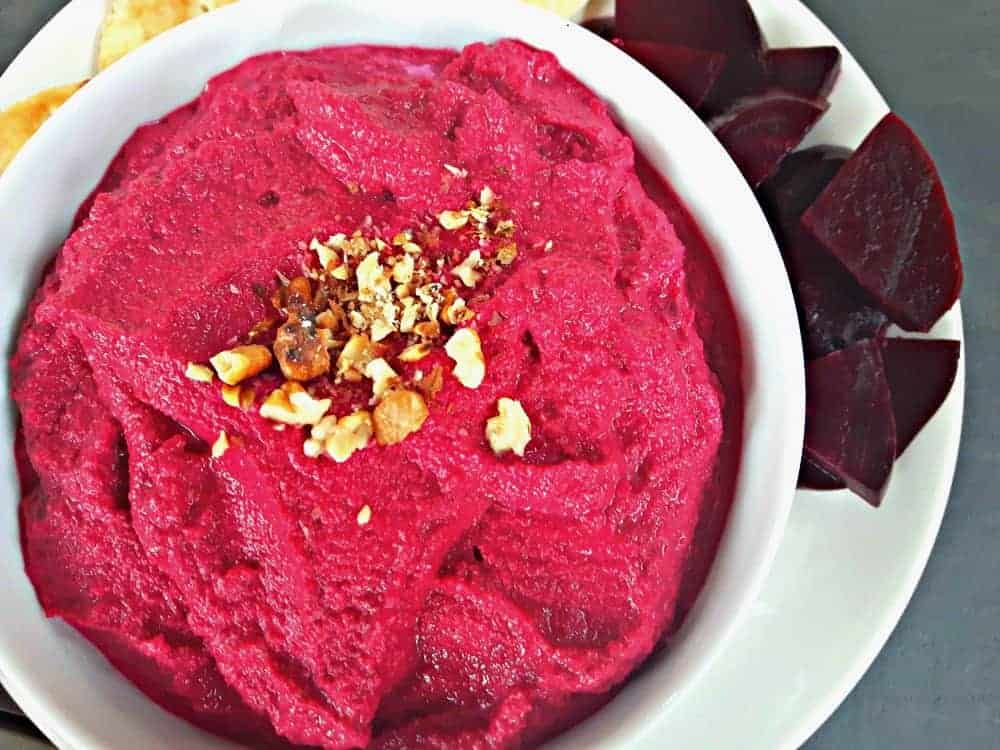
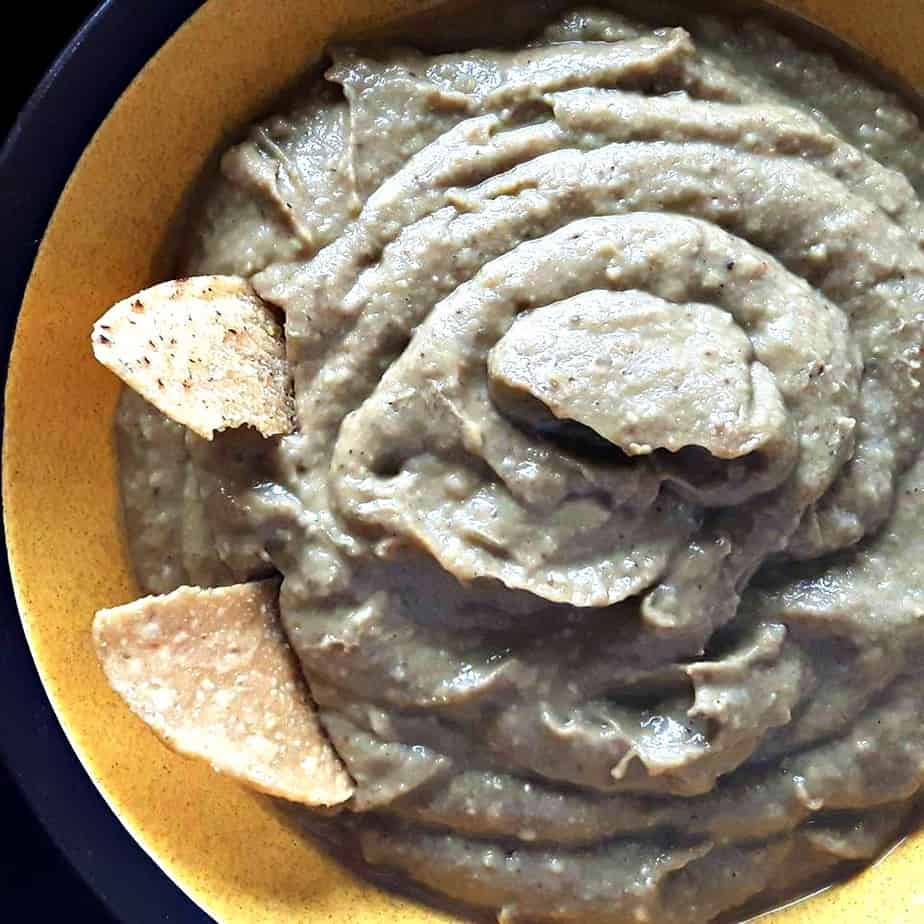
Once you try this homemade Creamy Beetroot hummus, you will be hooked.
It’s absolutely delicious and very healthy for you. Not to mention it’s that much better tasting than the store bought kind, which is always to sweet.
If that is not enough motivation enough for you to give it a Go, then check out the health benefits; Beets are high in immune-boosting vitamin C, fiber, and essential minerals like potassium (essential for healthy nerve and muscle function) and manganese (which is good for your bones, liver, kidneys, and pancreas).
Beets also contain the B vitamin folate, which helps reduce the risk of birth defects. Not to mention with powerful phytonutrients that give beets their deep crimson color may help to ward off cancer. If that is not reason enough to prepare this then i don’t know what is!
Hummus never tasted so good, serve with a warm pita and enjoy!
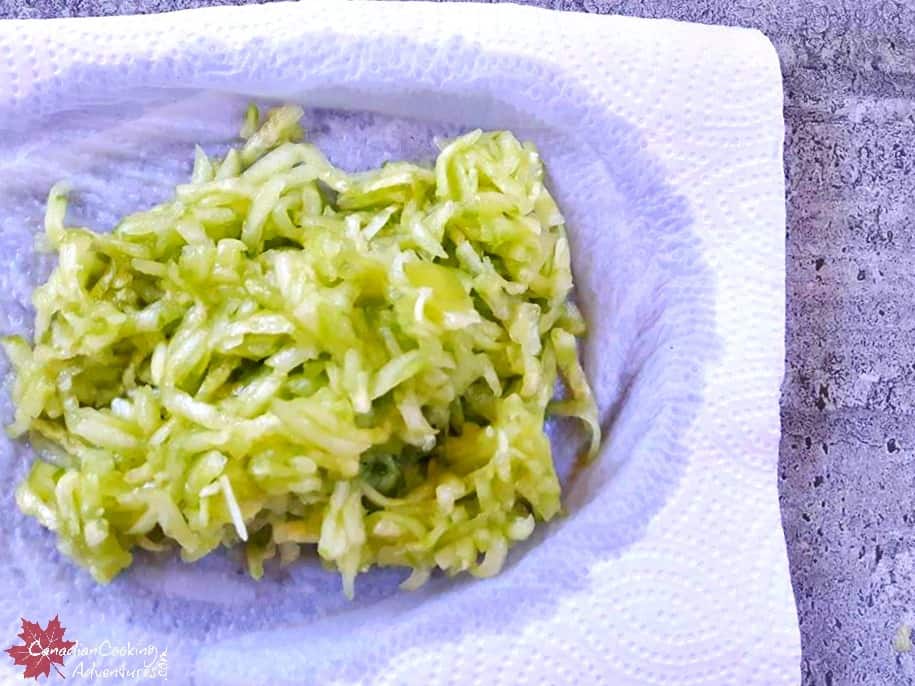
Make sure to peel your beets while there warm, otherwise there too hard to peel when there cold.
Also don’t throw out the beet greens as they are packed with nutrients that may strengthen your immune system, support brain and bone health, and more. Cook them up with some butter, salt and pepper and serve as a side dish to any meal.
I am so thrilled you are reading one of my recipes, if you made this recipe i’d love to hear about it! Thank you very much for reading and until next time see ya in the kitchen. Don’t want to miss a recipe? Sign up for our NEWSLETTERdelivered right to your inbox!
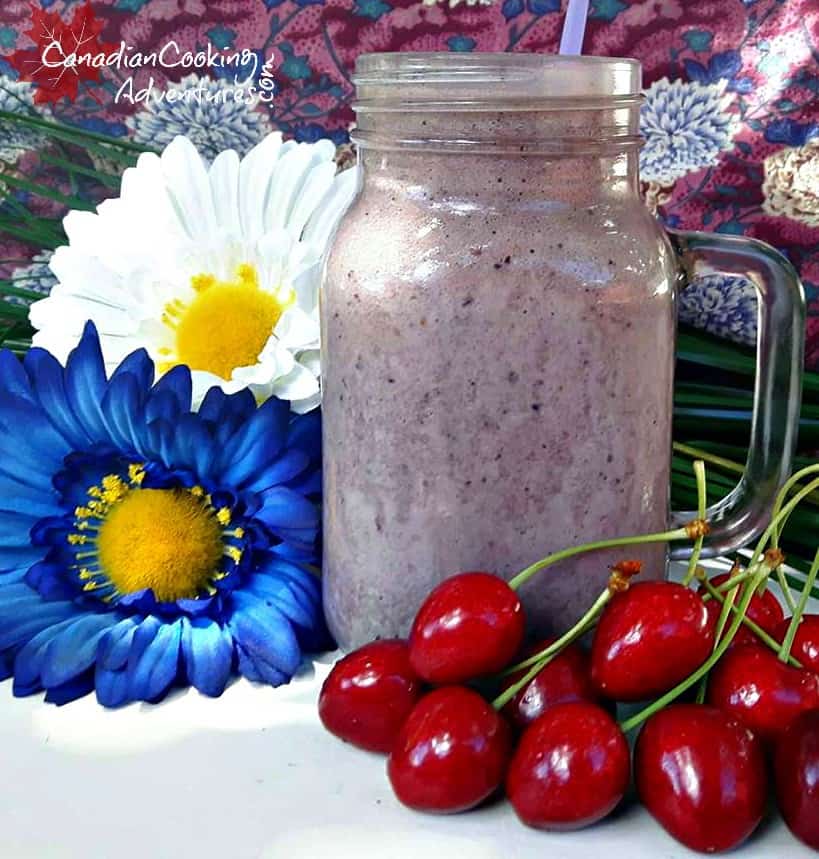
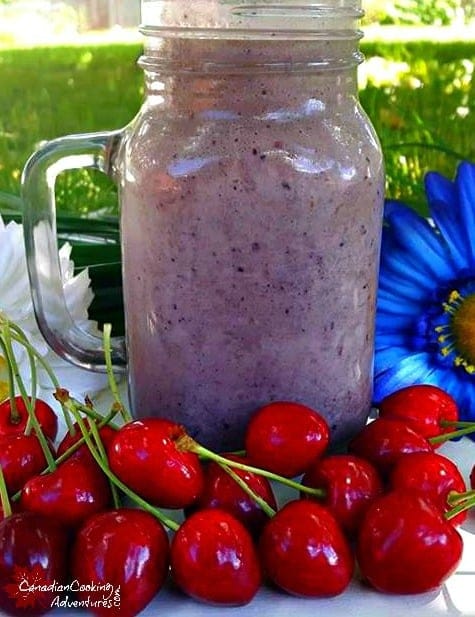
If your looking for the ultimate breakfast shake, then you found it. I drink this everyday and let me tell you it has changed my life!
You too can start nourishing your body and start boosting your immune system everyday just by waking up and simply adding this shake to your breakfast routine. Whether your going on a cleanse, or just wanting to improve your overall health you can’t go wrong with incorporating this shake into your daily routine. Did you know Blueberries and Cherries are pack with some of the highest antioxidants in the fruit world? Pair those with some Spirulina powder is a super green food, and your breakfast routine will be packed full of all the nutrients you need for the day! That is why I call this smoothie, “Cherry Berry Magic Smoothie” it really is that good for you. I have been making this smoothie for my breakfasts for the past couple of years, and it gives me just the right amount of energy I need to start off my day, while keeping me super healthy.
So how can this shake benefit you? Well Cherries are packed with vitamin C, which is needed to build collagen your skin’s natural wrinkle prevention thus slowing down the aging process. Cherries are also loaded with Queritrin, a flavonoid believed to be one of the most potent anticancer agents. And blueberries? these guys are ranked the number 1 in antioxidants. Just one cup has 13,427 total antioxidants, vitamins A & C, plus flavonoids. That’s about 10 times the USDA’s recommendation, in just one cup! Then be sure to add your favorite protein powder also to this drink if your wanting to use it as a meal replacement in the mornings. I use “Spirulina” which is packed full of protein. So what is Spirulina?
Spirulina is a magical plant that comes from blue -green algae, that is found in warm fresh waters.And contains significant amounts of calcium, niacin, potassium, magnesium, B vitamins and iron. Which reinforces our immune systems and helps control high blood pressure and cholesterol, thus giving us the ultimate protection from cancers. I like to buy the organic variety that is grown in Hawaii, I trust the brand and have been using if for years. I also like to add chia seeds too, because they are super rich in nutrients such as fiber, iron, and calcium and Omega-3 fatty acids. I hope you give this powerhouse of a shake a try, you won’t regret it.
To make the Cherry Berry Magical Smoothie:
Place your banana, pitted frozen or fresh cherries, frozen blueberries, greek yogurt, chia seeds, spirulina powder and ice cubes in a blender.
Blend until smooth.
Serve and Enjoy!
I am so thrilled you are reading one of my recipes, if you made this recipe i’d love to hear about it! You can post a review, picture below or via Instagram and let me know how it turned out. And by doing so you will be automatically entered into our seasonal CONTEST to win one of our great prizes. Winner will be notified via email within a week after the contest closes. Thank you very much for reading and until next time see ya in the kitchen. Don’t want to miss a recipe? Sign up for our NEWSLETTER delivered right to your inbox!
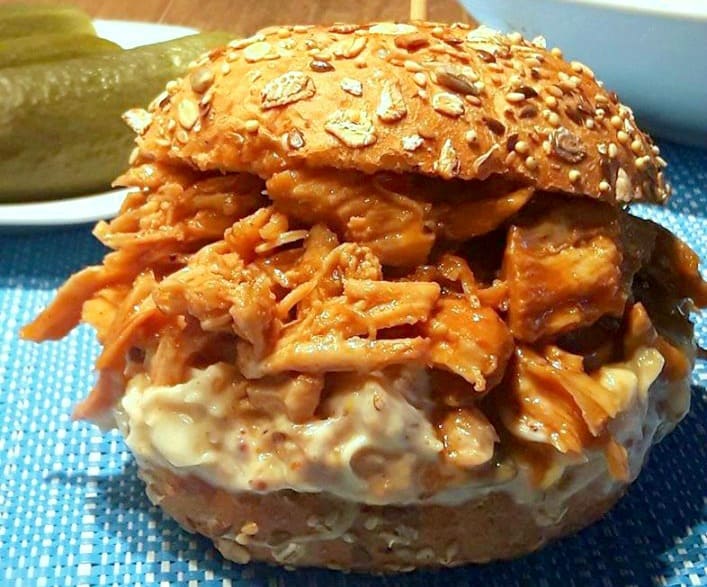
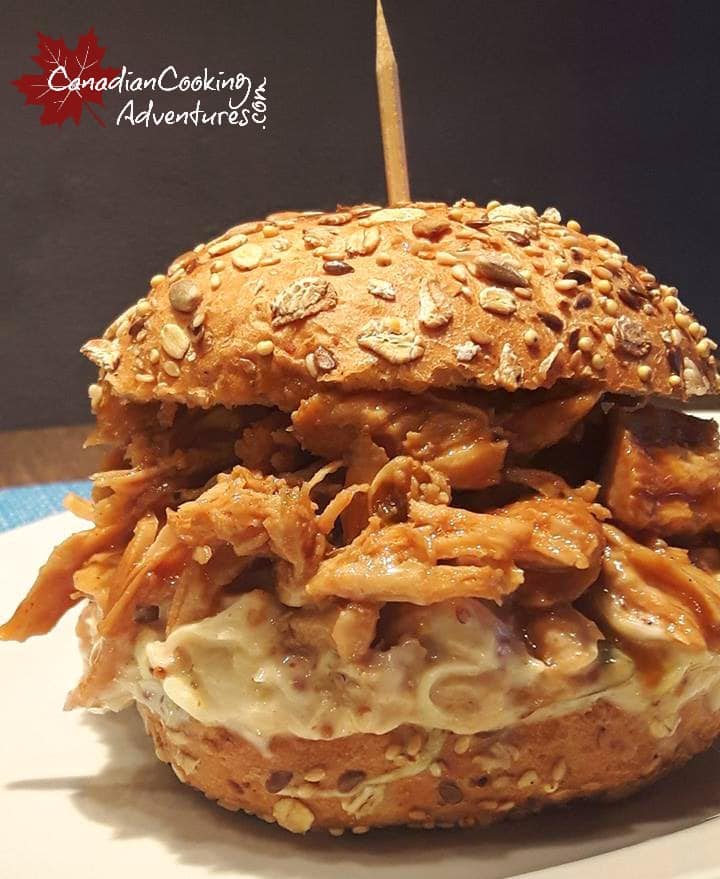
I just love recipes that call for a little spice, don’t you? Impress yourself tonight with this no fuss recipe, which takes less than 10 minutes to prep. Simply allow it to cook in the slow cooker before shredding it with two forks before plating. While it’s cooking in your slow cooker, make some fresh homemade coleslaw and then simply let it sit in the fridge to cool before pairing with the shredded chicken. Serve with on a nice crusty bun and you have a great meal, can’t get any easier or delicious than that eh? This Chipotle Chicken recipe can be doubled and made for a larger crowd too, or stored in the fridge up to 3 days. I hope you enjoy it as much as we do!
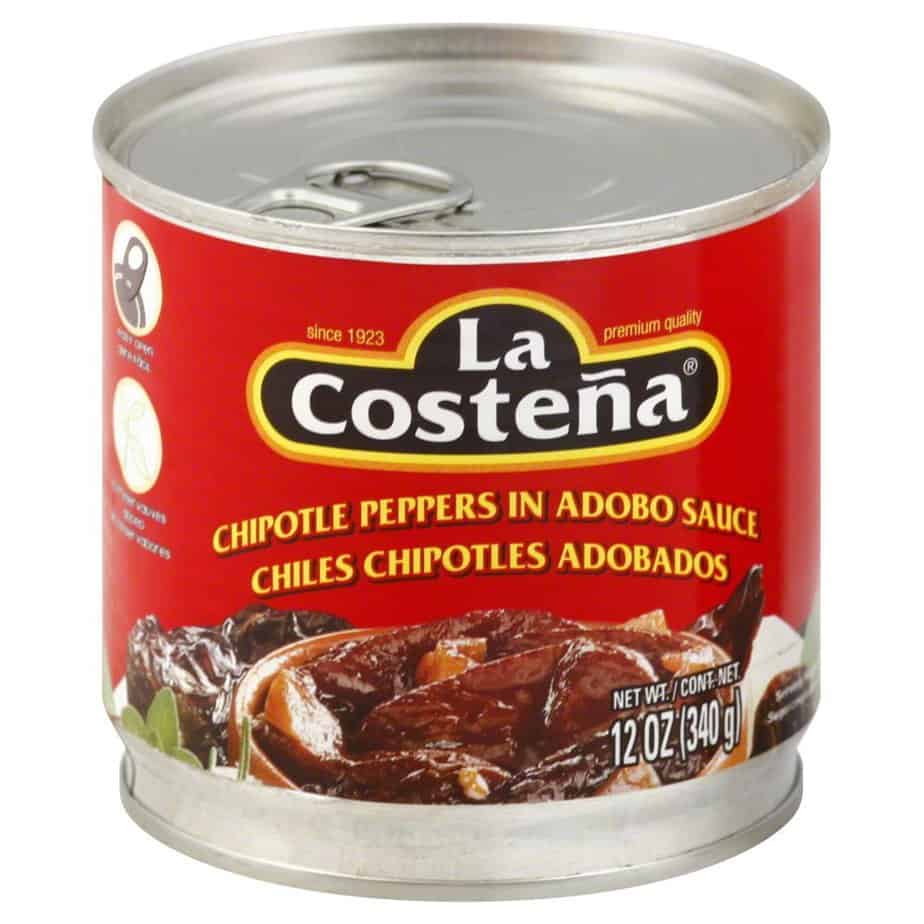
These are what Mexican Chipotles look like
This is what you will be looking for, same stuff just in a can with some sauce.
To make the Creamy Chipotle Chicken:
In a blender puree your 1 chipotles with (seeds removed) and set aside.
Now. combine all your ingredients in your slow cooker, and then add in your chicken breast and stir till everything is well coated. Add in your pureed chipotle along with 1 tsp of the sauce.
Slow Cooking: LOW for 5-6 hours
Pressure Cooker: 35 minutes
Stovetop: Add one cup of water and all your ingredients, minutes the yogurt to a saucepan and simmer on low covered for 30 minutes. Then stir in the yogurt, mix everything together and cook for the reamaning 30 mins on low till done.
Once the chicken is tender, use two large forks to shred the chicken.
Then let the Chicken sit with the lid off for 30 minutes before serving, this allows it to absorb the remaining sauce and thicken up.
Serve on a crusted bun with a sweet or tangy coleslaw.
Note: Store leftovers in an airtight container in the fridge for up to 3 days.
I am so thrilled you are reading one of my recipes, if you made this recipe id love to hear about it! You can post a review and or picture below. And by doing so you will be automatically entered into our seasonal CONTEST to win one of our great prizes. Winner will be notified via email within a week after the contest closes. Thank you very much for reading and until next time see ya in the kitchen. Don’t want to miss a recipe? Sign up for our NEWSLETTER delivered right to your inbox!
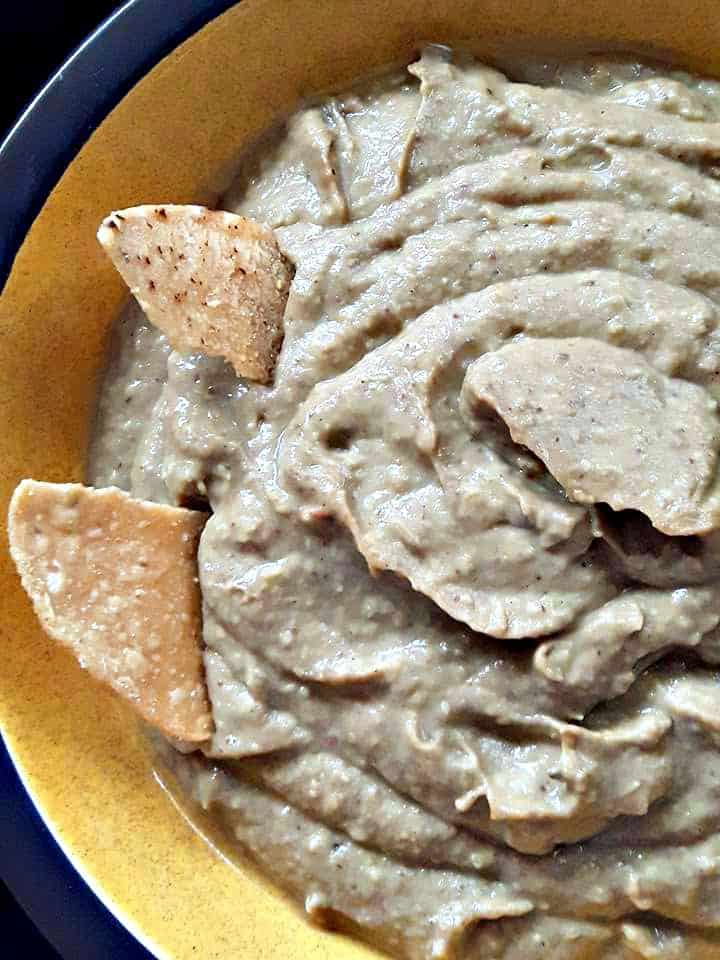
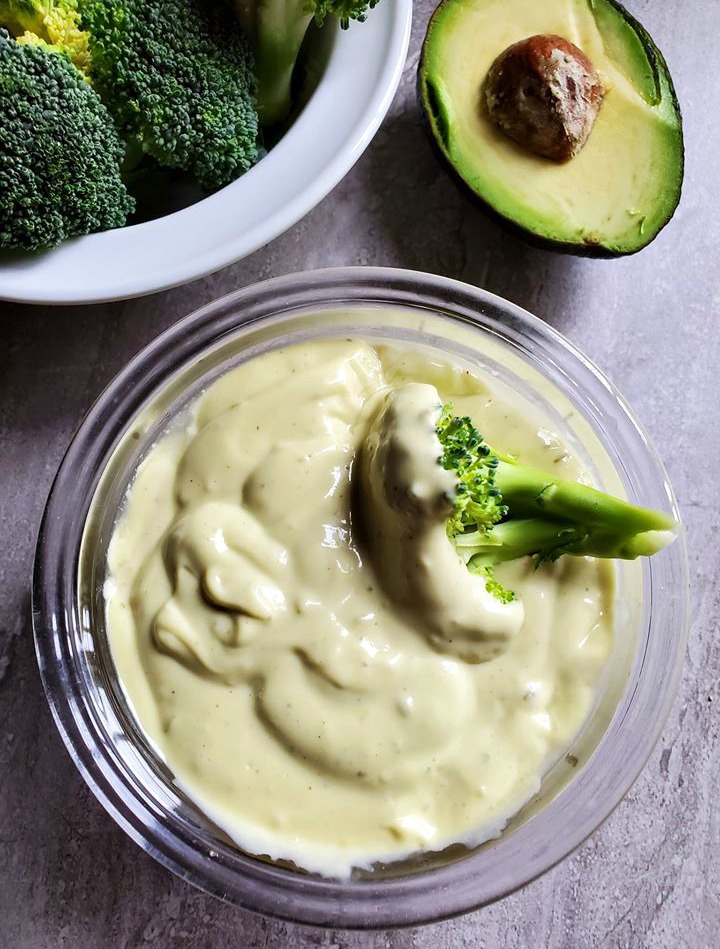
This Avocado Black Bean dip is an easy healthy appetizer that gets it’s creaminess from a combination of avocados and black beans.With a hint of chipotle chilies that give it an unforgettable flavor.
Excellent recipe for game day or as a healthy alternative to some other snack foods that may intrigue you. Serve with a side of your favorite tortilla chips.
This dip is packed full of fiber and many other nutrients, that are sure to leave you feeling great after eating. This dip would go great in burritos and or served along nacho type dishes as well.
Sometimes I will make this instead of my plain old guacamole, because the black beans have 21 grams of fiber per 100 grams so it encourages me to skip on the meat protein for that particular meal.
Note: Store leftovers in an airtight container up to a week.
LOOKING FOR MORE AWESOME DIP RECIPES?Try some of my favorite Homemade Creations below!
I am so thrilled you are reading one of my recipes, if you made this, I want to see! Follow Canadian Cooking Adventures Instagram, snap a photo, and tag and hashtag it with @canadiancookingadventures and #canadiancookingadventures.
This Spicy Coconut Chicken Curry is a fusion type dish that I came up with in the past year or so.
This dish is packed with flavors that your sure to enjoy!
As you may know, I love Thai and Indian food. So you will always find all those types of spices in my pantry along with coconut milk.
For this recipe, I have infused spices from both cultures, to come up with this Chicken Potato Curry recipe, that I think is worth sharing. And have made time and time again in my kitchen.
Everything goes so well together to make a creamy, spicy and flavorful curry. Serve over a bed of jasmine rice or alongside some naan bread.
NAAN bread also goes amazingly well with this meal. You can find that recipe at the bottom of this post!
This dish can be made with shrimp too, just add your shrimp during the last 5 minutes of cooking and omit the step of cooking the chicken.
Cooking Methods:
Pressure Cooker: Cook for approx. 10 minutes – after following the initial steps 1-6.
Slow Cooker: Place on LOW for 2-3 hours HIGH for 3 hours. – after following the initial steps 1-6.
Stove Top: Cook covered on low for 60 minutes. – after following the initial steps 1-6.
DID YOU MAKE THIS RECIPE?
If you make this recipe, I would love to hear about it! You can leave a 5 star review in the comments below! Thank you very much for reading and until next time see ya in the kitchen. Don’t want to miss a recipe? Sign up for our NEWSLETTER delivered right to your inbox!
If your a CURRY lover like me. Then you will want to try these dishes below!
LOOKING FOR AN AWESOME NAAN BREAD RECIPE TO SERVE ALONGSIDE THIS CURRY? Then look no further, I got you covered! My Garlic Naan Bread Recipe is a sure WINNER!
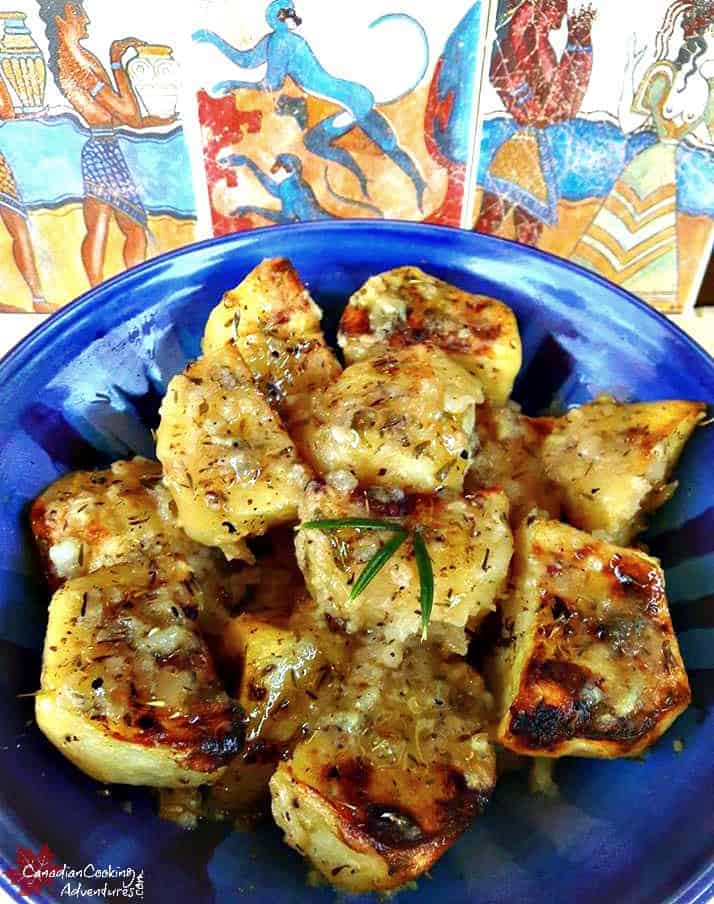
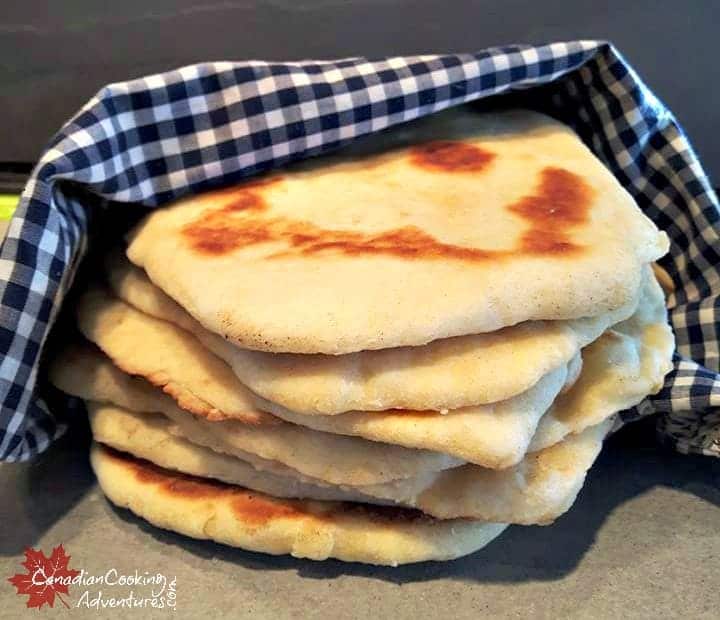
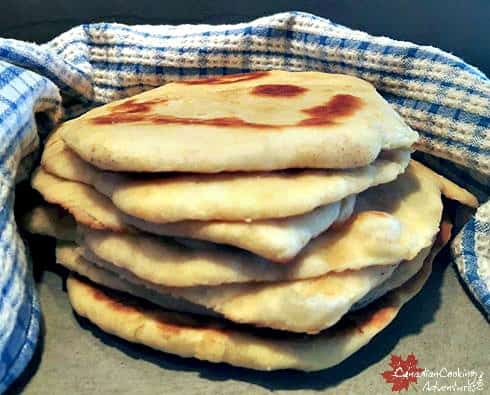
This is my favorite recipe for Homemade Pita Bread. It is light, fluffy and simply delicious. Once you learn to make this at home you won’t ever want to buy the pre – packaged stuff again.
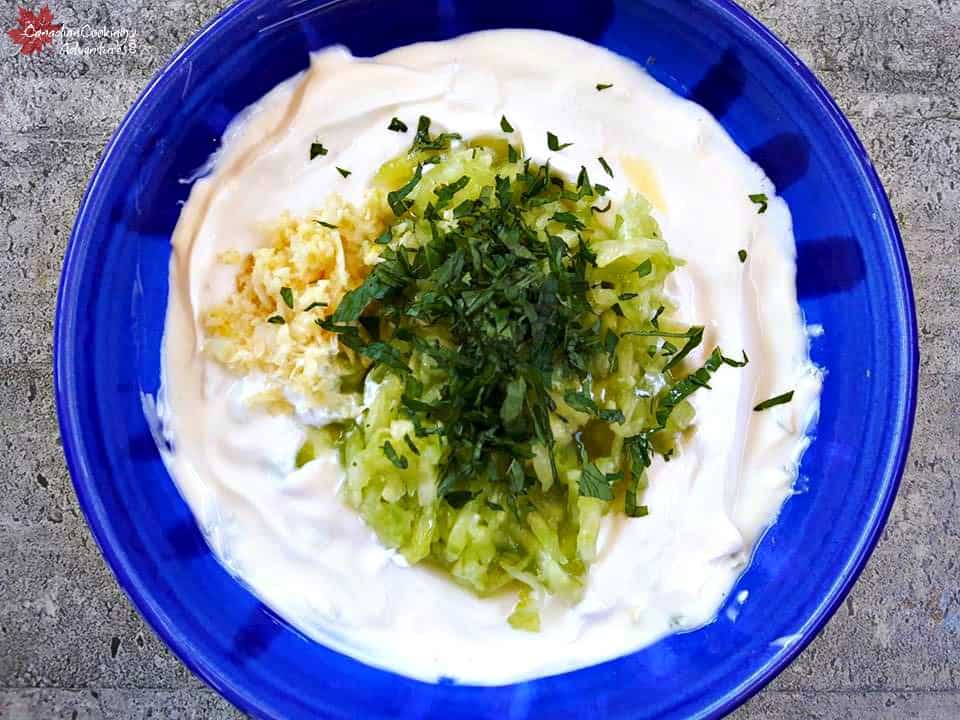
Serve with some homemade Beef Koftasand Tzatziki sauce and you will be in Business for a great dinner tonight!
Trust me, this is the good stuff. I made this pita bread a few years back.
And it still holds true to being an excellent recipe for this Greek bread.
Not to mention healthy and super easy to make. But don’t tell my family I said that because they think I’m a culinary genius ha!
You too can be a culinary genius in your family and skip the bakery this week by impressing them with a batch of homemade Greek Pita Bread.
I like to make my Pita bread in batches, so I tend to double this recipe to make either 16 small pitas or 12 large, but that’s up to you.
This recipe will make 6 “thick” pitas or 8 “thinner” pitas, it all depends on how you shape them. The smaller “thick” are best for stuffing and the “thin” are best for dipping.
I encourage you to try both, for this recipe I made thinner ones, either way it’s just as delicious, so let’s get started.
WILL PITA BREAD MAKE YOU FAT
Unless your eating tons of it.
You should be fine, since Pita Bread is a lighter bread than most.
Also it is low in calories.
IS PITA BREAD HEALTHY
Yes, it contains a rich source of protein and carbohydrate and a good amount of vitamin B, and other vitamins.
HOW TO MAKE PITA BREAD
In a large bowl dissolve the yeast in your warm water, and then add 1 cup of your flour in. Mix it all together and let it stand for 15 minutes to rise. You will notice a gooier mixture with some bubbling once step 1 is done.
Now add 2 tbsp of olive oil and salt into your pita mixture, and the rest of your flour. Mix again slowly, until the dough is soft and smooth (and slightly sticky) if the dough sticks to the bowl you can then add in more flour slowly but not to much.
Using your hands knead the dough for about 10 minutes in the bowl and then remove it and place on a lightly floured surface, form into a ball and then place back in the bowl and drizzle olive oil over the bread. Before covering with a dry towel and allowing to rise for 2 hours.
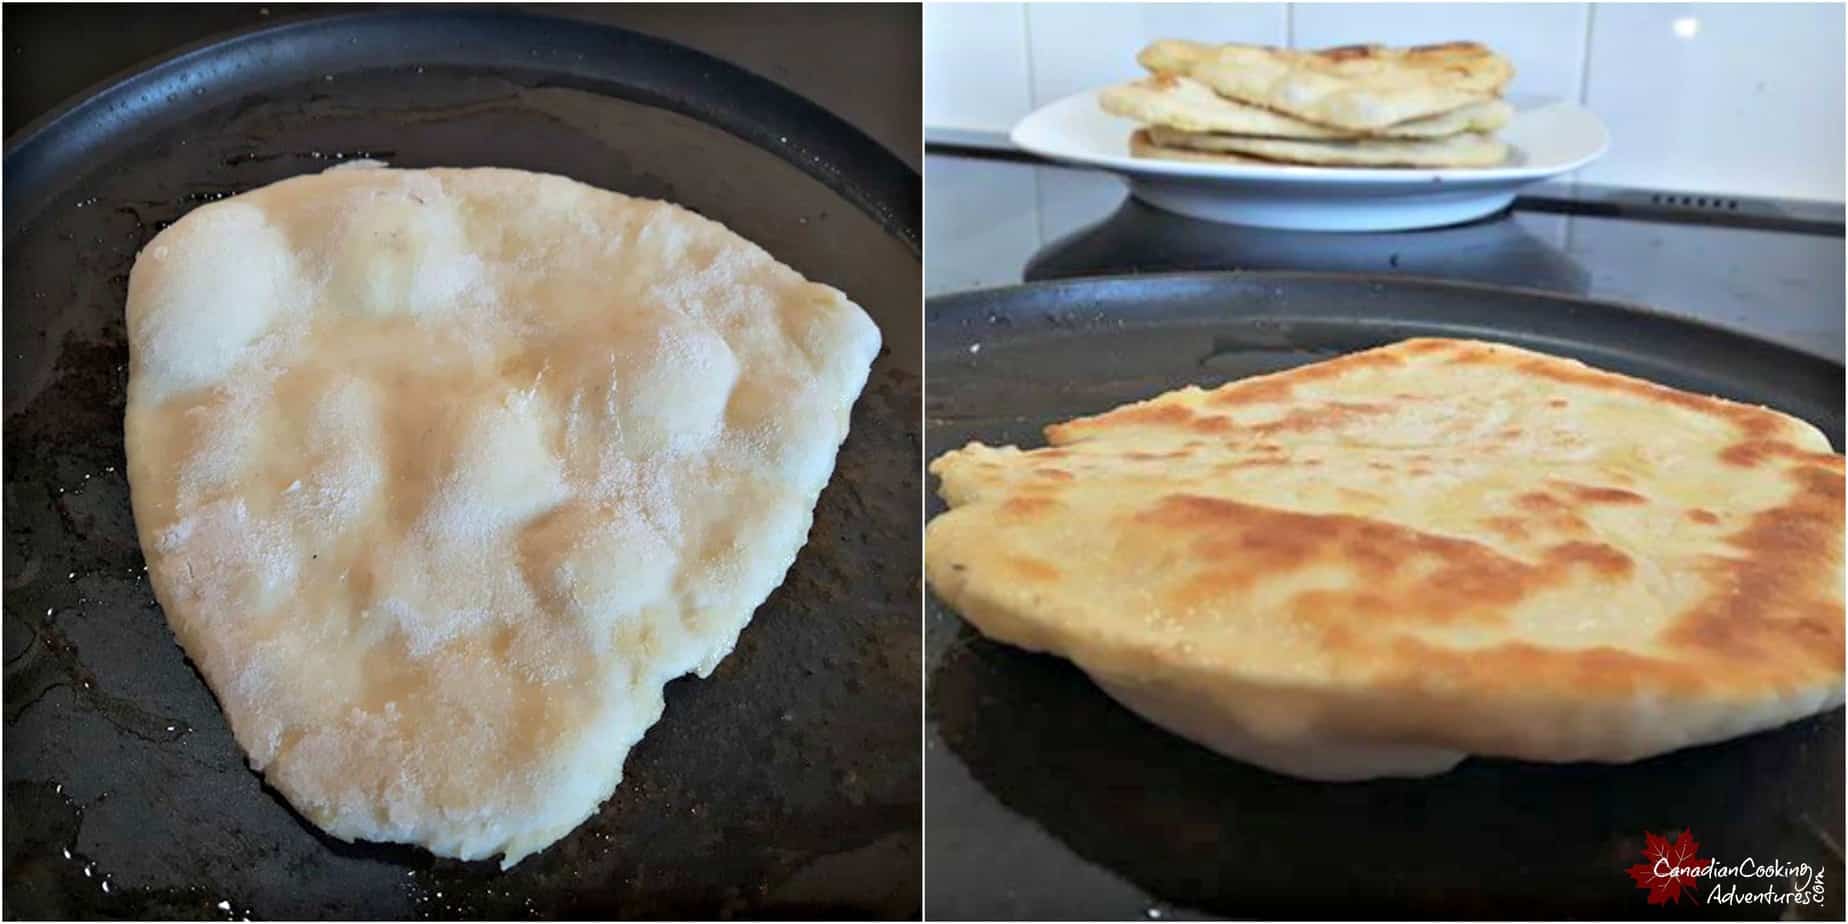
Now take the dough out of the bowl and knead a little bit with your hands. Split in -6-8 evenly sized pieces on a floured surface and form into pita bread shapes, either with your hands or use a rolling pin.
Make about 1 cm thick pitas and let them rise for 30 minutes covered with saran wrap before cooking.
To Cook the Pita Bread.
Heat a non-sticking frying skillet to medium-high heat with a (little bit of oil) and fry each pita bread for about 3 minutes on each side and turn over and repeat x2, until lightly browned and air bubbles appear.
Note: If your placing food inside the pitas, allow them to cool before taking a sharp thin knife and cutting it down the side. Pita Bread can be frozen easily by placing in a ziplock bag. Just place parchment paper in-between each one. This will seal in the freshness and allow you to remove each piece, one at a time as needed.
I’m so thrilled you are reading one of my recipes, if you made this, I want to see! Follow Canadian Cooking Adventures Instagram, snap a photo, and tag and hashtag it with @canadiancookingadventures and #canadiancookingadventures.