Creamy Reuben Soup

This Creamy Reuben Soup is low carb and absolutely delicious. If YOU like Reuben sandwiches, then your going to love this soup! 

I  grew up eating the old classic “Reuben Sandwiches” in my home. My mom used to make then from scratch for me. With spicy mustard, which was my favorite way to eat them.

This soup reminds me so much of my childhood, but only in a soup.

Image a creamy Reuben sandwich? That is this soup, and it is Amazing!

I bought 1 pound of a “pickled corn beef” a few days ago. And was looking to make something unique with it, since I wasn’t really feeling like making the typical beef brisket that you can find just about everywhere.

So I got to thinking and was like “Oh” I can make a Reuben Sandwich.

Wait better yet a Reuben Soup, now doesn’t that sound amazing?

This soup tastes just like the sandwich but it’s warm and satisfying and makes an excellent meal.

Now if you can’t find any pickled corn beef then you can pickle it yourself.

Now of course you don’t have to use a pickled corn beef to enjoy this recipe, however if you decided not to pickle it then I do suggest adding in 1 tsp of cayenne seeds to this soup.

It is mid November here in Canada and this recipe could not come at a better time for me and my partner. Actually it turned out way better than we would have ever imagined.  

Now I don’t know about you, but I do not have all night to be slaving over a stove, so instead I made this whole soup in my pressure cooker.

First I simmered the chopped onion in some butter on the browning setting, then the minced garlic.

Then simply added some flour, beef stock and the remaining ingredients into the pot. Minus the sour cream and swiss cheese and set it to cook for a good while in the pressure cooker.

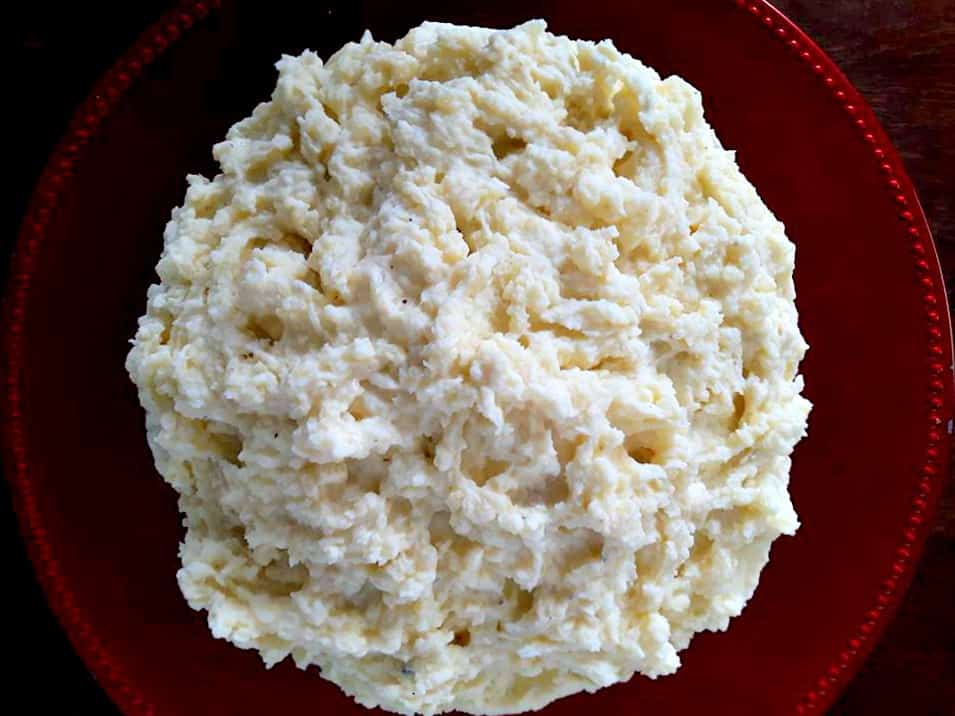
Once it was cooked, I shredded the brisket in my “food processor to get the meat to be very thin as you see above.

I definitely would not skip that step as it really helps to make this soup come together.

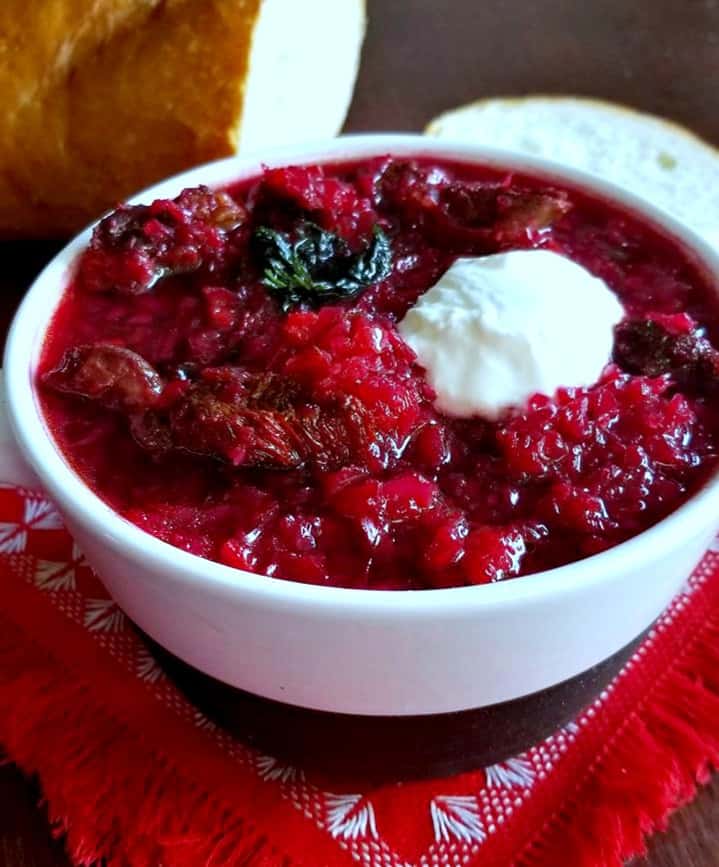
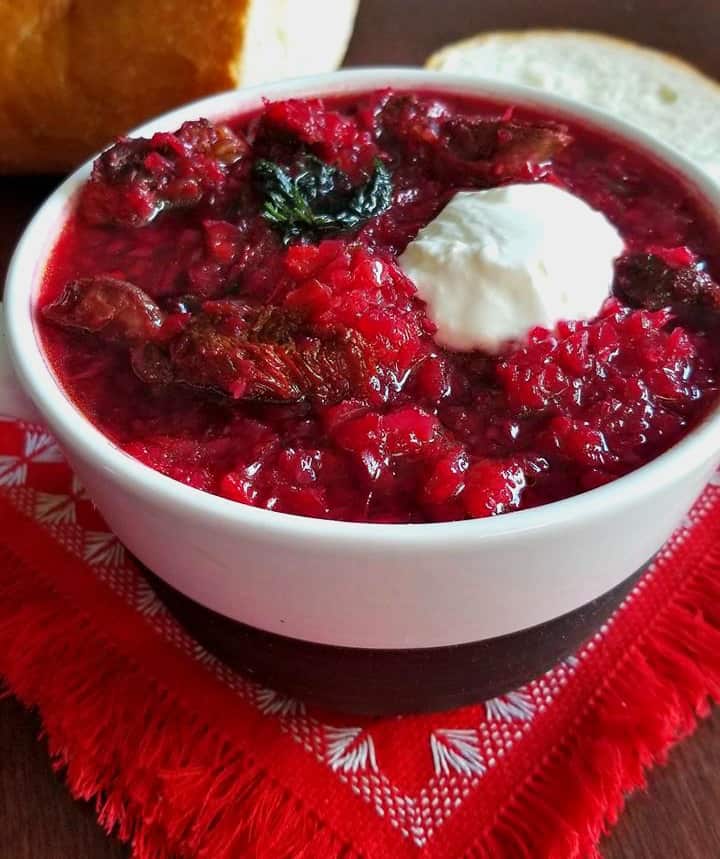
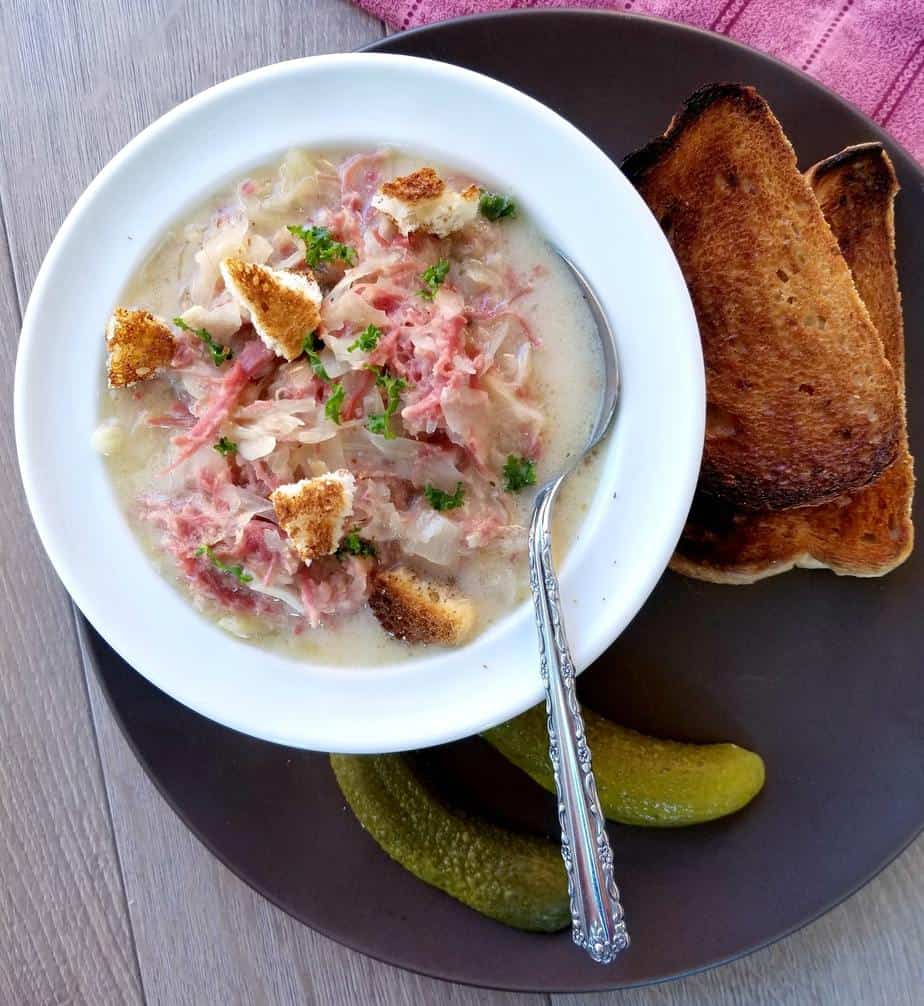
Once the brisket has been shredded you will simply add it back to the pot along with the swiss cheese and sour cream to simmer for another 5 minutes before serving. Serve alongside some toasted “Rye Bread” enjoy! 

We love this soup so much so, that we have made it a couple more times in the past month!

Notes: Feel free to freeze this soup it works great as leftovers too. 

I am so thrilled you are reading one of my recipes, I appreciate every single one of you! Thank you very much for reading and until next time see ya in the kitchen. Don’t want to miss a recipe? Sign up for our NEWSLETTER delivered right to your inbox!

Mac and Cheese Tortellini

This Creamy Mac and Cheese Tortellini is an excellent recipe for you cheesy pasta lovers out there!

So step up your mac and cheese tonight with this sophisticated dish that can easily be served for dinner. Feel free to also add in some vegetables, I will provide some suggestion below. 

Do you ever just have a craving for some “Good Old Fashioned Macaroni and Cheese”? 

But not that stuff you get from the box, more like the kind before the box stuff was ever invented. 

Well then you came to the right place, this recipe is creamy delicious and satisfying.

I like to use a 3 cheese tortellini for this recipe.

Feel free to use whatever kind you prefer, but the more cheese the better right?

Your going to love it, just be sure to get your hands on the freshest possible kind of Tortellini ou there.

The fresher it is the better the dish will be.

So whenever that craving hits for some real Macaroni and Cheese, I hope you think of this recipe! 

 Creamy and satisfying! 

The ultimate comfort food ready to enjoy!

This sure beats regular mac and cheese if you ask me.

Wanting to feed more people?

Simply double up the recipe!

Wanting to add in some vegetables? Below is a list of some vegetables that will go great in this dish!

  • Broccoli
  • Asparagus
  • Tomatoes
  • Peas

I am so thrilled you are reading one of my recipes, if you made this recipe i’d love to hear about it! Thank you very much for reading and until next time see ya in the kitchen. Don’t want to miss a recipe? Sign up for our NEWSLETTER delivered right to your inbox every Month!

WANTING ANOTHER AWESOME MAC AND CHEESE RECIPE? Try Asparagus Mac and Cheese

Or my Farmers Sausage Mac and Cheese

Chicken Chickpea Curry

This One Pot Chicken Chickpea Curry has a wonderful depth of flavor that you’re sure to love. 

HOW TO MAKE CHICKEN CHICKPEA CURRY

  • This popular dish is made with boneless chicken breast and simmered in a rich tomato spiced cream sauce that you’re sure to love. 
  • You can prepare this dish all in one pot on the stove or in your slow cooker/pressure cooker.
  • I like to prepare this in my slow cooker on the browning setting, just make sure you are using that lid otherwise you will have a mess for sure.
  • Find cooking instruction below in the recipe card. 

I have experimented with plenty of curries for some time now, so you can trust me when I say this recipe is a sure winner.

Now you will want to go down the ethnic food aisle in your local grocery to pick up some “Madras Curry” which is the right kind of curry powder for this recipe.

Then you will add just a few more traditional Indian spices that will make this dish absolutely amazing.

Also if your not to familiar with dried fenugreek leaves, then I encourage you taking a stroll down your groceries ethnic for those as well.

They are sure to have it there somewhere, however if you cannot find them feel free to use cilantro or parsley instead.

Who said it takes a chef to make real Indian curry? Obviously never was in your kitchen.

Feel free to omit the chickpeas if your not a fan, however I love them and find they work so well in this recipe.

Not to mention add more fiber and helps to spread the meal out so you can have leftovers the next day.

If you prefer a much more spicier curry, I definitely recommend that you use fresh tomatoes versus canned. The canned tomatoes do give it a hint of sweetness that I find contrast well with the spices.

However this is your curry, so do as you please.

Cooking methods:

  • Simmer on a low-medium heat for 1 hour on the stovetop
  • Cook in the pressure cooker around 10 minutes or depending on your instructions
  • Cook in the slow cooker from 8-10 hours.

If you like curry dishes as much as me then you are going to love this simple recipe. Be sure to make some basmati rice to serve alongside or if you really want to make it extra special go ahead and make some homemade Naan Bread.

Like this dish, try my “Chicken & Spinach Curry“ it is delicious!! 

If your a CURRY lover like me… Then you will also want to try these dishes below too!

I am so thrilled you are reading one of my recipes, I appreciate every single one of you! Thank you very much for reading and until next time see ya in the kitchen. Don’t want to miss a recipe? Sign up for our NEWSLETTER delivered right to your inbox!


Key Lime Cheesecake – No Bake

Today I’m sharing with you this amazing recipe for a Key Lime CheesecakeEverybody loves cheesecake so it’s always a dessert winner if you ask me. 

I usually add whip cream to the top of this cheesecake as well. 

However the holidays are right around the corner and I thought why not make it festive by adding some Pistachios crumbled on top instead.

Doesn’t it look so fancy? 

WHAT DOES KEY LIKE CHEESECAKE TASTE LIKE

Just like the key lime pie only in a cheesecake.

So if you love cheesecake and love key lime pie you are sure to love this recipe which combines both cakes into one amazing cake.

IS KEY LIME CHEESECAKE GOOD

Yes it is one of my favorite cheesecakes ever! Then next to this cake, would be my other favorite cheesecake which is also on this blog.

Try it if you can, Cherry Cheesecake! 

The first time I tried Key Lime pie was at one of our local restaurants a few years back, my first thought was how come I have not tried this sooner.

Maybe it’s because I live in Canada where it’s more cold than warm.

But really that is not any kind of good excuse, I was immediately a hooked the first time I tried it.

So much so that I make it quite often now and even have a great recipe for the pie on this blog too, so go check it out!

CAN KEY LIME CHEESECAKE BE FROZEN

YES, you can freeze any type of cheesecake. Just be sure to wrap it tightly with aluminum foil or freezer wrap. 

I just love no bake cheesecakes!!

If you have not tried one before, then I encourage you to give it a go.

This is a no bake cheesecake, has a graham cracker crust, and is filled with cream cheese, condensed milk, vanilla extract and a little sour cream, oh and the juice from 10 limes, can’t forget the most important part.

I used a 8 inch cheesecake pan, this is the size I like most because it gives you a more taller and thicker cheesecake which can serve 12 people.

There really isn’t much to this recipe, just follow the basic steps below and you will have the most amazing Key Lime and pistachio cheesecake ever.

The awesome part about this cake is that you won’t have to spend all day in the kitchen baking, it really takes less than an hour to prepare.

Then the rest of the time is spend in your freezer, setting.

Also make sure you defrost the cheesecake for anywhere from 20 – 30 minutes on the counter prior to slicing and serving. 

This way you will have a creamy cheesecake, he really likes it creamy.

HOW TO MAKE A KEY LIME CHEESECAKE

  • You will want to start by either making the crust from scratch or buying a pre-made one. I highly recommend doing it from scratch though as it is not only simple to do but tastes way better. 
  • Then you will want to make the filling  – (see recipe below for those institutions)
  • The then topping – (see recipe below for those institutions)
  • Once it’s on the serving tray, sprinkle around the outer edge with the crushed pistachios.
  • Set cheesecake on the counter for another 20 minutes and then slice and serve. Enjoy!

During the defrosting time you can start to decorate it with the lime zest and pistachios.

Simply leave the cheesecake in the cheesecake pan on the countertop, and zest one lime overtop, release the cheesecake half way through defrosting and be sure to keep the metal bottom on in tack.

This ensures the cake stays together during serving, simply sparkle your crumbled pistachios over the out part of the cake prior to serving.

I think this cheesecake could be a staple at any holiday event, because I have yet to find someone who doesn’t love the fresh taste of key lime in their dessert.

Don’t forget the limes and zest!

Sprinkle the crushed Pistachios around the cheesecake rim like this, add as much as you want. 

Soley remove it from the cheesecake pan, keeping the metal bottom on for serving to help keep it intact.

That’s all folks, what a fresh and creamy cheesecake, enjoy!

Notes: You can skip the pistachio topping and add whip cream if desired. This cheesecake typically will make 12 slices, ruffly this thin. If you want thicker this will easily serve 8.

If you love Key Lime flavors, then be sure to try my other key lime inspired recipes!

I am so thrilled you are reading one of my recipes, if you made this recipe i’d love to hear about it! Thank you very much for reading and until next time see ya in the kitchen. Don’t want to miss a recipe? Sign up for our NEWSLETTER delivered right to your inbox!

Mexican Pulled Chicken

This Mexican Pulled Chicken is slow-cooked in Mexican green chili sauce and jalapenos, this melt-in-your-mouth smoky chicken is the perfect comfort zone. Pair it with fresh pico de gallo and rice and you’re in for a dinnertime treat!

And is little on the spicy side.

So if you are paring this with homemade pico de gallo (salsa fresca).

I would advise to omit the jalapenos in the salsa since the chicken has enough heat it it already.

But do not worry, it’s not too hot due to the addition of the chile adobo which give it a sweet smoky flavor as well.

Pair this dish with some full fat sour cream and you will have a more mellowed out dish. So if you like Mexican food just as much as me, then I’m more than certain this will become one of your new favorites.

Personally I can handle the extra heat, that is why I made my pico de gallo with jalapenos in it.

As you may know I really love spicy food, however my partner leans more towards sweet stuff and said he would prefer the pico de gallo to have no jalapenos in for this pairing.

This recipe is super easy to make, and packed with full of flavor so follow along.

All we are doing here is simply placing our chicken breasts into the slow cooker, along with 1/2 cup of mexican green chili sauce, a few adobo chilies, some chicken stock and our seasonings.

Then we are allowing it to simmer on medium to low heat all day, only to return to shred the chicken with two forks.

Then placing back into the pot to simmer/brown for a few minutes to allow the sauce to thicken up some. This dish is so tasty and is my new favorite way to eat pulled chicken.

Serve over a bed of jasmine rice, along with homemade pico de gallo and you will be in flavor heaven.

The nice thing about mexican food is that you can make a lot of it in a short period, and you can store any leftovers in the fridge for up to 3 days. I hope you enjoy, ARRIBA MEXICO!

Looking for an awesome recipe for Mexican Salsa? Check out my recipe for Pico De Gallo this goes great with this pulled chicken.

Notes: Squeeze some fresh lemon juice overtop for a pop of extra flavor.

I am so thrilled you are reading one of my recipes, if you made this recipe i’d love to hear about it! Thank you very much for reading and until next time see ya in the kitchen. Don’t want to miss a recipe? Sign up for our NEWSLETTER delivered right to your inbox!

Spicy Tuscan Chicken

These Chicken Breasts are smothered in a creamy, parmesan sauce and served over a bed of egg noodles. This is definitely my favorite way to make Tuscan Chicken. 

If you have ever been to the Olive Garden, this recipe is definitely a fan favorite. However mine cuts the fat in half by adding 1 cup of half n half cream, not two.

So instead of adding another cup of cream we are adding 2% milk and then some sour cream too. Plus I find doing so makes this dish taste all that much more creamier.

And who doesn’t like creamer meals with less calories than the original?

Also we are spicing it up a little by adding in some red chili flakes that really kick this recipe up a notch. And if you ask me it tastes way better than in the restaurant.

This recipe can serve a large family in a short period of time and also does well as leftovers or packaged into meal prep bowls for the weeks lunches ahead. Creamy, and oh so satisfying this is sure to hit the spot if your craving something fancy for dinner tonight.

I like to serve this dish over a bed of large egg noodles, they just go so well with the sauce. Of course you can add just about any type of pasta, so I will leave that up to you.

Just make sure to cook the pasta separately then add the dish on top once everything is cooked. This dish is very satisfying, both as a lunch dish or to serve as main meal. You can prepare this dish with turkey also, however it really tastes that much better with chicken.

Once the chicken has browned and cooked throughout on both sides, remove it and set aside for later. Then in the same frying pan add the crushed garlic and diced sun-dried tomatoes, slimming till fragrant.

Then pour one cup of half and half cream, along with 1 cup of %2 milk, 4 tbsp of sour cream and 3/4 cup of parmesan cheese and stir to combine.

Add in the spinach and simmer till the spinach has wilted then add back in the cooked chicken breasts and simmer on medium low for 5 minutes.

Turn off the heat and allow the sauce to thicken up some before serving over a bed of pasta. If you end up giving this a give it a try, I would love to know how you liked it. Bon Appetit!

Creamy, tasty and great served the next day as leftovers! This recipe was inspired by Alyssa over at The Recipe Critic

Notes: You can always substitute whole milk or use just 2% in replace of the cream if desired.


MEAL PREP IDEA: Make enough to create a few meal preps bowls for the week ahead.


I am so thrilled you are reading one of my recipes, if you made this recipe i’d love to hear about it! Thank you very much for reading and until next time see ya in the kitchen. Don’t want to miss a recipe? Sign up for our NEWSLETTER delivered right to your inbox every Month!

Beef Borscht

This Homemade Beef Borscht is simmered in a healthy beef bone broth and is packed full of flavor. 

HOW TO MAKE BORSCHT SOUP

Borscht can be made several different ways, so it all comes down to personal preferences. But one thing is for certain, you want to use beets. Fresh is always best, however pre frozen can work too. 

Example: Borscht Soup can be made vegetarian or not. Also it can have cabbage, red beans and potatoes in it or not.

  • Can be made VEGETARIAN, and the cabbage and beets can be shredded as with my original recipes > Ukrainian Borscht
  • Can also be made with sausage, chopped potatoes and kidney beans, see that recipe here >
  • Can be made with LARGE sliced Beets, see that recipe here > Creamy Beet Soup

And of course with it can be made with beef. As you will discover in this recipe here!! 

Feel free to make a bone broth as the base for this soup, or simply use some pre made beef stock. 

Typical bone broths take hours to prepare, however with this recipe we are skipping that and doing the long stovetop simmering part in the pressure cooker. So a quick version of bone broth!

Unless you would prefer to simmer the stock on the stovetop for 4 hours, which is another option. With the pressure cooker you can have the stock done in under 15 minutes, so i’ll leave the first and important step up to you.

Or you can be real lazy here and use a good quality pre made beef stock. This all depends on the time you have and what you prefer for your homemade borscht. 

To make this soup that faster way, you will want to have a pressure cooker and at the very minimum a food processor, which will saves you a ton of time.

Otherwise you can use a grater to get the job done as well, but be prepared to put some extra work into it.

I much prefer using the food processor as I’m able to shred most of my vegetables up very finely as opposed to chunky. After all this is a soup not a stew, right? If your looking for a more chunkier borscht soup, you can have that as well. 

After all it is all about preference.

With the beef if your using “stewing beef”, simply cut it up small enough to fit in a spoon. Sunflower oil is traditionally used also, so if you have some on hand I recommend using it.

Serve alongside some crusty bread and  a dollop of sour cream and some dill and you will be in borscht heaven!

BORSCHT HOW TO SERVE

Serve alongside some crusty bread and  a dollop of sour cream if  desired! Fresh dill also goes very well in the soup or on top of each bowl served. 

WHO INVENTED BORSCHT 

Some people think Borscht soup originated in Russia, however it’s actually from the Ukraine. When searching the web and cook books, you will find there are several ways to make borscht.

Did you know that consuming bone broth is actually good for you? Yes it’s true, bone broth has many healthy benefits such as join protection, gut health, skin, immune support and even helps to detoxifies you.

Traditionally borscht is made with beef stock and chunks of beef, and to get that bone broth beef shanks are simmered in water for most of the day. Which becomes the base for the soup, if you just want to use pre-made beef stock instead you can do that also if you like.

But don’t skip on the beef chunks/stewing beef, this is what makes the borscht beef broth after all. The bright red beets and bone broth carry so many health benefits, it’s no wonder I feel so great after eating this soup for a couple of days.

This recipe will make a large pot of soup, so if you have any any leftovers “which is highly unlikely” unless it’s just you. Then you can enjoy it over the next few days or freeze it as a meal prep option for another time if desired.

Plus the flavours in this soup develop and improve overnight, so don’t be afraid to make this large batch. There are plenty of ways to preparing borscht soup, and this is my favorite way to make the beef version.

Why? Well because one it’s simpler and two it takes less time to prepare that typical stove top borscht.

Notes: Keep in mind, as with all my recipes. If you want to make more or less of this soup, simple adjust the serving size in the ingredients section above and the servings will automatically adjust for you. And save yourself time and hassle, and let your food processor chop up your beets and cabbage up, also it gives a great consistency to the soup.

Looking for a Vegetarian Borscht recipe? Check out my other recipe here for Ukrainian Borscht

Create 4 or 5 meal preps for the week with the remaining soup 


I am so thrilled you are reading one of my recipes, if you made this recipe i’d love to hear about it! Thank you very much for reading and until next time see ya in the kitchen. Don’t want to miss a recipe? Sign up for our NEWSLETTER delivered right to your inbox every Month

Mountain High Mash Potatoes

These Mountain High Mash Potatoes are so creamy and full of flavor a perfect side dish to your holiday meal. If you have been searching for the creamiest and tastiest mashed potato recipe for the everyday or for the upcoming holidays, then you have found it. 

But there are a few tricks to getting your potatoes so creamy, and step one is using the right tool for the job. Back in the day we used potato mashers, but those always left clumps in the potatoes and today they’re becoming less and less popular since people are learning that with a potato ricer you can have the creamiest mashed potatoes ever without the clumps.

Below you will find a link under my kitchen essentials where you can find an excellent potato ricer,  trust me it’s a kitchen tool you will come to love. If you do not mind a few lumps in your mashed potatoes then a regular masher will do a great job as well.

You can cook these potatoes in the slow cooker or if you like on the stove top, completely up to you. Just keep in mind that the stovetop method cooks them much quicker and is my prefered method.

There are a few ways I like to make mash potatoes, and I will share them all with you on this blog soon. But for now I’m sharing one of my favorites ways to make them, it’s a pretty basic way and one of the most healthiest I would say without sacrificing the flavor.

And that is because we are using sour cream and cream cheese instead of the traditional heavy cream.  Which gives the potatoes a slightly different taste that I like allot. This recipe here is great for serving 6-8 people, if you have more or less to feed just use the recipe server below and the recipe will auto populate the ingredients so you don’t have too.

I hope you give it a go and if you are making these for the upcoming holidays, felsis feliz navidad to you and yours.


Note: These can be done in your slow cooker as well, just follow steps 1-2 and place them in the slow cooker anywhere from 4-6 hours then follow steps 4-5 and you’re done. Don’t skimp on the salt it really helps to bring the flavors all together.


I am so thrilled you are reading one of my recipes, if you made this recipe id love to hear about it! You can post a review/picture below or via Instagram and let me know how it turned out. And by doing so you will be automatically entered into our seasonal CONTEST to win one of our great prizes. Winner will be notified via email within a week after the contest closes. Thank you very much for reading and until next time see ya in the kitchen. Don’t want to miss a recipe? Sign up for our NEWSLETTER delivered right to your inbox!