Mini Egg Chocolate Cheesecake Cups

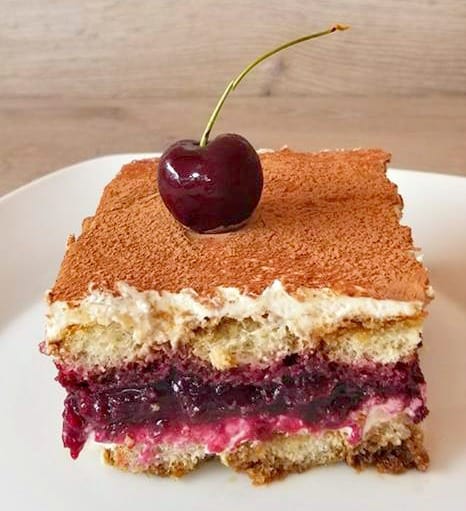
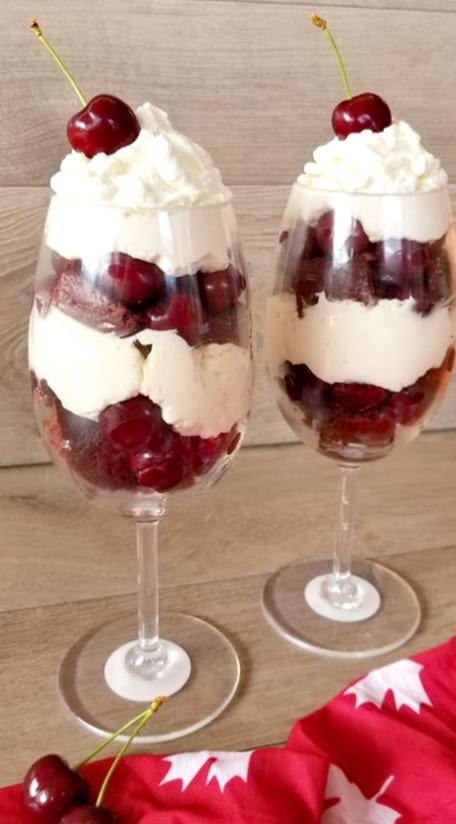
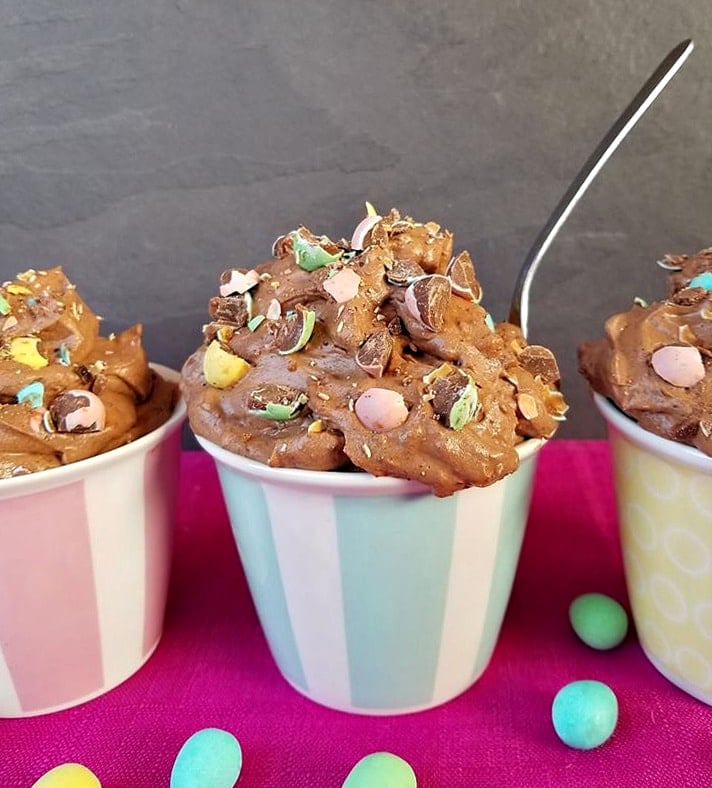
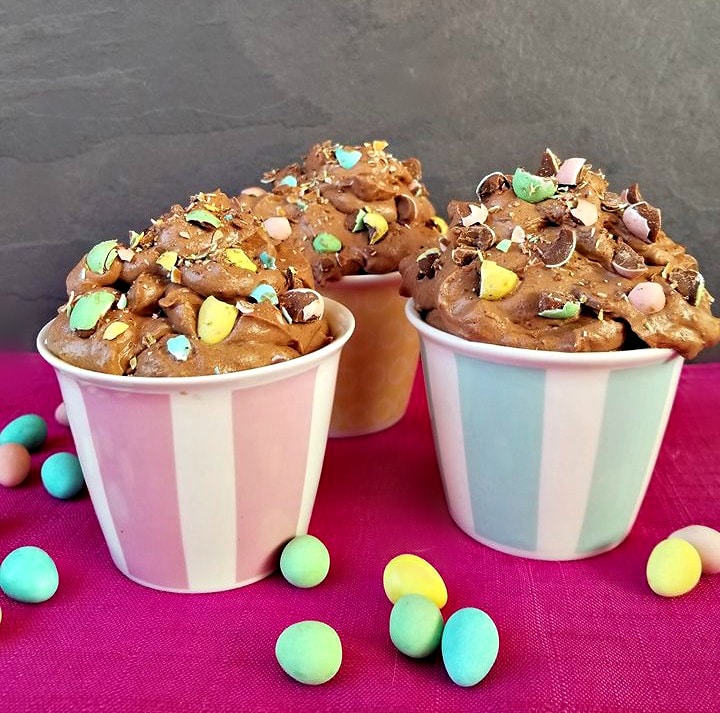
These (no bake) Mini Egg Chocolate Cheesecake Cups are sure to bring some smiles to your table this Easter season! 

Spring is officially here and that means Easter is right around the corner.

I wanted to come up with a fun and cute recipe that the whole family would enjoy! 

I think I hit the nail on the head with this one, don’t you?

PHILADELPHIA MINI EGG CHEESCAKE RECIPE

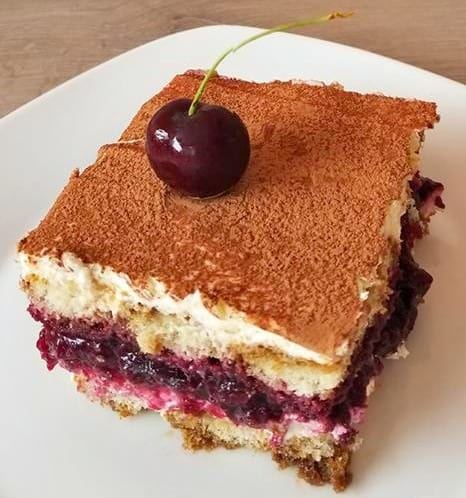
What I REALLY like about these Cheesecake cups is that their not heavy at all.

And that’s because of the whip cream addition that makes them almost like a chocolate cheesecake mousse! YES, A Chocolate Cheesecake Mousse!

My partner who lives, I mean loves cheesecake. Has already given it a 10 out of 10 and then asked is there more? 

Lucky for him, I am going to be making these again for Easter as I will be serving them to our guests. 

I had such a good time making these, I bet the kids would have a blast making them too!

Absolutely delicious and Festive!

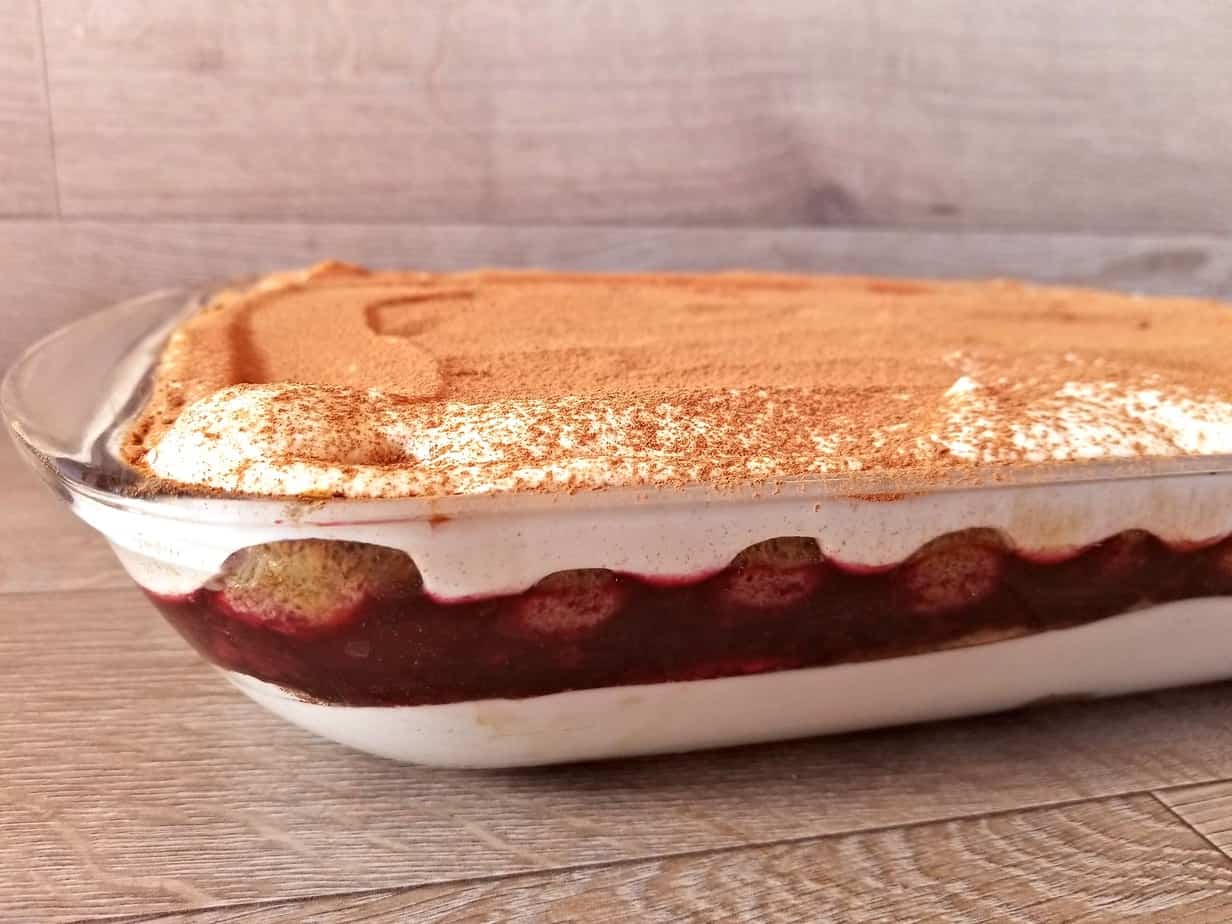
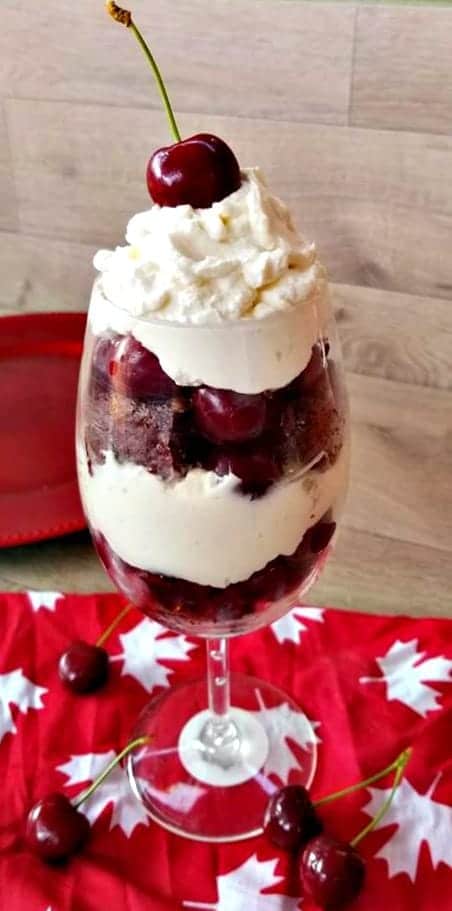
This recipe here will serve three to four people in “large cups” such as you see in these pictures. However if you want to have smaller portions, you could easily serve 6 people.

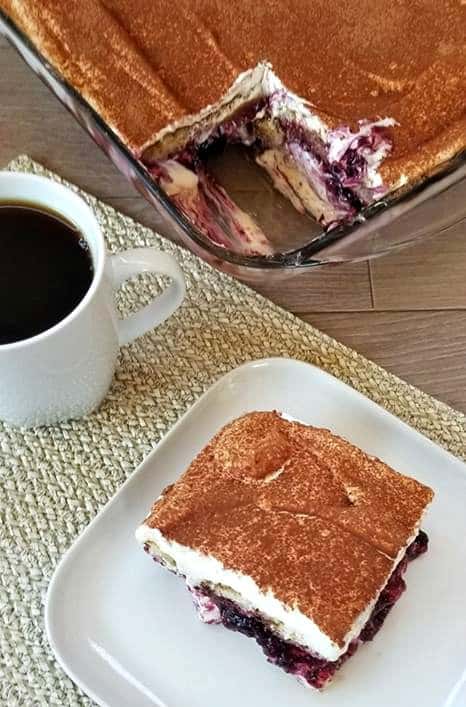
Also, since this is a no bake cheesecake recipe it can all be ready in less than 30 minutes!

And like any of my recipes, you can adjust the ingredient ratio in the ingredient section and serve more people or less people if desired. 

Now let me ask you a serious question, do you know anyone that doesn’t like cheesecake? Well I don’t. 

So trust me when I say that these cheesecake cups are sure to put a smile on everyone’s face this Easter Season.

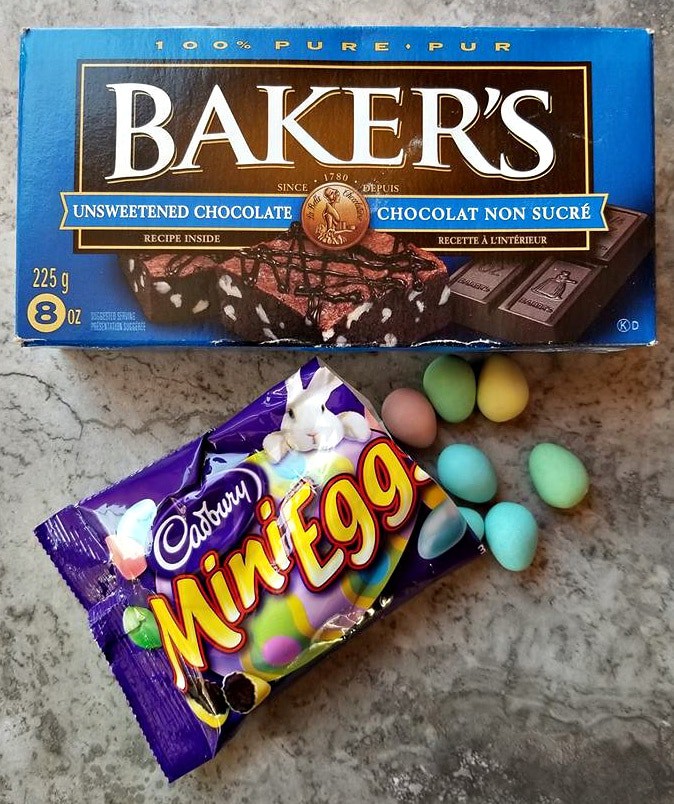
You may have been thinking, aren’t Cadbury eggs Canadian?

Because I sure did, but after some research I learned their actually a milk chocolate created and produced by Cadbury UK. And are now also produced in Canada, so I decided to place this recipe under my England cuisines category. I hope that is okay with my Canadian readers!

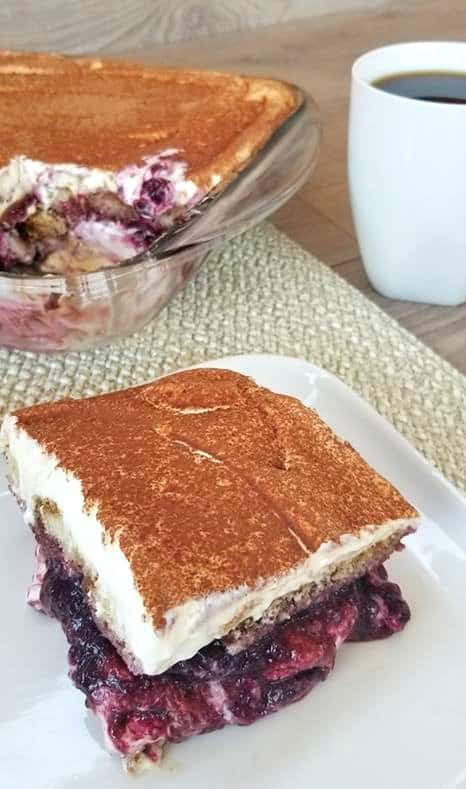
These cups are so good that people may just ask for seconds or thirds. So if you are serving more than a few, I would definitely double up the recipe.

As they are best served a bit chilled and can be stored in the fridge for up to 24 hours before serving if need be. 

Your going to be shocked at how easy and tasty this recipe is. People are sure to be asking how you made it? But let’s leave that little secret to us kitchen warriors.

Wishing you a Delicious Easter!

DID YOU MAKE THIS RECIPE?

If you make this recipe, I would love to hear about it! You can leave a 5 star review in the comments below! Thank you very much for reading and until next time see ya in the kitchen. Don’t want to miss a recipe? Sign up for our NEWSLETTER delivered right to your inbox!

Cherry Tiramisu

This Super delicious and decadent Cherry Tiramisu is a cross between Black Forest Cake and Tiramisu! And is super simple to make, I kid you not!

It is said the origin of tiramisu goes back to the 1960s in the region of Veneto, Italy.  Tiramisu has several meanings such as “pick me up”, “cheer me up” or “lift me up”.

And is coffee-flavoured Italian dessert.

That is made with espresso or strong roast coffee and mascarpone cheese, and cocoa among a few other key ingredients.

My recipe here uses espresso, vanilla extract, mascarpone cheese, cocoa and whipped cream vs raw eggs.

Be ready to have your socks knocked off with this one 🙂

Just be sure to follow the directions I have listed below and you will be on your way to Tiramisu heaven! 

You may be thinking, can it really be made without the eggs?

Doesn’t traditional Tiramisu have raw eggs in it? And my answer to that is “Yes” and “No”.

Some traditional Tiramisu recipes that hail from Italy will ask you to put raw egg whites in the Tiramisu.

However not all Italians do that, just look at Laura Vitale recipe which this recipe was inspired by.

She is Italian and does not agree with putting raw eggs in her recipe either.

The reason some do that is one because it’s tradition and two it also creates a light and fluffiness to the cake.

With mine, we are substituting those raw eggs for fresh whipped cream which helps to maintain that light fluffy texture. And is much better if you ask me! 

See this whole sheet cake above? Between me Jason and my girlfriend had it polished off in two days.

It is that good guys!! The whole darn thing was gone in less than 48 hours 🙁 and I was so sad.

Also if you have kids in the house or don’t drink alcohol you can omit the rum.

You can make the Tiramisu more on the sweet side like most cakes or follow the traditional Tiramisu style that has more of a liquor espresso taste, which I must prefer.

Plus the cherries have enough sugar in them already so adding heapings of extra sugar is not necessary.

I used fresh sweet cherries for this filling and cooked them down with a little cornstarch and water.

You can use fresh or frozen cherries just make sure there the sweet ones otherwise you will want to add some sugar as well.

And if you want to skip the stovetop cooking method, by using a cherry pie filling instead. Just keep in mind most of those are filled with sugar so your Tiramisu will be allot sweeter than mine. If prepare it from scratch it tastes much better if you ask em.

Tiramisu has always tasted best the next day, so if you cannot wait the 24 hours. Allow it to sit in the fridge for at least 6 prior to serving.

Also feel free to replace the cherries with raspberries if you’d like, they go really well with the Tiramisu flavors as well.


I am so thrilled you are reading one of my recipes, I appreciate every single one of you! Thank you very much for reading and until next time see ya in the kitchen. Don’t want to miss a recipe? Sign up for our NEWSLETTER delivered right to your inbox!


Red Velvet Parfaits

Hello friends, Canada day is just right around the corner and i’m so excited!! 

This is by far my favorite time of year, people are out and about enjoying the nicer weather and community events are happening everywhere. 

And the biggest celebration of the year besides New Years is about to happen. I wanted to create something special for my guests that are coming over in the next few days.

So I decided to take the typically a red velvet cake to a new level and created four of these decadent red velvet parfaits that highlight the red and white colours of our flag.

These parfaits are just perfect for Canada day, however they can also be made for Valentines day to.  A super simple to make dessert that is sure to impress any guests you may be serving this too. 

To make this you will want to start by washing and putting the cherries.

Once that is done you will want to bake the cake, cool it and cube it.

You can prepare the Whipped Cream Cream Cheese Frosting by whipping the whipped cream to stiff peaks.

Then in another bowl make the cream cheese frosting.

Once those two have been whisked you will fold both the mixtures together which will create the most tasty Whipped Cream Cream Cheese Frosting that will be placed into the parfits.

Fresh lambert cherries, red velvet cake and a decadent whipped cream cheese frosting is what makes these so special.

I used a easy to bake red velvet cake mix where i just added eggs, water and oil. Of course you can make your red velvet from scratch if you have a favorite one in mind.


Key Lime Cheesecake – No Bake

Today I’m sharing with you this amazing recipe for a Key Lime CheesecakeEverybody loves cheesecake so it’s always a dessert winner if you ask me. 

I usually add whip cream to the top of this cheesecake as well. 

However the holidays are right around the corner and I thought why not make it festive by adding some Pistachios crumbled on top instead.

Doesn’t it look so fancy? 

WHAT DOES KEY LIKE CHEESECAKE TASTE LIKE

Just like the key lime pie only in a cheesecake.

So if you love cheesecake and love key lime pie you are sure to love this recipe which combines both cakes into one amazing cake.

IS KEY LIME CHEESECAKE GOOD

Yes it is one of my favorite cheesecakes ever! Then next to this cake, would be my other favorite cheesecake which is also on this blog.

Try it if you can, Cherry Cheesecake! 

The first time I tried Key Lime pie was at one of our local restaurants a few years back, my first thought was how come I have not tried this sooner.

Maybe it’s because I live in Canada where it’s more cold than warm.

But really that is not any kind of good excuse, I was immediately a hooked the first time I tried it.

So much so that I make it quite often now and even have a great recipe for the pie on this blog too, so go check it out!

CAN KEY LIME CHEESECAKE BE FROZEN

YES, you can freeze any type of cheesecake. Just be sure to wrap it tightly with aluminum foil or freezer wrap. 

I just love no bake cheesecakes!!

If you have not tried one before, then I encourage you to give it a go.

This is a no bake cheesecake, has a graham cracker crust, and is filled with cream cheese, condensed milk, vanilla extract and a little sour cream, oh and the juice from 10 limes, can’t forget the most important part.

I used a 8 inch cheesecake pan, this is the size I like most because it gives you a more taller and thicker cheesecake which can serve 12 people.

There really isn’t much to this recipe, just follow the basic steps below and you will have the most amazing Key Lime and pistachio cheesecake ever.

The awesome part about this cake is that you won’t have to spend all day in the kitchen baking, it really takes less than an hour to prepare.

Then the rest of the time is spend in your freezer, setting.

Also make sure you defrost the cheesecake for anywhere from 20 – 30 minutes on the counter prior to slicing and serving. 

This way you will have a creamy cheesecake, he really likes it creamy.

HOW TO MAKE A KEY LIME CHEESECAKE

  • You will want to start by either making the crust from scratch or buying a pre-made one. I highly recommend doing it from scratch though as it is not only simple to do but tastes way better. 
  • Then you will want to make the filling  – (see recipe below for those institutions)
  • The then topping – (see recipe below for those institutions)
  • Once it’s on the serving tray, sprinkle around the outer edge with the crushed pistachios.
  • Set cheesecake on the counter for another 20 minutes and then slice and serve. Enjoy!

During the defrosting time you can start to decorate it with the lime zest and pistachios.

Simply leave the cheesecake in the cheesecake pan on the countertop, and zest one lime overtop, release the cheesecake half way through defrosting and be sure to keep the metal bottom on in tack.

This ensures the cake stays together during serving, simply sparkle your crumbled pistachios over the out part of the cake prior to serving.

I think this cheesecake could be a staple at any holiday event, because I have yet to find someone who doesn’t love the fresh taste of key lime in their dessert.

Don’t forget the limes and zest!

Sprinkle the crushed Pistachios around the cheesecake rim like this, add as much as you want. 

Soley remove it from the cheesecake pan, keeping the metal bottom on for serving to help keep it intact.

That’s all folks, what a fresh and creamy cheesecake, enjoy!

Notes: You can skip the pistachio topping and add whip cream if desired. This cheesecake typically will make 12 slices, ruffly this thin. If you want thicker this will easily serve 8.

If you love Key Lime flavors, then be sure to try my other key lime inspired recipes!

I am so thrilled you are reading one of my recipes, if you made this recipe i’d love to hear about it! Thank you very much for reading and until next time see ya in the kitchen. Don’t want to miss a recipe? Sign up for our NEWSLETTER delivered right to your inbox!

Northern Lights Ice Cream

The Great White North has some of the most spectacular Northern light displays also known as the aurora borealis. 

Which can seen been across many parts of the Northern Canadian provinces during the colder months of the year.

These lights come out to light up the sky with the most beautiful neon bright colors at night that make my heart sore with joy.

So if you’re in Canada and thinking hey, why haven’t I seen the Northern lights yet? Well maybe it’s because you didn’t know when or where they would be on display. Some people travel far to view this natural phenomenon.

While others track them and go view them right in there very own backyards. So we are now into the cold month of February here in Canada, and I thought it was only appropriate to make this ice-cream in honor of them. 

Actually this ice-cream has been something that has been on my mind for sometime, but I only found it appropriate to make it now. So how does it tastes? 

Well even though there is an array of colors in this ice cream, it actually just tastes like Vanilla.

So if your wanting a hint of some other flavor, I recommend adding some “mint food flavouring” to the green ice cream mixture which will add a nice cooling element than will remind you of the cool lights up north.

There are plenty of legends told by many peoples past and present of what these light may be. Some say they are representations of the dead playing a game with a walrus skull as the “ball.” While others believe their dancing spirits of children who had passed.

The Northern Lights were considered sacred by many native tribes. The Inuit and northern Algonquian tribes believed that the spirits of the dead could be seen in the Northern Lights and that some were spirits of the animals.

While the Icelandic people associated the lights with childbirth and held that they would relieve the pain of delivery as long as the expectant mum didn’t look at the Aurora whilst giving birth, because the child would be born cross-eyed!

And in Greenland the lights were also linked to giving birth but rather sadly they were judged to be the souls of stillborn babies or even babies killed at birth.

And in Finland many people believed the lights were caused by the firefox who ran so quickly across the snow that his tail caused sparks to fly into the night sky creating the Aurora.

Either way, I think we can all agree there is something magical going on when these lights appear in the nights sky. Making this Ice Cream is easy too, all we are doing here is whipping some heavy cream with a hand held mixture, adding a can of condensed milk and some vanilla extract to make the coolest ice cream ever!

I have always been fascinated and memorized by the northern lights, and have sought them out on numerous occasions and have been lucky to see them a few times.

Each time being just as magical as the last however not all Canadians have seen these lights. And that’s because there hardly visible within the cities limits, and are more common in some areas than others. So you must find the right spot to view them, and the darker the better.

Have you ever seen the Northern Lights? And if so where? I would love to hear about your  experiences in the comments below.

Wanting to track the Northern Lights? This resource from Service Aurora is one of my favorite places to do that.

Source: The Aurora Zone

Video to makeThe Northern Lights Ice Cream

Notes: If you want your colors as vibrant as mine, you are going to want to mix some of the colors together. Each package of food coloring produces mixing color instructions, or go here to learn how to: Wilton.com

I am so thrilled you are reading one of my recipes, if you made this recipe i’d love to hear about it! You can post a review, picture below or via Instagram and let me know how it turned out. Thank you very much for reading and until next time see ya in the kitchen. Don’t want to miss a recipe? Sign up for our NEWSLETTER delivered right to your inbox every Month!

Red Velvet Ice Cream

Are you as BIG of a Red Velvet Fan as me? Well then, you’re in for treat! I’m finally ready to share my family’s favorite recipe for Red Velvet ICE CREAM!! 

You cannot find this in stores guys, it only can be made in your kitchen. And your going to want to keep it under wraps, because it will be gone in no time.

Anyone who has ever tasted this ice cream has gone nuts. And rightfully so, it’s the BEST Red Velvet ice cream out there. And I’m so proud to say that I have come up with it. 

Because ice cream machines vary between 1 and 2 quarts capacity, I have create this recipe for my 2 quart machine. If your wanting only 1 quart of ice cream, just simply DIVIDE the recipe in half or use a 1 quart machine. 

The machine I used is listed below in my amazon picks, it’s the best. If you end up giving it a try I would love to know what you think, let me know in the comments below. 

If you’re having a gathering and would like to serve this to your guests, then why not bake an extra “Red Velvet Cake”. Serve each guest with one slice of cake and one scoop of ice cream. Makes about fourteen ½-cup servings.

I am so thrilled you are reading one of my recipes, if you made this recipe i’d love to hear about it! You can post a review/picture below or via Instagram and let me know how it turned out. Don’t want to miss a recipe? Sign up for our NEWSLETTER delivered right to your inbox!


Cherry Frozen Yogurt

I was never a huge fan of store bought cherry frozen yogurt, which came as a surprise to me because I love cherries. 

Truth is I was never a fan of store bought frozen yogurt, they just tasted fake to me.

So when I started experimenting with homemade frozen desserts, I was pleasantly surprised at how good they actually where. 

I’ve been making this particular yogurt for the past few years, it tastes fresh and I like the fact that I know everything that is going into it.

So really there is no guilt when it comes to eating as much as a want.

Just be sure to remove it from the freezer 15 minutes before serving, otherwise it will be too hard to scoop.

The corn syrup definitely helps it to not freeze solid so do not skip on that, otherwise you can add vodka instead, but I’ll leave that up to you!

This is not store bought frozen yogurt, but much healthier and tastier I promise you that.

Just be sure to set it outside the freezer 15 minutes prior to serving to ensure easy scooping. If your adding some booze to make it more creamy, be sure not to add more than 3 tablespoons of 40 proof liquor per quart of ice cream base. Makes about fourteen ½-cup servings.


I am so thrilled you are reading one of my recipes, if you made this recipe i’d love to hear about it! Thank you very much for reading and until next time see ya in the kitchen. Don’t want to miss a recipe? Sign up for our NEWSLETTER delivered right to your inbox!


White Chocolate Macadamia Nut Cookies

T’was the night before Christmas, when all through the house, not a creature was stirring, not even a mouse. And that’s because the mice know that these cookies are for Santa and his reindeer. 

WHO INVENTED WHITE CHOCOLATE MACADAMIA NUT COOKIES

White chocolate chips were invented by Nestle in the 30’s, but macadamia nuts weren’t available to the public until 1975. Sometime after that these delicious flavors found each other, and history was made. 

I just love Macadamia Nuts and putting them in cookies is Amazing.

Plus these are Santa’s favorite cookies, so make sure save some for him too.

There are various recipes online that claim to be the best, I have tried a few. I have also tried a few from cookbooks and magazines that I have in my library.  I’ve come up with this recipe that makes the best large chewy cookies that everyone is sure to love.

CAN YOU FREEZE WHITE CHOCOLATE MACADAMIA NUT COOKIES

Yes, once you make the dough you can freeze in into small balls in the fridge for up to 3 months. Covered of course, then simply defrost them and smash them down before baking. 

HOW TO MAKE White Chocolate Macadamia Nut Cookies

The key is the ingredient ratio; along with using butter and shortening in the recipe. So be sure to follow this one to a tea and you will be sure to have the best cookies this time of year.

Christmas is just right around the corner, so I am getting my holiday baking done early this time. That way I have plenty of time to do all the other things that are at hand.

These cookies are simple to make and really go well with a cup of milk, rather rumor has it.

These White Chocolate Macadamia Nut Cookies are one of Santa’s favorite cookies.

So if you leave them by the chimney this Christmas he may leave behind something extra special for the baker.

Wishing you and your’s a wonderful and very merry Christmas.

Super easy to make, you can have these done in under 30 minutes.

Notes: After cookies are completely cooled, place in airtight container or plastic freezer bag.  Keep the dough refrigerated if you are going to be making these in batches.

Don’t forget to leave them by the fireplace with a glass of milk for Santa. 

LOOKING FOR MORE CHRISTMAS DESSERTS?

I am so thrilled you are reading one of my recipes, if you made this, I want to see! Follow Canadian Cooking Adventures Instagram, snap a photo, and tag and hashtag it with @canadiancookingadventures and #canadiancookingadventures

Stay connected and follow along on FacebookPinterest, and Instagram for all of my latest recipes!