Beef Vermicelli

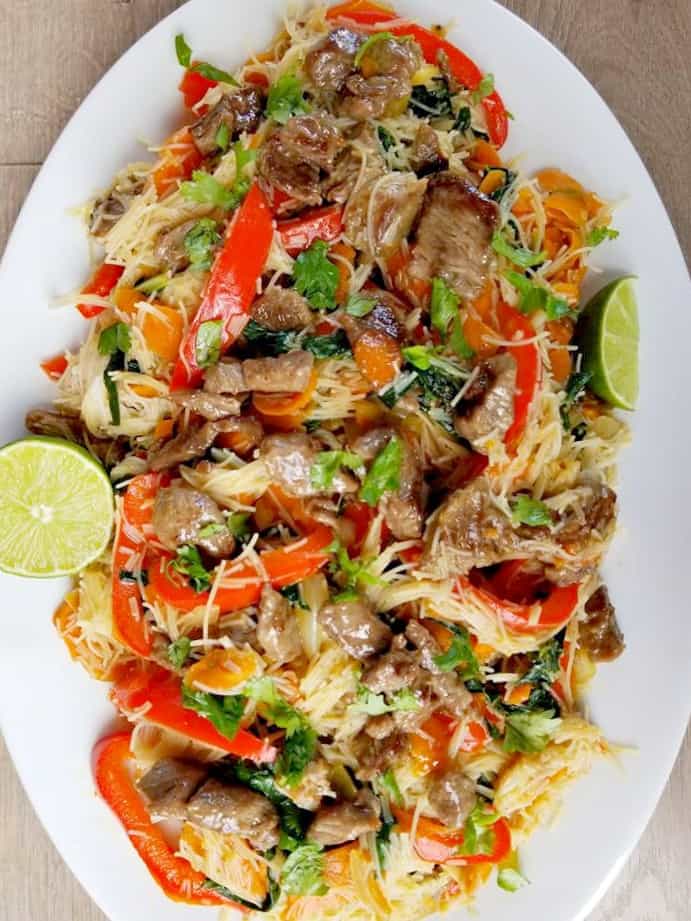
These Beef Vermicelli noodles are super simple to make and are packed full of flavors from Thai food that you have come to expect and love.

Because everyone thinks i’m some kind of highly skilled Asian chef, when really im just following some basic steps to obtain this lovely dish. 

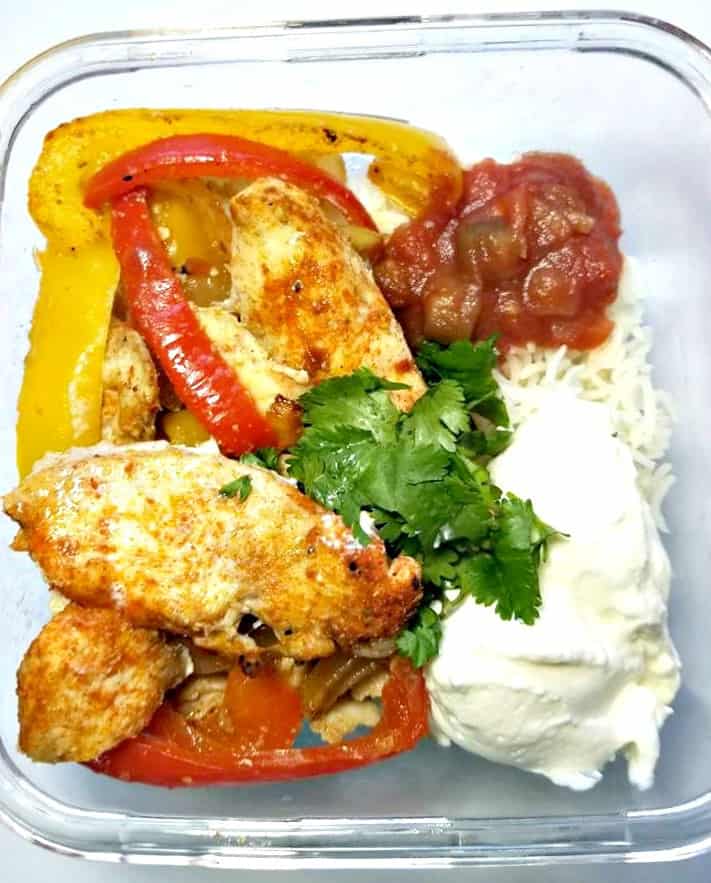
This recipe is very easy to prepare and has red and yellow peppers along with bok choy in it among some other very important ingredients. 

I used to order this often from my local Vietnamese restaurant, now I make it myself.

Today you can find many different types of ways to prepare this popular dish, this is my take on this delicious recipe.

I hope you give it a try and let me know what you and your family think. 

Some people like to make this dish with shrimp, chicken or pork. 

And others like it purely vegetarian, which is good also. So do what works best for you, after all it’s your meal. 

You will want to start marinating the beef first and while its marinating you can then soak the vermicelli noodles.

Also preparing the vegetables around this time is perfect too. Since the actually cooking part takes less than 15 minutes.

To me this vegetable mixture is perfect, peppers and bok choy works so well.

The only traditional ingredient I didn’t add here was thai basil which you can top this dish with at the end if you’d like.

You can always substitute Thai basil leaves for regular fresh basil leaves.

I didn’t have any on hand today so I used cilantro instead which works good too.

Also I like to use Garlic chili sauce, which gives it the right amount of heat vs cutting up fresh whole thai red chilies.

They are just to hot for me to handle, and I always end up with burning hands.

I like to add 2 tbsp of this Garlic chili sauce to my recipe, however for this one I used 1 tbsp in the ingredients section because I’m sure more people prefer a milder dish.

ENJOY!

I am so thrilled you are reading one of my recipes, if you made this recipe i’d love to hear about it! Thank you very much for reading and until next time see ya in the kitchen. Don’t want to miss a recipe? Sign up for our NEWSLETTER delivered right to your inbox every Month!

The best way to get ahold of me is through the comments! I absolutely love hearing from my readers, and I respond to each and every comment I receive.

Green Thai Curry with Chicken, Peppers and Bok Choy

Today I’m sharing with you a recipe for an excellent Green Thai Curry, which has chicken, pepper and bok choy in it. 

I could eat Green Thai curry each and every day, I’m not kidding I love it that much. 

And the good thing is it’s also very healthy and quick to make. 

Today I’m sharing with you a recipe for this chicken, pepper and bok choy curry.

For this soup you will want skinless chicken breasts, red and yellow peppers and fresh bok choy.

And of course the green thai curry paste which has the traditional ingredient of “Lemongrass”, “Galangal” and “Kaffir lime leaves” in it.

I like to also add a few frozen kaffir lime leaves to the curry, even though there is some in the paste I find it adds a nice touch. However if you prefer, you can squeeze the juice of half a lime in at the end instead.

So I will leave that up to you, frozen kaffir lime leaves can be purchased in bulk at many asian groceries.

One bag typically lasts me well over 50 different curry meals, so it’s wise to pick up a frozen bag for whenever the thai curry craving hits.

Now there are plenty different ways to make Thai curry, and that is because you can add just about any type of vegetable or meat protein to it. 

However the techniques are always the same and the main ingredients always consists Coconut milk along with “Green Thai Curry Paste”, which already has the traditional ingredients of “Lemongrass”, “Galangal”, and“Kaffir lime leaves” and Bird’s Eye Thai chilies in it.

If you want more heat you can add more Bird’s eye thai chilies to the soup, however I recommend not to as it will be very hot. I just did in this dish for added color, and to make it pretty.

Now if you are not familiar with all those ingredients, Bubba says don’t fret, you can find them all at your local asian grocer or right in the international aisle at your local grocer which will sell it in packages and or jars (see picture) below for our favorite Green Thai Curry paste”.

Even though we use the premade “Green Thai Curry paste” in this recipe, which has crushed Kaffir lime leaves, I also like to add a few more kaffir leaves and I always keep them on hand in my freezer for whenever I am making anything Thai.

I find it really enhances the dish, however you do not have to since they are in the “Green thai curry paste” already and the lime squeezed in at the end adds that element of tang that is needed.

Once you get familiar with the basic ingredients of thai cooking, you will be shocked at how easy it is to prepare these Thai dishes at home. Literally you can have them on the table in under 30 minutes.

Bubba recommends picking up this paste at your local grocer, it’s our favorite and goes a long way.

Keep in mind a good coconut milk, will be half solid a half watery.

One that is all watery does not work as well for this dish, typically organic varieties or thai have the best products. 

Optional ~ for extra heat add 1/2 a Bird’s eye chili to step 6.

WHAT IS IN GREEN THAI CURRY

  • Keep in mind a good coconut milk, will be half solid a half watery. One that is all watery does not work as well for this dish, typically organic or traditional thai milk varieties have the best products.
  • “Lemongrass”, “Galangal” and “Kaffir lime leaves” can be found in most Asian stores. “Thai Green Curry Paste” can be found in most Supermarkets, Thai Green Curry paste has all the above ingredients in it needed to make this dish.
  • Add in the lime last, you do not want to cook the lime because it will ruin the flavor.
  • Do not eat the “Lemongrass”, “Galangal” and “Kaffir lime leaves” there just for flavoring, if you’re going to use these for added flavor, make sure to bruise each item before adding to the pot.
  • Want more heat, simply add in some Thai Bird’s eye chilies or Thai Chili Paste. Caution when preparing Bird’s Eye Chilies, these chilies are very hot and can burn the eyes so proceed with caution.


I’m thrilled you are reading one of my recipes, if you made this recipe i’d love to hear about it! Thank you and until next time see ya in the kitchen. Don’t want to miss a recipe? Sign up for our NEWSLETTER delivered right to your inbox!

Creamy Parmesan Chicken and Scallop Pasta

This Creamy Parmesan Chicken and Scallop Pasta is served in a creamy white sauce and is super simple to make and is sure to impress.  

I like to use penne pasta for this dish, however you could use fettuccine too. 

Drizzle with fresh lemon juice and enjoy!

You don’t have to wait for only a special occasion for this dish, if you have a seafood lover in your life they are sure to enjoy this anytime of the year. 

You will want to start by chopping your onion and then mincing your garlic, saute it in a pan and then placing on the side.

Next saute the chicken pieces, and scallops separately in a little butter then set aside.

Before placing everything back in the saucepan to merge together with some heavy cream, chopped yellow pepper, parsley, salt and pepper and fresh parmesan cheese.

Right before serving squeeze some lemon over top and serve hot directly from the pan.

Once you try this simple recipe, you will be hooked, just be careful to not overcook the scallops or it they will become rubbery. 

You are going to want to cook it on medium low for a 3 minutes on each side, then remove it immediately from the heat and set aside before tossing back for the last minute with everything else before serving!

 Serve in a bowl or on a large plate, this dish is creamy!

Note: You can also add spinach if you desire.

LOOKING FOR MORE ITALIAN RECIPES?

I am so thrilled you are reading one of my recipes, if you made this recipe i’d love to hear about it! You can post a review, picture below or via Instagram and let me know how it turned out. Thank you very much for reading and until next time see ya in the kitchen. Don’t want to miss a recipe? Sign up for our NEWSLETTER delivered right to your inbox every Month!


Mexican Black Bean Chili

I absolutely love black bean chili and this is my favorite way to make it. Without any meat, because you really don’t need it. 

Now there are so many black bean chili or soup recipes out there and almost all call for some type of meat protein in it.

However, if done right you really don’t need meat for black bean chili, because one cup of black beans provides 15.2 grams of protein.

Plus black beans are also a good source of antioxidants making this one of the healthiest chili recipes around.

Did you know that the fiber in black beans actually helps lower the total amount of cholesterol in the blood and decrease the risk of heart disease?

Well if that is not more reason enough to omit the meat and go Vegetarian tonight, I don’t know what is!

I like to serve fresh jalapenos on-top this chili before serving.

So if you have small kids or those who can’t handle the heat, you can omit the fresh jalapenos at the end.

You can cook this on the stove top or in your slow cooker, both methods work great.

I hope you give this a try because it’s super delicious!

Note: I like to use “Better than Bouillon” Chicken stock. We buy ours from Costco, so instead of using 8 cups of liquid Chicken Stock, we use 3 tbsp of that instead. If your interested in trying it out, the link is below.

I am so thrilled you are reading one of my recipes, if you made this recipe i’d love to hear about it! Thank you very much for reading and until next time see ya in the kitchen. Don’t want to miss a recipe? Sign up for our NEWSLETTER delivered right to your inbox every Month!


One Pan Chicken Fajitas (Meal Prep)

I have been doing meal preps for some time now, however have never blogged about it. This will be my first meal prep, of many that I will be coming out with in 2018. We are all busy these days, and spending every night in the kitchen is not on everyone’s agenda. I get it! Either is eating out for lunch everyday, but we all seem to keep doing it. If your sick of eating out all the time or slaving in the kitchen every night. Then your going to want to + add this recipe to your “Meal Planner” that we offer for free here.

So what are meal preps? And how can they help you?  Meal preps are meals done all at once, then stored in sealable containers for lunches or dinners for you and your loved ones to eat ahead of time. Some can be frozen, while most are to be eaten within 4 to 5 days, I recommend eating this one here within 4 days. That is why this is going to be a 4 day meal prep. Meal preps basically are a convenient and healthy way to prepare meals in advance for either yourself or loved ones. They work well for either lunches or dinners, so if there is more than just you in the home. You may want to prepare more preps today to feed a few of you over the week. All you will need to do is simply double this recipe, with the “recipe adjuster” option below. So for all of you who are either sick of  a, cooking everyday or b, eating out everyday. This recipe is for you!

When doing meal preps, your going to want to purchase some quality glass bowls. Plastic just is not healthy for you, and they hardly last long. The bowls you will be looking for will be sturdy and with a solid lid, you do not want your food leaking all over your bag if you are packing these for lunch. I recommend buying glass bowls, that can be microwaved and put in the oven and dishwasher as well. Investing in a quality set vs cheaper set will pay for itself in years to come, not to mention save you a ton of money.

Ready to go in the Oven


To season the fajitas you will want a good fajita seasoning, however please don’t waste your money on those overpriced packaged ones. Those cost around $2 dollars a pack you can make the same stuff at home for a fraction of the cost. Fajita seasoning is a combination of cumin, coriander, chili powder, paprika, cayenne pepper, garlic powder, onion powder with salt and black pepper. Then all you need is some fresh chicken breasts, and sweet red peppers, lime juice and your ready to rock and roll. These One Pan Chicken Fajitas are one of my favorite recipe for doing meal preps with. Once cooked you can sectioned the sheet pan fajitas off into four separate prep bowls as seen above. I fill mine in this order, basmati rice, topped with my cooked fajitas and a couple spoon full of salsa and sour cream. You of course can use quinoa or brown rice if preferred, after all there your prep bowls.


Once the bowls have been prepped I like to squeeze fresh lime juice over the chicken fajita mix. I find placing a lime wedge inside starts to taste strange by the third day. Also keep in mind, these last on average about 4 days in the fridge. You will want to top each bowl with fresh cilantro daily, otherwise that part will taste bad after a few days stored in these containers. That’s is all there is too it folks, pretty simple eh? Do this a couple times per month, and you will be saving 100$ of dollars vs eating out.


You can pair these chicken fajitas with:

  • Basmati rice = my choice
  • Brown rice
  • Quinoa


You can substitute the chicken for shrimp, beef or tofu also.


To make the Easy One Pan Chicken Fajitas:

  1. Start by making your fajita seasoning. Mix together cumin powder, coriander powder, chili powder, paprika, onion powder, garlic powder, and pepper in a small bowl. Set aside.
  2. Next wash and slice your sweet bell peppers into thin strips, then your onions then placing them onto one side of your baking sheet.
  3. Next, slice your chicken breasts into strips and place on the other side of your baking sheet.
  4. Crush the garlic and place on-top of the chicken and onions.
  5. Prepare your fajita mix, stir everything together and pour over your fajita pan and stir so everything is covered with the mix.
  6. Bake in the over at 400 f for 25 minutes.
  7. While the fajitas are baking, in a rice cooker prepare your rice.
  8. Once the fajitas have cooked and cooled down, squeeze the juice from one lime overtop the fajitas.
  9. Now it’s time to prep the bowls, fill each bowl with the cooked rice and top with the fajita mixture.
  10. Add sour cream and salas of your choice.
  11. Cover with a sealable lid and store in the fridge up to 4 days.
  12. Garnishes with chopped up cilantro the day your to eat your prep meal.
  13. Enjoy!


If you liked this recipe, check back soon for more one pan recipes (meal prep) meals that will help you get through the week without cooking constantly or having you eating out everyday.


Note: You can serve these fajitas with mexican salsa instead of regular salsa if desired. My recipe for Pico de gallo, is right here.


I am so thrilled you are reading one of my recipes, if you made this recipe i’d love to hear about it!You can post a review, picture below or via Instagram and let me know how it turned out. And by doing so you will be automatically entered into our seasonal CONTEST to win one of our great prizes. Winner will be notified via email within a week after the contest closes. Thank you very much for reading and until next time see ya in the kitchen. Don’t want to miss a recipe? Sign up for our NEWSLETTER delivered right to your inbox every Month!