Black Licorice ice cream

Growing up in Canada Black Licorice ice cream was readily available. However over the years it either lost it’s popularity or the suppliers have gone out of business. 

How sad for Black Licorice ice cream lovers across the Country!

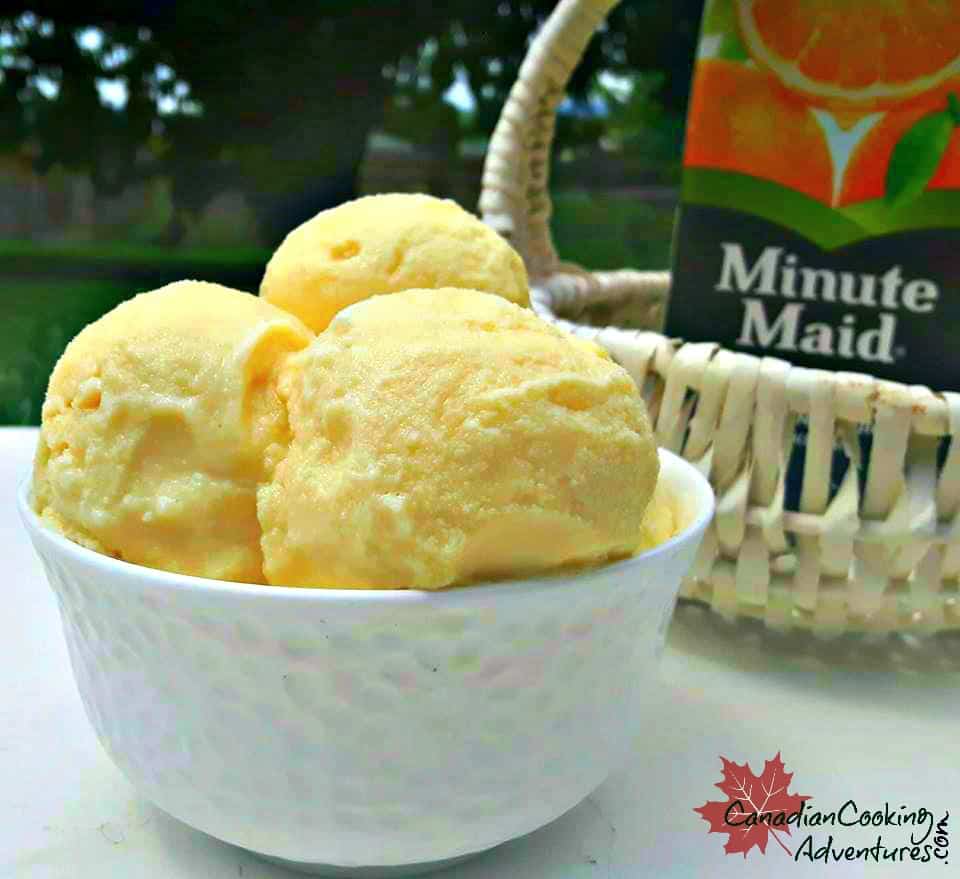
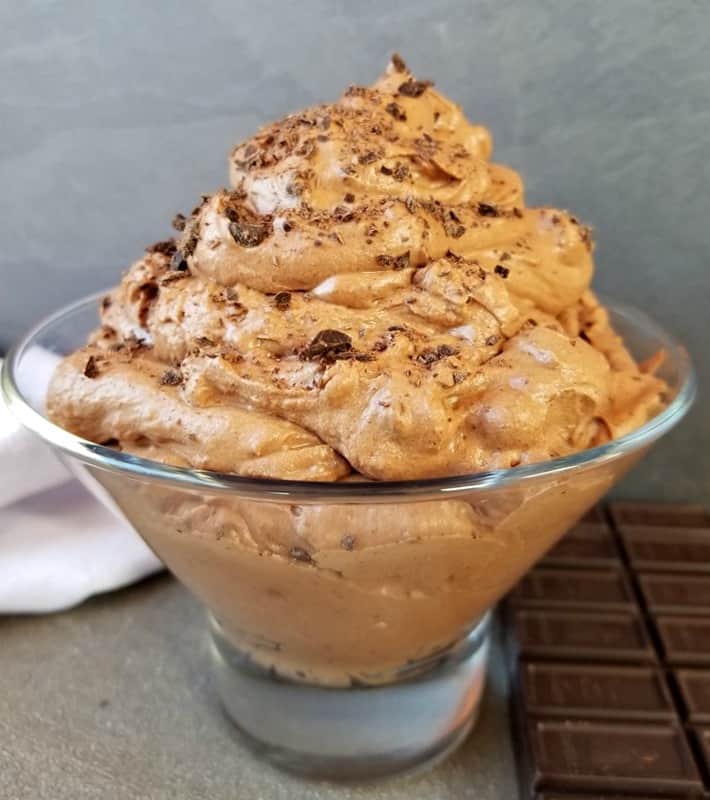
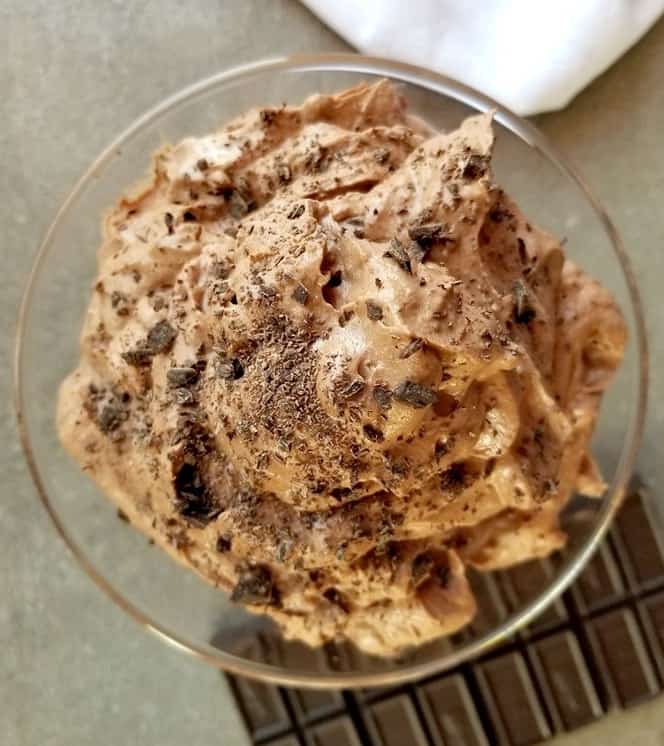
I like to have this in the freezer during the summer months, I swear my family comes over just to have a bowl there obsessed too.

WHERE TO BUY BLACK LICORICE ICE CREAM

It is very hard to find black licorice ice cream these days, so I cannot tell you. However you can try to find blue licorice ice cream as some stores have that version. 

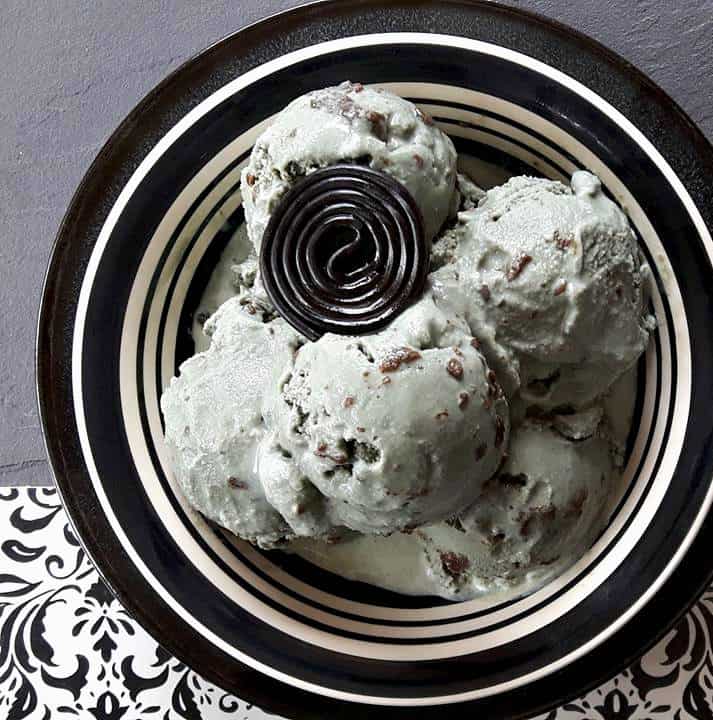
One bowl is hardly enough! 

THE MACHINE I USED TO MAKE THIS AND RECOMMEND IS LINKED BELOW


HOW TO MAKE BLACK LICORICE ICE CREAM

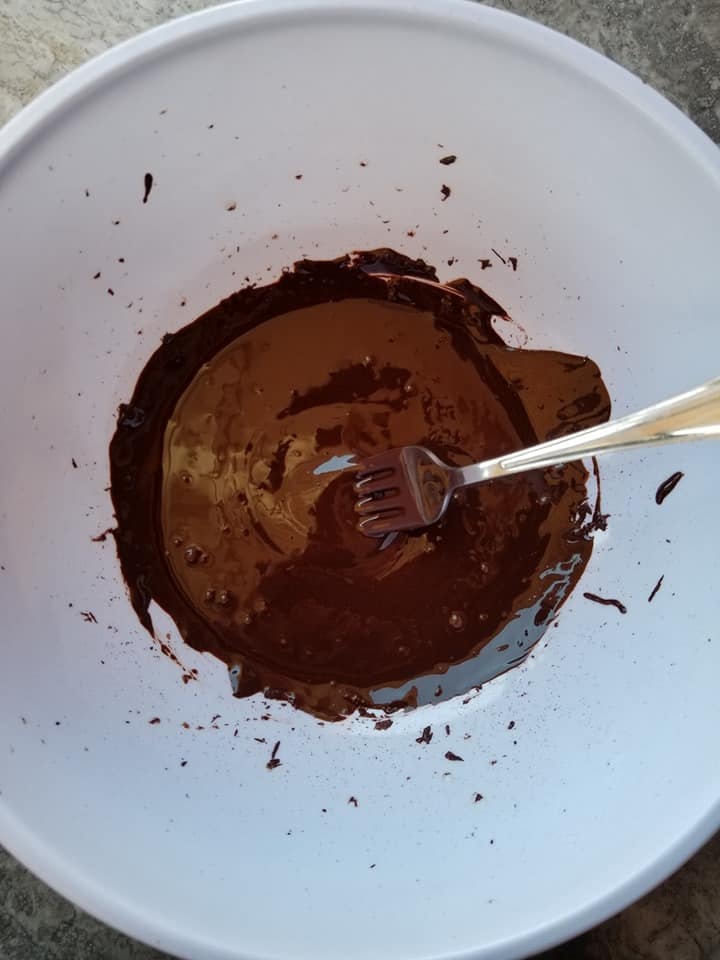
  1. With most of my ice cream recipes, I will prepare them by using the coldest of ingredients (never cooking anything first) however with this recipe we are going to be heating up the first few ingredients to infuse the Licorice into the ice cream. This step is necessary and so worth it!
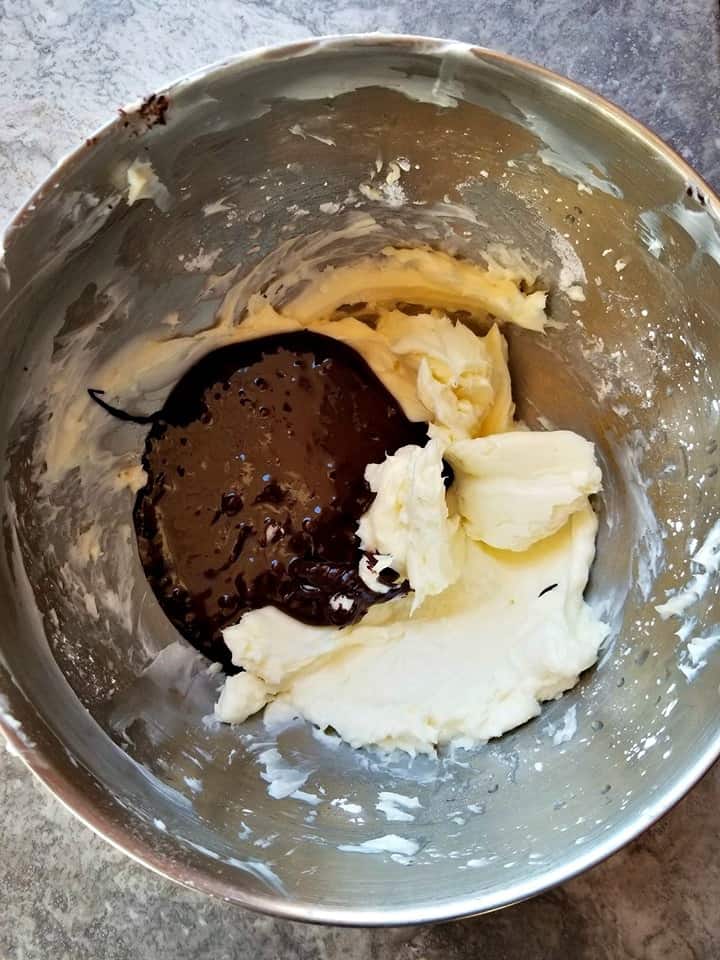
  2. It is important to not skip this step, once you have infused the ice cream base with the licorice flavors you’re going to whisk in your egg yolks and then simply let it all become cold in the fridge for a while.
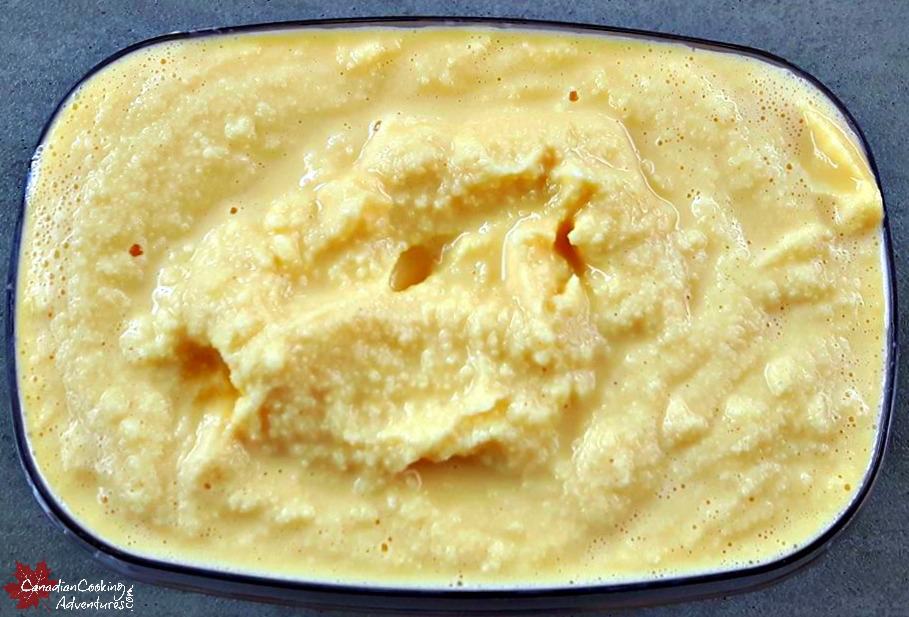
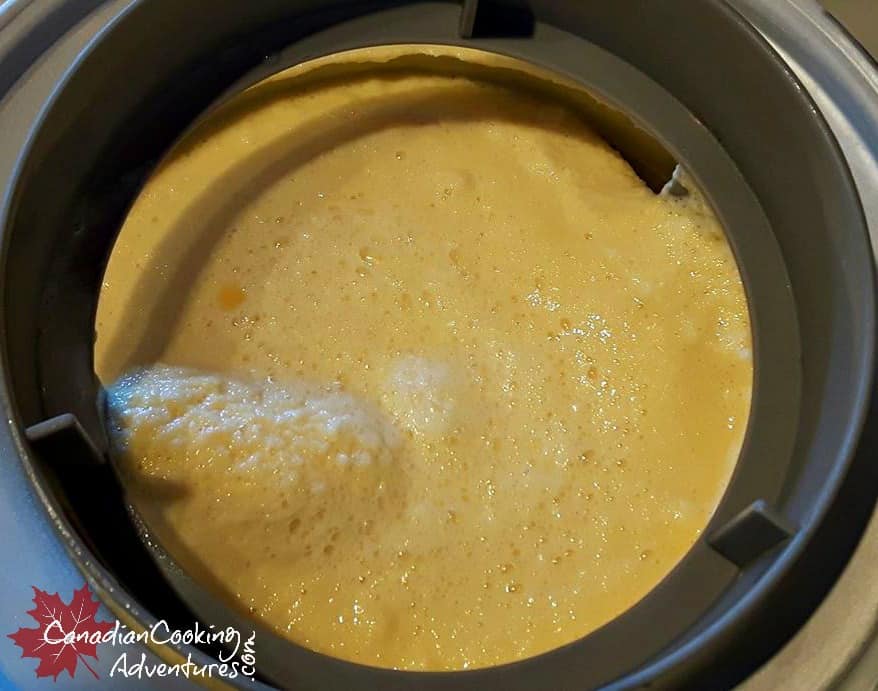
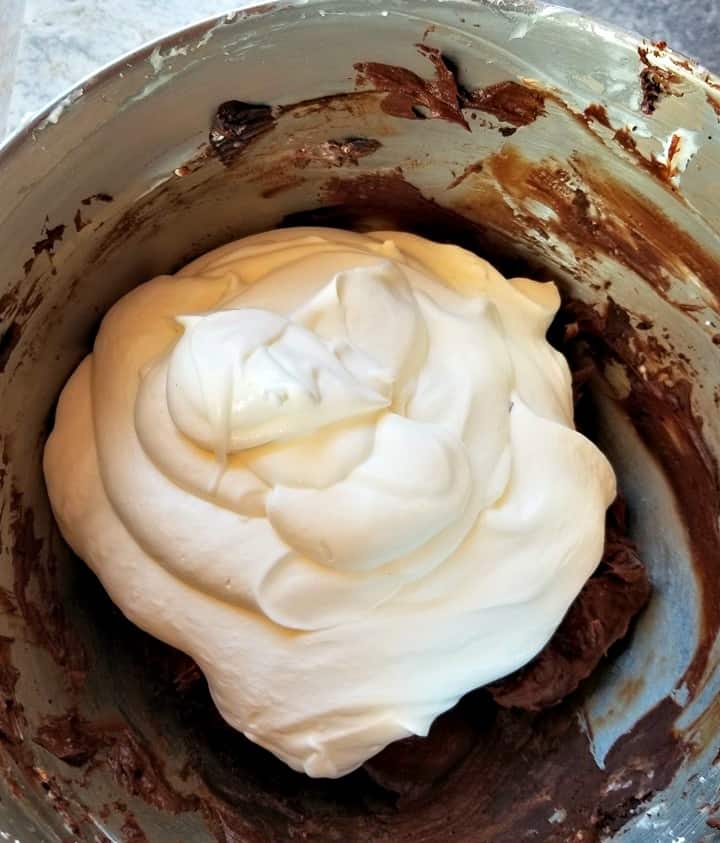
  3. The final step will be to pour your base into the ice cream machine and then you will be in business. 

Keep in mind the Black Licorice needs to be broken up, so once its reaches its highest melting point, start to break it up with a wooden spoon while cooking it down. It will still be in chunks just smaller ones and it will melt and become soft. 

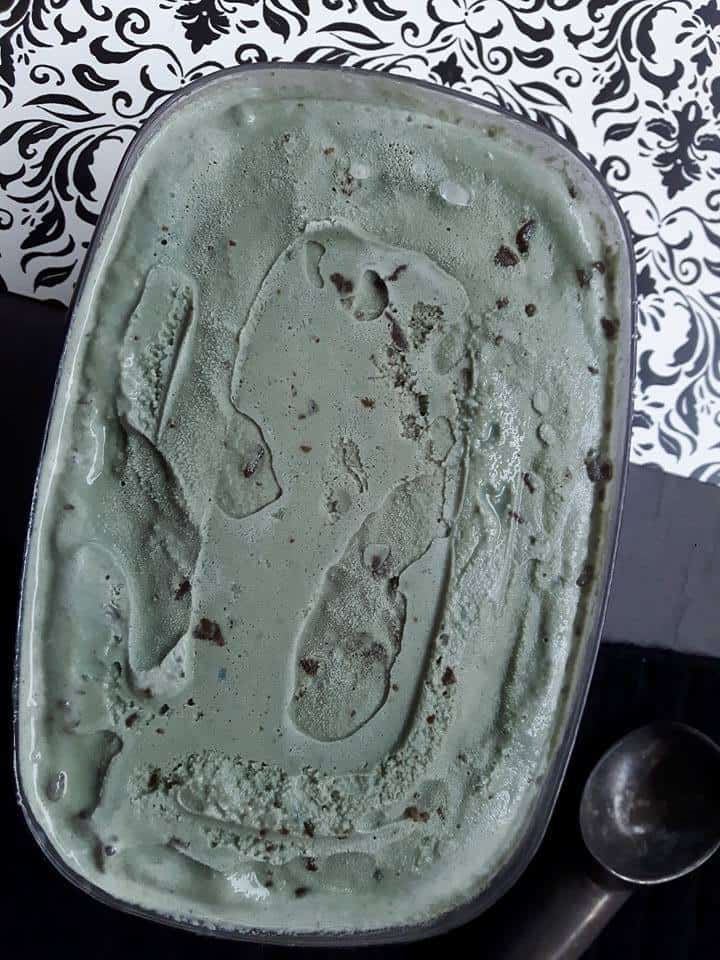
This will leave you will nothing but soft licorice pieces that will be blended throughout the ice cream.

WHAT DOES BLACK LICORICE ICE CREAM TASTE LIKE

Black licorice ice cream taste like the candy just in a creamy form with the hint of aniseed.

I NEED YOUR HELP READERS! If you think my recipe for Black Licorice Ice Cream is the best Black Licorice Ice Cream Recipe on the net.

Then please rate it with 5 stars below, this will help more people to find it!

Having tried many other recipes online, I think you will agree it’s pretty spot on. Enjoy!

Recipe adapted from FOOD @ Star Anise Ice Cream 

If you have ever been to this site before you will see that I really love to make homemade ice cream & frozen yogurt so stay tuned for more unique and tasty recipes here.

Did you grow up with Black Licorice Ice Cream? I would love to hear about it in the comments below!! Until next time see you lovely people in the kitchen.

I am so thrilled you are reading one of my recipes, if you made this recipe i’d love to hear about it! Thank you very much for reading and until next time see ya in the kitchen. Don’t want to miss a recipe? Sign up for our NEWSLETTER delivered right to your inbox every Month!

White Chocolate Cranberry Shortbread Cookies

The Magic of Christmas is in the air with these White Chocolate Cranberry Shortbread cookies. Can you feel it? 

Wanting another holiday cookie recipe? Try my White Chocolate Macadamia Nut Cookies

Shortbread always brings back memories of Christmas for me. Having grown up in a large family these where always sure to be there on the living room table for everyone to enjoy! Along with Ginger Snap Cookies and White Chocolate Macadamia Nut Cookies.

I miss those days honestly, when my Grandma and older folks where around and all of my family lived in one city.

Personally, I just love the Christmas Season because this is about the only time that I really start to embrace the colder months. 

The nights get darker fast and everyone stays inside in most parts of Canada. 

However, that does not stop people from celebrating as they decorate their houses with pretty lights that light almost every street. 

Which creates a warm glow in the dark of night and creates a warmth only Christmas brings. 

It is just so pretty when the snow hits these lights because it literally glistens.

Creating a magical joyful feeling that is hard to ignore, I have even seen many Ebenezer Scrooge’s change overnight with the help of someone’s offer of warm cookies.

What is Christmas without a little home baking?

And if you ask me shortbread is definitely something that can’t be skipped.

Nothing beats homemade shortbread, so I encourage you to try them this year. Once you try these cookies, I’m certain you’ll be requested to make them again. 

And the nice thing is you can make these ahead of time and store them in an airtight container in the fridge for up to a month.

Where you can bring them along for others to enjoy wherever you may go this holiday season.

Having tried several shortbread recipes throughout the years, I’m now sharing one of my favorites with you.

The combination of the soft and flaky shortbread, along with the tartness from the cranberries and sweetness from the white chocolate make this cookie so lovely.

HOW TO MAKE CRANBERRY SHORTBREAD COOKIES

You will need: directions in the recipe card below.

  • 4 cups flour
  • 2 cups butter, softened
  • 1 cup sugar
  • 1-1/2 pkg. (4 oz. each) BAKER’S White Chocolate (6 oz.), chopped
  • 1-1/2 cups dried cranberries

Wishing you and yours’s a Joyful and peaceful Christmas and New Year.

Notes: After cookies are completely cooled, place in airtight container or plastic freezer bag.  Keep the dough refrigerated if you are going to be making these in batches. Also keep in mind the dough is not meant to be sticky like other cookies this is shortbread after all.

LOOKING FOR MORE CHRISTMAS DESSERTS?

I am so thrilled you are reading one of my recipes, if you made this, I want to see! Follow Canadian Cooking Adventures Instagram, snap a photo, and tag and hashtag it with @canadiancookingadventures and #canadiancookingadventures

Stay connected and follow along on FacebookPinterest, and Instagram for all of my latest recipes!

Winter Cake

This Winter Cake is made with coconut flakes and cream cheese frosting. It is moist and delicious and makes for a festive dessert.

WHAT IS WINTER CAKE

It is a white cake that is covered in frosting and coconut flakes.

I wanted to come up with a cake that celebrates winter!

And being it’s winter time in Canada, this cake seemed fitting.

Now i’ll be honest, I’m not a cake decorator.

Meaning, I hardly ever create a cake that is shop worthy, looks wise.

However, I am a good baker and so you can expect this cake to be super moist on the inside and packed full of the most delicious coconut flavors you could ever want on the outside. 

WHAT FROSTING FOR A WINTER CAKE

This cake has a homemade cream cheese frosty that is covered in coconut flakes. 

Making for a beautiful winter inspired looking cake. Don’t you think?

The cake actually reminds me of snow and so I decided to add some snow to this photoshoot!

I think I got some stunning photos with this recipe. 

WHAT DOES WINTER CAKE TASTE LIKE

It is not overwhelming sugary , but there are hints of sweetness.

I much prefer to highlight the coconut flavors vs just sugar for this cake. 

So you defiantly will have a big bite full of those tasty coconut flakes. 

Like eating a snow storm on a plate 🙂

The awesome part about this cake is that you won’t have to spend all day in the kitchen baking it.

MAKING WINTER CAKE

Do not forget to use cake flour for this recipe, it really makes all the difference in how it tastes. 

A cake made from scratch and that takes less than an hour to make. 

COUNT ME IN!

I know a lot of people dread the cold and what comes with that, but I think their is a lot to also be grateful for. 

Like snow, not everyone get’s to have a white Christmas. 

How to Make Winter Cake

I used a square baking pan for this cake, however you can use a circular baking pan if desired or even double to recipe and create a layered cake.  

  • Start by preheating your oven to 350 f.
  • Then lightly grease with oil or butter a 9×2 inch square (23 x 5 cm) = 10 cups (2.4 liters) pan.
  • Or line the bottom of the pan with parchment paper. 
  • Sift cake flour into a bowl then mix in the baking powder and salt.
  • In an separate bowl with an electric stand mixer cream sugar, butter and canola oil 
  • Then ix in egg yolks and extracts.
  • Blend in flour mixture and slowly adding in the coconut milk.
  • Separately whip egg whites with cream of tartar to stiff peaks.
  • Now fold 1/3 of the egg whites into cake batter at a time.
  • Pouring the batter into the square cake pan.
  • Bake until set, let cool completely then frost and finish with shredded coconut flakes
  • Enjoy.

WHAT FROSTING FOR COCONUT CAKE

A cream cheese frosting of course!

Soon after I finished the photoshoot this cake was enjoyed on the couch by me and my partner.

Give it a try you may be surprised at how good it really is. 

There really isn’t much to this recipe, just follow the basic steps below and you will have the most amazing coconut cake too.

That’s all folks, this is what a fresh and creamy coconut cake looks like, enjoy!

CAN WINTER BE FROZEN

Yes, Winter Cake can store in the freezer up to  4 months. To thaw simply remove cake from the freezer and allow it to sit. 

I am so thrilled you are reading one of my recipes, if you made this recipe i’d love to hear about it!Thank you very much for reading and until next time see ya in the kitchen. Don’t want to miss a recipe? Sign up for our NEWSLETTER delivered right to your inbox!

ORANGE CREAMSICLE ICE CREAM

Do you remember eating creamsicle popsicles as a kid? Well then this Orange Creamsicle Ice Cream is just like that only better. 

There was never enough of them on those hot summer days.

I personally could eat one after the other after the other, but with 6 normally to a box. I had to refrain myself, otherwise my Mother would be very upset.

This recipe takes me back to that time, walking down the sidewalk with my friends, playing hop scotch and just being a kid.

Never thought something so simple, could do that.

Try it for yourself, and even better yet make it for the kids.

Its super healthy as it only contains, orange juice, cream, condensed milk and vanilla.

Just 4 simple Ingredients that can take you right back to your childhood.

What you will need:

HOW TO MAKE ORANGE CREAMSICLE ICE CREAM

To make 2 quarts of Orange Creamsicle Ice cream:

  1. Star buy pouring your orange juice, cream into a large bowl
  2. Then pour in your canned of condensed milk, vanilla extract and stir to combine.
  3. Pour it all into your operating ice cream maker, and allow it to turn for 25 minutes.
  4. Once its done, it will have a creamy texture.
  5. You can then place into an airtight container in the freezer for a minimum of 2 hours or freeze overnight.
  6. Allow it to defrost 10 minutes prior to scooping.

I hope you enjoy!

I am so thrilled you are reading one of my recipes, if you made this recipe id love to hear about it! Thank you very much for reading and until next time see ya in the kitchen. Don’t want to miss a recipe? Sign up for our NEWSLETTER delivered right to your inbox!


Oatmeal Pumpkin Spice Cookies

These Oatmeal Pumpkin Spice Cookies are perfect for the fall and will leave your whole smelling of pumpkin pie. 

These cookies here were made in my Air Fryer, however you can also make them just the same in the oven of you like.

No need to heat up the whole house when and air fryer is present. That is my motto! 

We love pumpkin cookies around here, however I wanted to try them without flour.

So I substituted that for oatmeal and an 2 eggs. And it turned out better than I thought they would. 

They are a bit chewy but soft on the inside and crispy on the outside. Making for something that tastes somewhat like a muffin/cookie. 

Made with just a few simple ingredients, which are: pumpkin filling, oatmeal, eggs, vanilla extract, pumpkin pie spice and salt. 

I shared these cookies with some friends of the family and they were given 5 stars by all. Pretty awesome, as this was the first time I ever made them and came up with this recipe myself on a whim. 

Or rather craving for a healthy fall treat!

HOW TO MAKE PUMPKIN OATMEAL COOKIES

  • The key is the ingredient ratio.
  • So be sure to follow this one to a tea and you will be sure to have the best oatmeal pumpkin cookies eva!
  • You will want to start by having to large mixing bowl. 
  • Then add in the pumpkin, oatmeal, butter, egg, baking soda, baking powder, pumpkin pie spice and salt into a mixing bowl. Stir the mixture to blend evenly.
  • Mix with a stand up mixer and then slowly add bowl one to and continue to blend.
  • Once everything is mixed, shape into small balls using your hands.
  • Place the balls in your air fryer on either tin foil or strictly the rack.
  • The thicker the cookie the more soft it will be inside.
  • Air fry in batches of 4 or 6 depending on the size of your air fryer.
  • Air frying times vary according to your air fryers instructions so it is best to check with your unit. 

Frosting: 

Meanwhile, in another bowl. Place the butter, vanilla extract,  confectioners’ sugar and milk. 

LOOKING FOR MORE AIR FRYER COOKIE RECIPES?

Notes: After cookies are completely cooled, place in airtight container or plastic freezer bag.  Keep the dough refrigerated if you are going to be making these in batches.

I am so thrilled you are reading one of my recipes, if you made this, I want to see! Follow Canadian Cooking Adventures Instagram, snap a photo, and tag and hashtag it with @canadiancookingadventures and #canadiancookingadventures

Stay connected and follow along on FacebookPinterest, and Instagram for all of my latest recipes!

Christmas Cheesecake

This Christmas Cheesecake is the perfect addition to your holiday celebrations! 

The Christmas Holidays are here once again! 

And boy oh boy am I excited! The holidays mean different things to different people, but I think we can all agree that it’s a time to rest and hopefully relax spending some quality time with those we love. And I hope this cheesecake may just be that one thing that helps with that.

CHRISTMAS CHEESECAKE NO BAKE

This cheesecake here is a no bake cheesecake, just so you know!

That means the only thing that is being cooked is the gram cracker crust, the rest is frozen prior to serving! 

WHY IS IT PURPLE

You may be thinking, how did you get that cheesecake purple? And is it even healthy! The answer to that is yes, it is healthy.

And it is made with purple yams.

If you have never cooked with purple yam before, trust me it is not hard.

It is like cooking any other yam actually. 

HOW TO PURPLE YAMS TASTE

You’re probably wondering if purple yams taste good in a cheesecake right? Well I assure you they do, purple yams are often cooked in cakes in the Philippines. And are a bit sweet and make for an excellent addition in a cheesecake. 

In the Philippines this cheesecakes is actually known as “Ube”.

Purple yams are packed with vitamins, such as A, C and are a good source of copper, dietary fiber, vitamin B6, potassium and iron.

And are known to improve blood sugar regulation and some studies have discovered significant antibacterial and antifungal properties.

HOW DOES A PURPLE YAM LOOK COOKED

HOW TO MAKE CHRISTMAS CHEESECAKE

  1. Start by making your base/crust, in a large bowl place your graham crackers, brown sugar and melted butter. Mix this together with a spoon and then use your hands to press it together so it sticks.
  2. Lightly oil your cheesecake pan and then place your graham cracker crust inside. Press firmly down to create your crust. No-bake graham cracker crust: Chill pie crust for at 30 minutes prior to filling. Prior to serving, rub the outside and bottom of the cheesecake pan with a wringed out hot cloth this helps to release the pan from the crust. Baked graham crust: Preheat oven to 325°. Bake crust for 10 minutes, cool completely before filling.

FILLING:

  1. Wash and cut your yams into bite size pieces and boil in a pot of water till tender.
  2. Strain your yams and allow to cool. Once your Purple Yams have cooled, mash them in a large bowl till smooth.
  3. Then add 2 packages of cream cheese and with your hand held blender whisk together till smooth. Add in your condensed milk, nutmeg and ground cinnamon. Pour over your crust slowly then chill in the freezer anywhere from 6 to 24 hours.

FINISHING THE CHEESECAKE:

  1. Once your cake is absolutely cold, release the cheesecake from the pan slowly.
  2. Add more whipped cream around the cake to decorate!
  3. Cut and allow to defrost for roughly 20 minutes, enjoy!
  • I like to use an 8″ inch cheesecake pan for this recipe which gives you a thick cheesecake as seen in the pictures below, which can serve 12 people.
  • If you prefer a thinner cheesecake, you can then use a 9″inch cheesecake pan. Really there is not much to it, besides boiling some purple yams, preparing your crust and whip up some cream cheese, along with whipped cream to give it the perfect lightness that makes this dessert so decadent!

Be sure not to skimp on the “whip cream” here because it really makes this cake come together perfectly.

If that is not more reason to enjoy them this holiday season in a cheesecake then I don’t know what is!

Wishing you and yours Happy Holidays!

Note: Place your cake back in the freezer or it will melt this cheesecake is best kept chilled. If you like a thinner graham cracker crust, feel free to use 1 1/2 cups of crushed crackers instead of 2.

I am so thrilled you are reading one of my recipes, if you made this recipe i’d love to hear about it!  Thank you very much for reading and until next time see ya in the kitchen. Don’t want to miss a recipe? Sign up for our NEWSLETTER delivered right to your inbox!

Best Chocolate Mousse

Are you having a Chocolate Craving? When my craving hits, I like to make this super delicious Chocolate Mousse.

This mouse is light an fluffy and filled with a deep chocolate taste. 

What makes it light? It is because we are using “low fat cream cheese” instead of full fat along with cocoa powder, vanilla and melted milk chocolate.

The combination of that along with whipped cream, makes for a much lighter yet delicious mouse.

Matter of fact one serving size of this is roughly around the same calories as half of one of your favorite chocolate bars.

CAN CHOCOLATE MOUSSE BE MADE IN ADVANCE

Yes, mine can. Because we are not using eggs it will keep well in the fridge for 2 to 3 days! So if your having a large gathering this could make for a special dessert for everyone. 

HOW MAKE CHOCOLATE MOUSSE 

  • It is super easy, you will want to start with placing the cream cheese on the counter to obtain a room temperature before using it. 
  • Then you will want two metal mixing bowls and a small microwavable bowl. 
  • Then you will want to melt the chocolate bar in the microwave bowl till melted, once melted add the cocoa powder. 
  • In one of the mixing bowl take a handheld blender and whisk the cream cheese. 
  • In the other add the whipped cream and whip with a handheld blender.
  • Fold the whip cream into the cream cheese. 
  • Then fold into the melted chocolate. 
  • Whip all together for less than one minute till combined and serve.
  • Top with shaved chocolate pieces if desired. 

TOPPINGS IDEAS FOR CHOCOLATE MOUSSE 

  • Fresh Blueberries
  • Strawberries
  • Bananas 
  • Nuts

SUBSCRIBE TO THIS BLOG TO RECEIVE MY NEWEST RECIPES

I am so thrilled you are reading one of my recipes, if you made this recipe i’d love to hear about it! Thank you very much for reading and until next time see ya in the kitchen. Don’t want to miss a recipe? Sign up for our NEWSLETTER delivered right to your inbox every Month!


Mini Egg Cheesecake Cups

Spring is officially here and that means Easter is right around the corner. These (no bake) Mini Egg Cheesecake Cups are sure to bring some sweetness to your home this season.

Now let me ask you a serious question, do you know anyone that doesn’t like cheesecake? Well I don’t. 

So trust me when I say that these cheesecake cups are sure to put a smile on everyone’s face this Easter Season.

What I REALLY like about these Cheesecake cups is that their not heavy at all. And that’s because of the whip cream addition that makes them almost like a cheesecake mousse! YES, A Cheesecake Mousse!

My partner who lives, I mean loves cheesecake. Has already given it a 10 out of 10 and then asked is there more? 

Lucky for him, I am going to be making these again for Easter as I will be serving them to our guests.  

I had such a good time making these, I bet the kids would have a blast making them too!

This recipe here can easily serve 6 people. Also, since this is a no bake cheesecake recipe it can all be ready in less than 30 minutes! And like any of my recipes, you can adjust the ingredient ratio in the ingredient section and serve more people or less people if desired. 

You may have been thinking, aren’t Cadbury eggs Canadian?

Because I sure did, but after some research I learned their actually a milk chocolate created and produced by Cadbury UK. And are now also produced in Canada, so I decided to place this recipe under my England cuisines category. I hope that is okay with my Canadian readers!

These cups are so good that people may just ask for seconds or thirds. So if you are serving more than a few, I would definitely double up the recipe.

Also they are best served a bit chilled and can be stored in the fridge for up to 24 hours before serving if need be. 

Your going to be shocked at how easy and tasty this recipe is. People are sure to be asking how you made it? But let’s leave that little secret to us kitchen warriors.


DID YOU MAKE THIS RECIPE?

If you make this recipe, I would love to hear about it! You can leave a 5 star review in the comments below! Thank you very much for reading and until next time see ya in the kitchen. Don’t want to miss a recipe? Sign up for our NEWSLETTER delivered right to your inbox!