Persian Jeweled Rice (Javaher Polow)

We sent Hunter out to look for Barberries to make this traditionally Persian jeweled rice dish, as Bubba was on a work assignment elsewhere for the month. Hunter came back much later than expected and with major jet lag, as his research lead him to Iran where this mature fruit grows in shrubs. Although we liked it in this dish we found a great substitute = Cranberries! So we tried them in this recipes and everyone agreed that using the cranberries in replace of the barberries would work just fine.  Indie in our Quality assurance also agrees it tastes very similar to the tangy Barberries says it’s a great substitute. Just make sure the cranberries you’re using are the unsweetened variety otherwise it will be too sweet. This is my favorite version of Persian jeweled rice, I hope you enjoy as much as we do. 


Kitchen Essentials:

To make the Persian Jeweled Rice: “Two Step Process


Step 1:

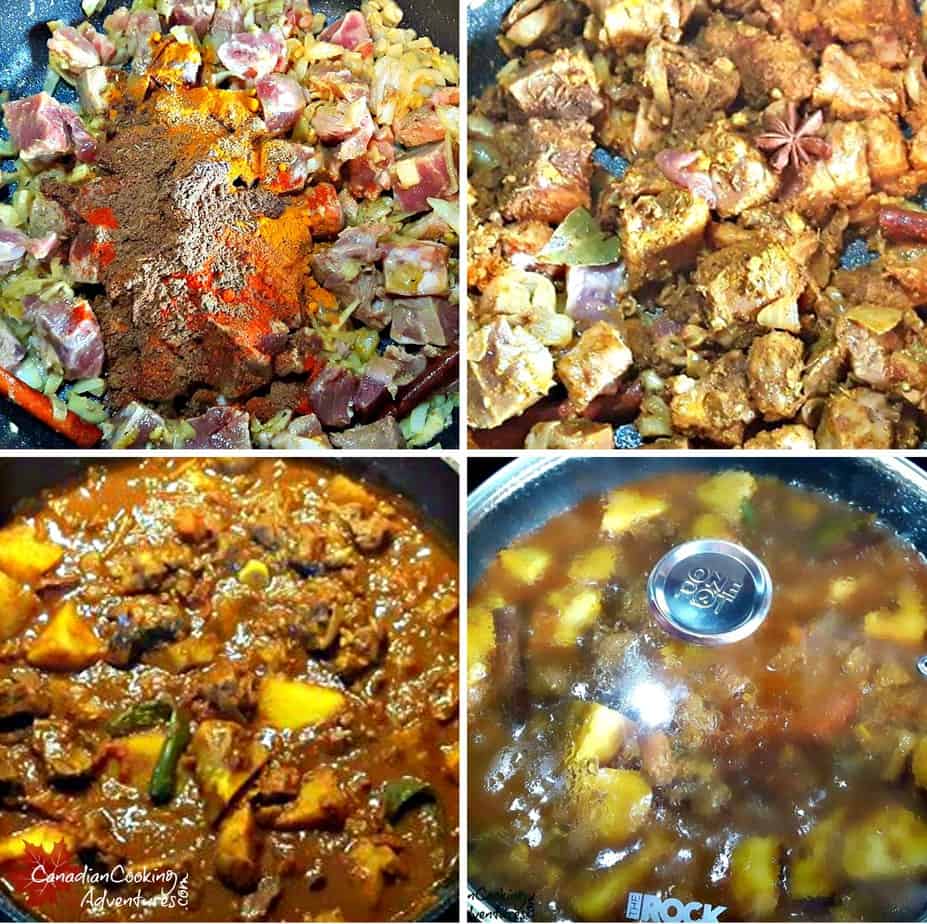
  • Heat 4 tbsp of butter in your pan with the Saffron threads cook for one min, remove and set aside. This will be used in your final step.
  • Add the onions to the same pan, and cook till soft, then add in all your spices and cook for 2 minutes till fragrant set aside.

Step 2:

  • Rinse your rice in cold water and bring a large pot of water to a boil. Add in a few pinches of salt and your rice. Boil your rice for 5 minutes, cooking halfway through and drain the water out in your strainer.
  • Separate your rice into 2 bowls, one cup of rice per bowl.
  • Now, toast your pistachios in the pan for 2 minutes. And add them to rice bowl 2, along with your dried, apricots, raisins, and cranberries too and set aside.

Rice bowl 1: Mix your cup of rice with the Yogurt.

Rice bowl 2: Mix your cooked pistachios and all your dried fruit to bowl, along with your cooked onion and spices.

Cooking the Jeweled RICE all together:

  • Add 2 tbsp of butter to your pan over medium heat and then the “yogurt + rice” mixture.
  • Then place the bowl 2 of the rice mixture/fruit/spices over top of the other rice, creating two layers.

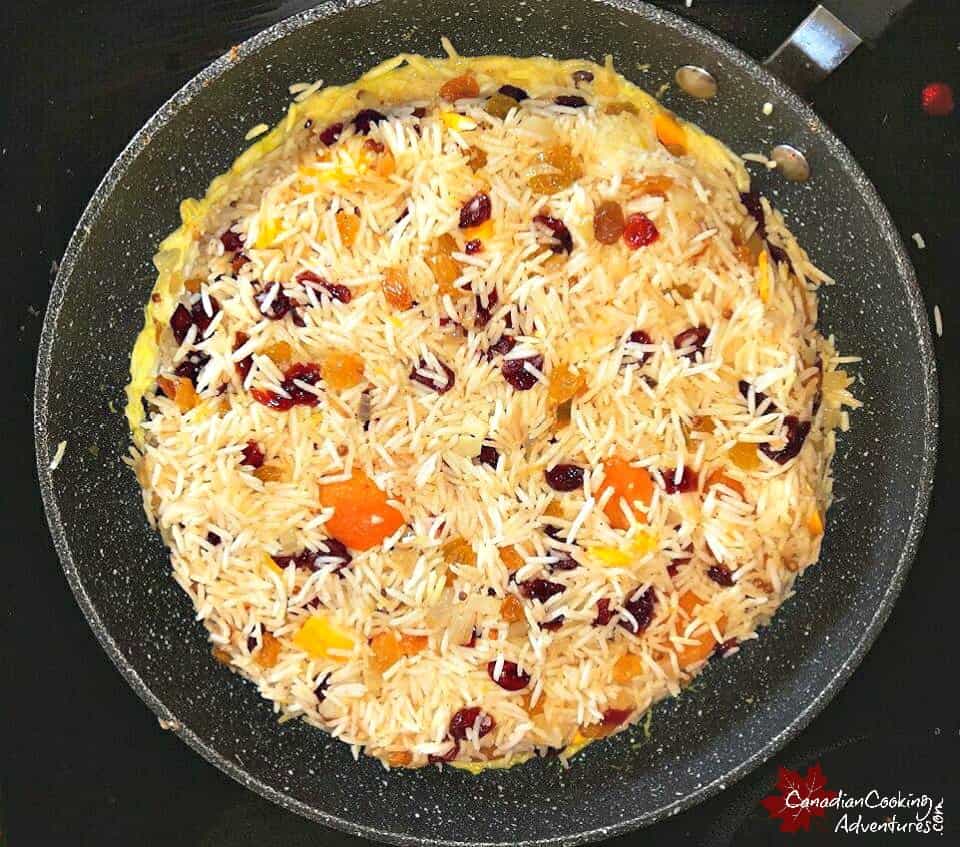
  • Use a rubber spatula to carefully push the rice away from the sides of the pot, scraping it up into a mound (leaving 1/2 a inch from the sides of the pan).
  • In the center of the mound, pierce 3 vent holes about an inch apart, with a knife to allow it to vent while cooking.
  • Pour the set aside saffron + butter mixture from step 1, over all the rice. And place a dry clean dishcloth over the pan and cover with a pot cover. Cook on medium low for 30 minutes till rice is tender.

To Finish the Dish:

  1. Turn heat off and allow it to sit there uncovered on the element for the remaining 10 minutes.
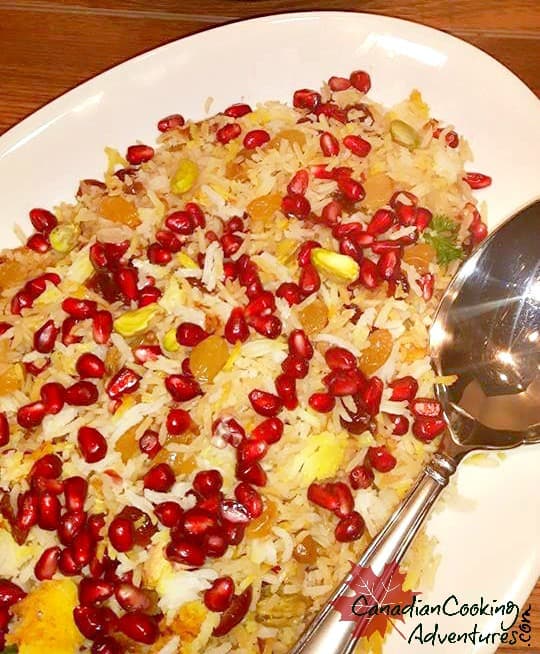
  2. Pour your rice onto a large serving plate and squeeze 2 tbsp of orange juice all over the rice.
  3. Sprinkle with pomegranate seeds and enjoy!

Thank you Hunter for all the hard work you did trying to find those Barberries but we will go with Cranberries for this recipe from now on. 


Note: Make sure not to skip the Yogurt as it helps the rice to cook properly. Saffron threads can be found in most Mediterranean or Middle Eastern markets. Typically Persian jewelled rice is served at weddings in Iran, along side


I am so thrilled you are reading one of my recipes, if you made this recipe id love to hear about it! You can post a review/picture below and let me know how it turned out. And by doing so you will be automatically entered into our seasonal CONTEST to win one of our great prizes. Winner will be notified via email within a week after the contest closes. Thank you very much for reading and until next time see ya in the kitchen. Don’t want to miss a recipe? Sign up for our NEWSLETTER delivered right to your inbox every Month!


Chicken Fajita Tortilla Soup (Slow Cooker)

This is a super simple way to make a fresh bowl of Tortilla Soup, really there is not much to it. 

Start by cutting up your chicken breasts into bite size pieces, and saute them till lightly browned.

Next all you have to do is add everything else into the slow cooker, and let it do it’s thing.

Just be sure not to skip on the important ingredients (see pictures) below and you soon too will be in Mexican soup heaven! Serve hot, and garnish with shredded cheese and top with tortilla chips.

Don’t have a slow cooker, this can be done on the stove top as well, just allow it to simmer covered on low for 1 hour. Provecho!


I am so thrilled you are reading one of my recipes, if you made this recipe i’d love to hear about it! Thank you very much for reading and until next time see ya in the kitchen. Don’t want to miss a recipe? Sign up for our NEWSLETTER delivered right to your inbox!


Ukrainian Borscht

Indulge in the rich and hearty flavors of authentic Ukrainian Borscht. Allow those delicious red beets come to life! And learn the secrets to creating a bowl of soup that will transport you directly to the heart of Ukraine.

Ukrainian Borscht soup can be also made with beef chunks if desired as well, You can find my recipe for Beef Borscht Soup here. 

Ukrainian Borscht soup is one of my favorite things to make going into the colder months. The bright red beets carry so many health benefits, it’s no wonder I feel so great after eating this. 

Traditionally borscht is made with chunks of beef, however you can omit that as I have in this recipe. I like this particular recipes because it REALLY highlight the beets and cabbage more than anything. 

I did make this soup with beef stock however as it does give a really nice broth however vegetable and chicken broth will work too. Whatever you have on hand!

CAN BORSCHT BE FROZEN

This recipe will make a fairly large pot of soup, so if you have any any leftovers “which is highly unlikely” then yes you can freeze it for another time. Think meal prep, make a big pot and store it away in the freezer for some healthy grab and go lunches!

HOW LONG WILL BORSCHT KEEP IN THE FRIDGE

Up to 5 days, the longer it is stored the deeper the flavors that will develop. However if you add meat to your soup, you will want to eat it up in 2 days.

WHO INVENTED BORSCHT 

Some people think Borscht soup originated in Russia, however it’s actually from the Ukraine. When searching the web and cook books, you will find there are several ways to make borscht.

I prefer it just like this, with my vegetables chopped up very finely as opposed to the chunky versions, after all this is a soup not a stew.

To do this you will want a food processor, which will saves you a ton of time otherwise you can use a grater to get the job done. Sunflower oil is traditionally used also, so if you have some on hand I recommend using it.

I hope you like this recipe for authentic borscht soup, it’s my favorite way to make it.  

Also you can save yourself allot of time and hassle by letting your food processor chop up your beets and cabbage. Also this will gives the soup a great consistency, leaving it very creamy vs chunky.

HOW TO MAKE BORSCHT SOUP

Borscht can be made several different ways, so it all comes down to personal preferences. But one thing is for certain, you want to use beets. Fresh is always best, however pre frozen can work too. 

Example: Borscht Soup can be made vegetarian or not. Also it can have cabbage, carrots, red beans and potatoes in it or not.

  • Can be made with large SLICES OF BEETS, see recipe here > Creamy Beet Soup
  • Can also be made with sausage, chopped potatoes and kidney beans, see that recipe here > coming soon.
  • Can be made with Beef, see that recipe here > Beef Borscht

Welcome to borscht heaven!

BORSCHT HOW TO SERVE

Serve alongside some crusty bread and  a dollop of sour cream if  desired! Fresh dill also goes very well in the soup or on top of each bowl served. 

Notes: Keep in mind, as with all my recipes. If you want to make more or less of this soup, simple adjust the serving size in the ingredients section above and the servings will automatically adjust for you.

Love BORSCHT?

Check out my other recipes here for Beef BorschtCreamy Beet Soup.

Love BEETS?

my Air Fryer Beets & my oh so popular Beet Feta Salad

I am so thrilled you are reading one of my recipes, if you made this, I want to see! Follow Canadian Cooking Adventures Instagram, snap a photo, and tag and hashtag it with @canadiancookingadventures and #canadiancookingadventures

Stay connected and follow along on FacebookPinterest, and Instagram for all of my latest recipes!

Cheesy Egg and Zucchini Scramble

We like to eat good when we are camping, can you tell? But we don’t like to spend the whole time cooking and cleaning up, so we try to make it as simple as possible. 

This whole breakfast can be made in one non stick pan and should take you less than 30 minutes to make give or take. 

Packed with so much fiber and protein this meal will be sure to satisfy any hungry camper.

Who said camping food has to be bland? This is fine dining if you ask me, try it yourself on your next camping trip and you decided if it’s a keeper and don’t forget to serve with some bread.


Note: If you’re camping   in bear country, take appropriate precautions to keep your campsite as unattractive to bears as possible. To do this simply purchase and properly use a bear-proof garbage container or ensure all your garage is placed in a sealed bin in your vehicle or at a designated dump once your done cooking, this helps keep our wildlife safe and you as well.


I am so thrilled you are reading one of my recipes, if you made this recipe id love to hear about it! You can post a review, picture below or via Instagram and let me know how it turned out. And by doing so you will be automatically entered into our seasonal CONTEST to win one of our great prizes. Winner will be notified via email within a week after the contest closes. Thank you very much for reading and until next time see ya in the kitchen. Don’t want to miss a recipe? Sign up for our NEWSLETTER delivered right to your inbox!


PIN IT FOR LATER

Flax & Quinoa Dressing (Stuffing)

This Flax & Quinoa Dressing is vegan since we are using vegetable stock vs chicken and omitting the eggs. 

Did you know that a stuffing that is not stuffed into a bird is called dressing? Some people like to make a dressing outside the bird and some like to make it inside the bird. It is completely up to you, however keep in mind the cooking times will vary. 

Today, I’m making a dressing and on occasion I will make this same dressing and stuff it inside a bird when baking a Turkey. You may find the dressing a bit dry when baking outside the turkey and in that case you can prepare a gravy on the side and serve it alongside if desired. 

I will do this sometimes if I want to serve turkey, because I just use the turkey drippings to make a perfect gravy. I find my Turkey cooks better without it stuffed inside anyway.

This dressing is so tasty, I could eat it all to myself. Now take note the dryer the bread the more tastier it will be also using a bread with other things in it only adds extra flavor. That is why I like to use Flax & Quinoa bread, which gives it a nice nutty flavor. 

However you can use any type of bread of course, just make sure it’s dried out some before you tear it apart to ensure the stuffing is not soggy. You can also add less or more celery/onions as well, depending on your preference.

This recipe makes enough for roughly four servings, so if you want to serve more people just add a few more bread slices and adjust the other ingredients according to your taste, there really is not much to it. Enjoy!

It’s going to be so GOOD!


Note: You can add flax seeds, diced apples, cranberries or sunflower seeds to this stuffing if you desire to make it more hearty.


I am so thrilled you are reading one of my recipes, if you made this recipe id love to hear about it! You can post a review, picture below or via Instagram and let me know how it turned out. And by doing so you will be automatically entered into our seasonal CONTEST to win one of our great prizes. Winner will be notified via email within a week after the contest closes. Thank you very much for reading and until next time see ya in the kitchen. Don’t want to miss a recipe? Sign up for our NEWSLETTER delivered right to your inbox!

PIN IT FOR LATER


Durban Mutton Curry

Are you a curry lover like me? If so then this Durban Mutton is sure to knock your socks off it’s that good. 

Durban Curry hails from a city inside South Africa, originally it was said that the East Indians where the ones to bring it over and the story goes that they were seen eating it often while on the work sites. 


I am so thrilled you are reading one of my recipes, if you made this recipe id love to hear about it! You can post a review, picture below or via Instagram and let me know how it turned out. And by doing so you will be automatically entered into our seasonal CONTEST to win one of our great prizes. Winner will be notified via email within a week after the contest closes. Thank you very much for reading and until next time see ya in the kitchen. Don’t want to miss a recipe? Sign up for our NEWSLETTER delivered right to your inbox!