Blueberry Avocado Breakfast Smoothie

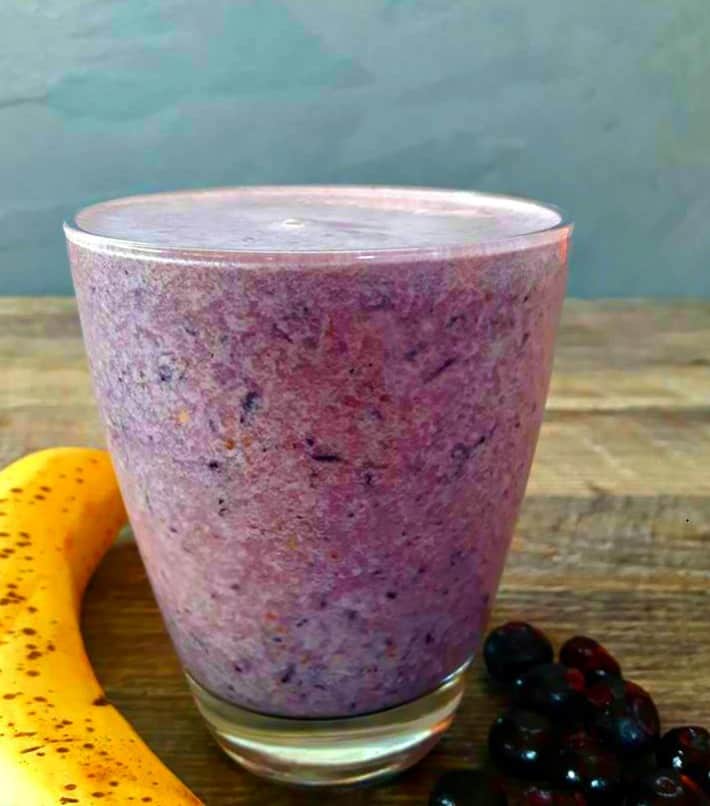
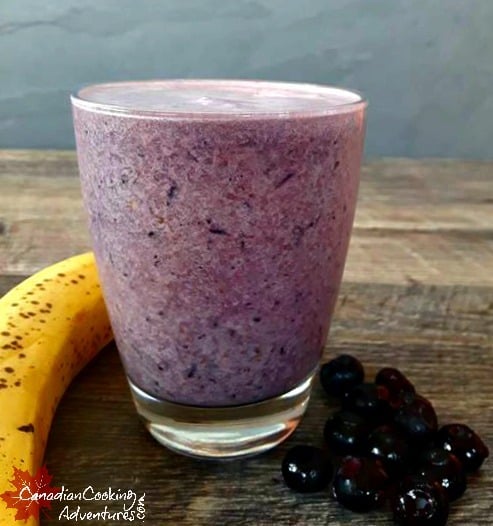
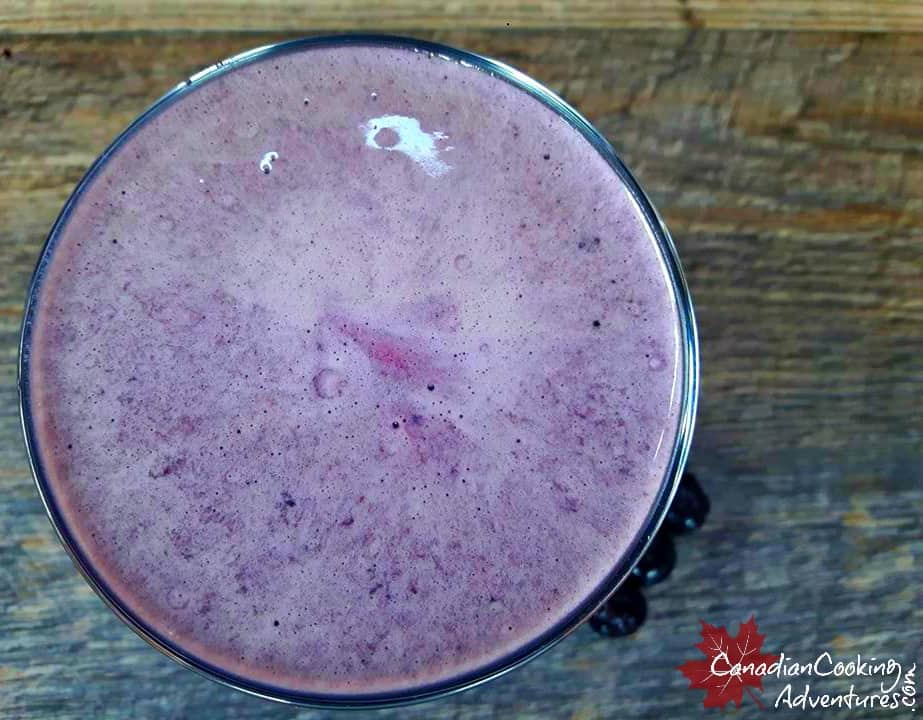
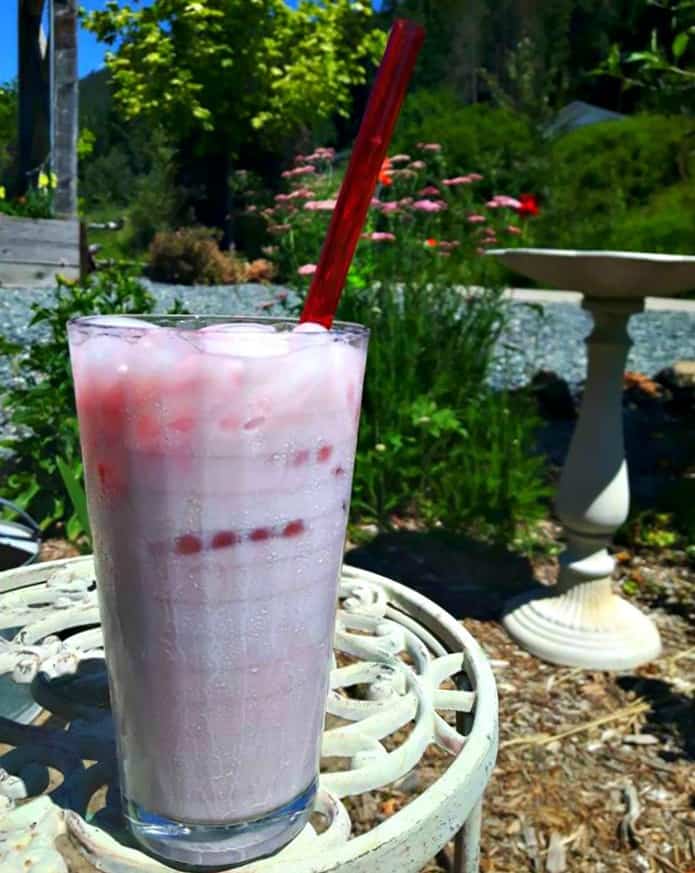
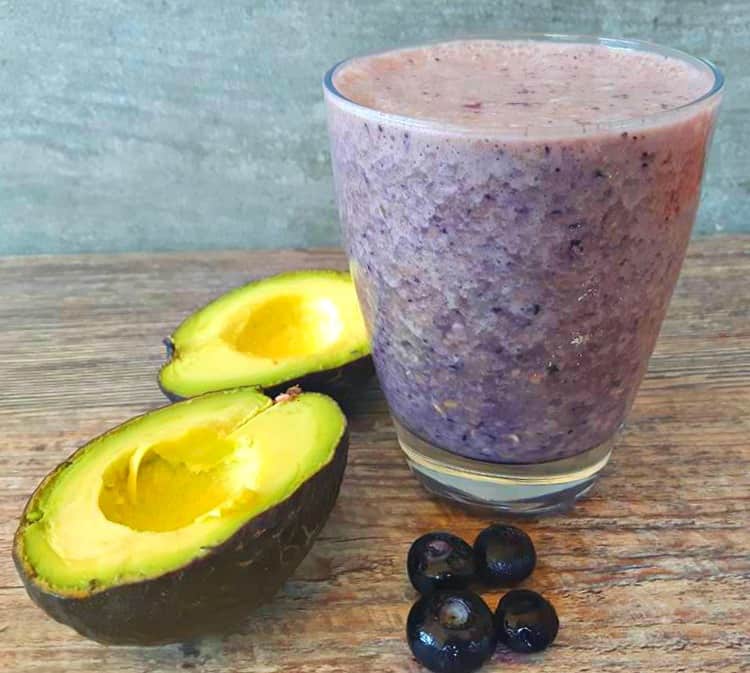
Here is another one of my favorite breakfast smoothies. What you will need to make this healthy breakfast smoothie is some unsweetened almond milk, frozen blueberries, a ripe avocado, prune yogurt, and a scoop of your favorite vanilla protein powder.

The prune yogurt gives it that sweet smooth texture so don’t skip it. This recipe makes enough for 2 medium sized smoothies.

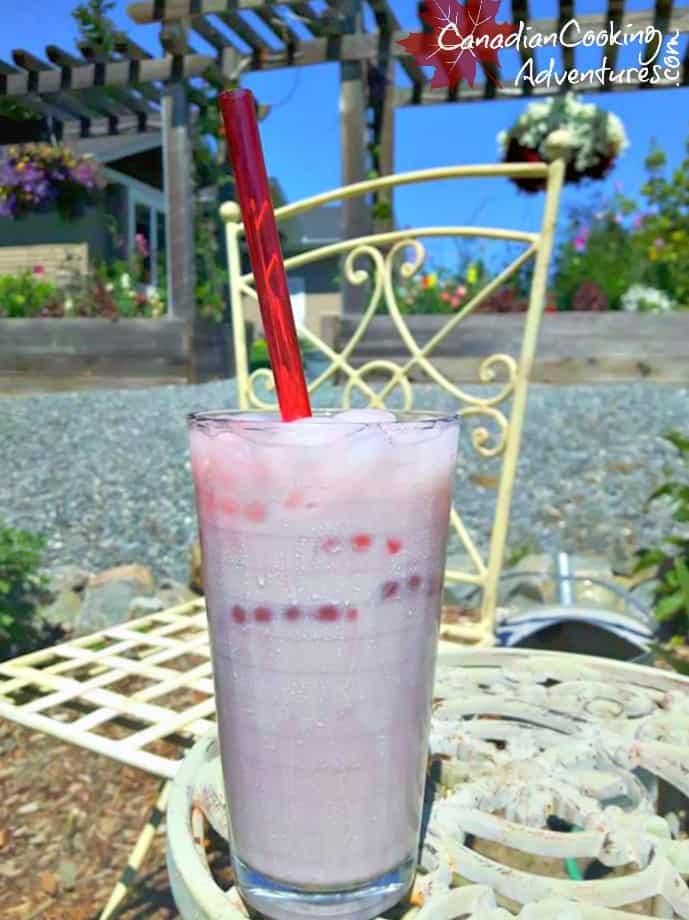
Start drinking this for breakfast every morning and watch your energy skyrocket and health improve. Save the bacon and eggs for those lazy weekends, everything in moderation is key to helping you feel your best. 

Note: You can add other fruits if you desire.


I am so thrilled you are reading one of my recipes, if you made this recipe id love to hear about it! You can post a review, picture below or via Instagram and let me know how it turned out. And by doing so you will be automatically entered into our seasonal CONTEST to win one of our great prizes. Winner will be notified via email within a week after the contest closes. Thank you very much for reading and until next time see ya in the kitchen. Don’t want to miss a recipe? Sign up for our NEWSLETTER delivered right to your inbox!

PIN IT FOR LATER

Garden Tomato Pie

It’s that time of year, where our gardens are bursting with tomatoes. So why not make a tomato pie? I love tomatoes, don’t you? I also have a pre-made pie crust in the freezer, so I thought why not make this delicious pie and share it with my readers. You can make your pie crust of course, or just buy a pre-made one and have this on the dinner table in under 45 minutes. It’s great for breakfasts or dinner and you can add any kind of tomatoes you like. Looking for a more vegetarian type tomato pie, simply omit the eggs and add some sauté asparagus it will be just as good.  I hope you give it a try, I’d love to hear how you liked it in the comments below!!

What you will need:

To make the Garden Tomato Pie:

  1. In a mixing bowl, combine the cheeses, sour cream, eggs, chopped green onion, mayonnaise, and whisk together till blended.
  2. Next, on cutting board slice garden tomatoes, pat dry with a paper towl to remove excess moisture
  3. Season generously with salt, pepper, thyme, basil.
  4. Pre-heat oven to 425F.
  5. Sprinkle a little flour on the pie shell, to ensure the shell.
  6. Then pour your cheese mixture into the pie shell and then top with you garden tomatoes, drizzle a little olive oil on top and season lightly with salt and pepper.
  7. Bake for 30 minutes until crust has completely browned and the tomatoes have roasted.
  8. Serve immediately, enjoy!

Note: You can pre-cook some bacon and crumble it over the pie if desired.


I am so thrilled you are reading one of my recipes, if you made this recipe id love to hear about it! You can post a review, picture below or via Instagram and let me know how it turned out. And by doing so you will be automatically entered into our seasonal CONTEST to win one of our great prizes. Winner will be notified via email within a week after the contest closes. Thank you very much for reading and until next time see ya in the kitchen. Don’t want to miss a recipe? Sign up for our NEWSLETTER delivered right to your inbox every Month!


Blueberry Banana Protein Smoothie

GOOD MORNING ? I want to share with you my favorite breakfast smoothie. All you will need to make this healthy breakfast drink is some, frozen blueberries, a fresh banana, flax and a scoop of your favorite vanilla protein powder. The banana gives it that sweet smooth texture so don’t skip it. This recipe makes enough for 2 medium sized smoothies. Start drinking this for breakfast every morning and watch your energy sky rocket and health improve.

What you will need: A good quality blender, I like to use my (Oster Pro Blender)


To make the Blueberry and Banana smoothie:

  1. Place your Frozen” Blueberries in the blender, flax, banana, protein powder.
  2. Blend until smooth!
  3. Serve immediately and enjoy!


Note: You can add other fruits if you desire.


I am so thrilled you are reading one of my recipes, if you made this recipe id love to hear about it! You can post a review, picture below or via Instagram and let me know how it turned out. And by doing so you will be automatically entered into our seasonal CONTEST to win one of our great prizes. Winner will be notified via email within a week after the contest closes. Thank you very much for reading and until next time see ya in the kitchen. Don’t want to miss a recipe? Sign up for our NEWSLETTER delivered right to your inbox!


Strawberry Milkshake (Kefir)

I’m a sucker for Strawberry milkshakes and so is my mom. I think between the both of us, we have enjoyed well over 1000 shakes together, that does not include apart. 

I like to brag these days that I like to enjoy a Strawberry Milkshake for breakfast. And that is the truth, and let me tell you I feel not one ounce of guilt. That’s because my Milkshake is super healthy for you, and does not compromise on taste.

The kefir gives it the right amount of creaminess we all crave and the fresh strawberries make it so fruity! So if you’re a sucker for Strawberry Milkshakes as well, then why not try this recipe out and let me know if you too could say goodbye those fattening shakes and say hello to the more healthy kefir shakes? 

I hope you enjoy like you’re a kid again! 


Go ahead an pour a Large Glass and RELAX!

Note: I like to put a fair amount of ice in mine, if you like it more creamy + add less.


I am so thrilled you are reading one of my recipes, if you made this recipe id love to hear about it! You can post a review, picture below or via Instagram and let me know how it turned out. And by doing so you will be automatically entered into our seasonal CONTEST to win one of our great prizes. Winner will be notified via email within a week after the contest closes. Thank you very much for reading and until next time see ya in the kitchen. Don’t want to miss a recipe? Sign up for our NEWSLETTER delivered right to your inbox!


Campfire Chili Poutine

This is one of our camping favorites and it’s really as easy as 1, 2, 3. As you may know Poutine originated in Quebec and has become popular Worldwide. It’s typically served with cheese curds and topped with hot gravy, I like to add chili to it when we go camping. To make this hearty recipe, all you need is some “french fries, canned chili and cheese”, Oh and you can’t forget the gravy. It may not look great but it sure is tasty, filling and is super easy to clean up. Just make sure you purchase the canned chili and gravy, after all this is camping and you want to make it as easy as possible. Also make sure to buy pre shredded cheese for this recipe too, think simple this is camping. Enjoy!

Camping Essentials:

To make the Campfire Chili Poutine:

  1. Lay out your tinfoil in two double layers for extra support.
  2. Cut open your bag of fries (its best not to use the skinny fries here) and pour them onto the tinfoil.
  3. Open your can of Chili, and your can of Gravy.
  4. Pour your Chili over the uncooked fries and then cover with  shredded cheese.
  5. Sprinkle with salt and pepper to taste and close up your package and allow it to cook on the grill for 30-40 minutes.
  6. Once your fries are half cooked, place your canned gravy on the grill and allow it to heat up. Make sure you open it prior to placing on the grill because it will be bubbling and hot once you remove it.
  7. Serve in the middle of the table with forks for all, and pour that hot gravy over-top.
  8. Enjoy!


Note: If you’re camping in bear country, take appropriate precautions to keep your campsite as unattractive to bears as possible. To do this simply purchase and properly use a bear-proof garbage container or ensure all your garage is placed in a sealed bin in your vehicle or at a designated dump once your done cooking, this helps keep our wildlife safe and you as well.


I am so thrilled you are reading one of my recipes, if you made this recipe id love to hear about it! You can post a review, picture below or via Instagram and let me know how it turned out. And by doing so you will be automatically entered into our seasonal CONTEST to win one of our great prizes. Winner will be notified via email within a week after the contest closes. Thank you very much for reading and until next time see ya in the kitchen. Don’t want to miss a recipe? Sign up for our NEWSLETTER delivered right to your inbox!

Blueberry Banana Oatmeal Pancakes

Honestly I am not a huge pancake fan, but Jason is. He requests pancakes at least once a month and I always give in and make him a batch usually on those lazy Saturday mornings. The main reason I’m not a huge fan of pancakes is probably because after eating them you just feel even more lazy. All that flour and sugar can be intoxicating. So i decided to try something different and came up with this much more healthy alternative to those boxed pancake mixes everyone is so accustom to. I omitted the eggs and substituted them for ground flax and water. If you prefer eggs, go ahead. Now i can say these pancakes are made allot more often in our home, and that’s because its packed full of healthy ingredients.

What you will need: A non stick frying pan, I like to use my Heritage The Rock Non-Stick Frypan, 10″ / 26cm and large Spatula along with an ice-cream scooper.

To make Blueberry Pancakes

  1. In a large bowl, mash 3 medium sized bananas. 
  2. Add in your vanilla, blueberries, oatmeal and mix to combine
  3. Heat your pan to medium heat and scoop two scoops per pancake of batter into pan.
  4. Cook for 3 minutes on each side, until golden brown on one side. “Watching carefully” for bubbling and that they are browning on one side before flipping over to cook on the other side.  
  5. Once cooked, plate and top with granola and the left over blueberries, then drizzle with maple syrup before serving.

Notes: They are more fragile than regular pancakes, and require careful lifting onto the spatula when turning. Make sure your using a non stick pan otherwise they will fall apart when turning over.

I am so thrilled you are making one of my recipes, if you made this recipe id love to hear about it! You can post a Review, Picture below or via Instagram and let me know how it turned out. And by doing so you will be automatically entered into our seasonal CONTEST to win one of our great prizes. Winner will be notified via email within a week after the contest closes. Thank you very much for reading and until next time see ya in the kitchen. Don’t want to miss a recipe? Sign up for our NEWSLETTER delivered right to your inbox!

Simple Walnut Granola Bars (No Bake)

So many granola bars types out there today on the market, MOST contain a bunch of sugar and OTHER fillers. And are no where as good for you as these homemade! I have tried a few recipes throughout the years,  trying to prefect the best bar. Not to CHEWY but not to HARD and I found for this TYPE of recipe simple is Best. These no sugar bars can be made with just 5 ingredients, cost half of what the store bought variety would and take less than 10 minutes to prepare.  With just some good old ingredients of “Oatmeal, Honey, Coca powder, Walnuts and your favorite Peanut butter variety, you to can enjoy homemade Granola bars too. I like to use Organic peanut butter with chia seeds in it, its less sweet than regular peanut butter, but the type you use is completely up to you but its best to use one without  all the added oils & sugar.  Whipping these up on a lazy Sunday is best BECAUSE you can store them covered in the fridge for an easy Quick on the Go breakfast throughout the week. Or if your heading into the great outdoors these can be excellent for that kind of adventure. Me and Jason, tend to eat one a day and so they go by end week!

Kitchen Essentials:

To make the Walnut Granola Bars:

  1. make the Walnut Granola Bars:
    1. In a large bowl add in your honey and peanut butter mix till creamy.
    2. In a small bowl mash half the banana and pour that into your peanut butter and honey mixture.
    3. Then add in your oats, coca powder and walnuts and mix till everything is combined.
    4. Press the granola bar mixture into a medium sized pan lined with tinfoil and press it till its flat and compact.
    5. Put in the fridge for a min of 1 hour and then cut into bars before serving.

Additions: Chia seeds, Flax Seeds, Dried fruit, Chocolate chips, any kind of nuts, etc

Note: Store covered in the fridge for up two a week or pack some outdoor adventure.


I am so thrilled you are reading one of my recipes, if you made this recipe id love to hear about it! You can post a review, picture below or via Instagram and let me know how it turned out. And by doing so you will be automatically entered into our seasonal CONTEST to win one of our great prizes. Winner will be notified via email within a week after the contest closes. Thank you very much for reading and until next time see ya in the kitchen. Don’t want to miss a recipe? Sign up for our NEWSLETTER delivered right to your inbox every Month!


Parmesan Roasted Carrots

I just love carrots, but that wasn’t always the case. I guess it’s because I grew up eating them the wrong way, boiled and tossed in butter after. Boring! 

So there was a time that I hated carrots, so much so that I never bought them in my adult years at all.

But I knew I had to find a way to eat them since they’re packed with beta-carotene a vitamin that is very important to have in your diet according to the eye doctors.

Not to mention the fiber along vitamin A, Vitamin C, Vitamin K, vitamin B8, folate, potassium, iron, copper, and manganese, proves just how important it is to get this vitamin rich food in your diet as much as possible.

This recipe is super simple, you don’t even have to peel the carrots if you don’t want too. However if you decide to, they can be a good thing to add to your dog’s next meal.

To make this simple side, you will want to wash the carrots well then chop off the ends, and lay them out on a non stick pan.

Drizzle all over with olive oil and a few tsp of butter, along with thyme, basil and oregano and parmesan cheese then let your oven do it’s thing. Serve as a side dish to any meal, goes great during the holidays too! 

If you are peeling your carrots, then don’t waste those Nutritious peels, save them and top your dogs next meal with them for a couple of days of added nutrition!! Carrot peels contain an excellent source of Fiber and Vitamins. Read more about the benefits here Benefits Of Carrots For Your Dog

ALSO here is an excellent recipe for Homemade Air Fryer Oatmeal, Corn and Carrots dog treats! That your dog is going to love. 

I am so thrilled you are reading one of my recipes, if you made this recipe i’d love to hear about it! You can post a review, picture below or via Instagram and let me know how it turned out. Thank you very much for reading and until next time see ya in the kitchen. Don’t want to miss a recipe? Sign up for our NEWSLETTER delivered right to your inbox every Month!