Frozen Pumpkin No Bake Cheesecake

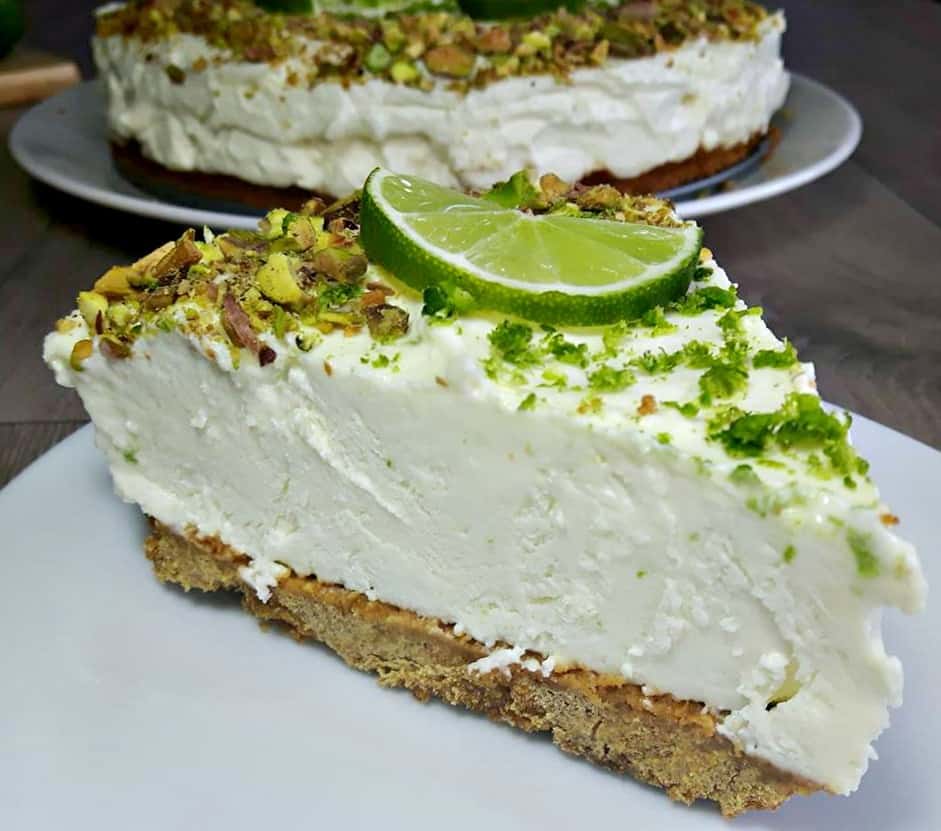
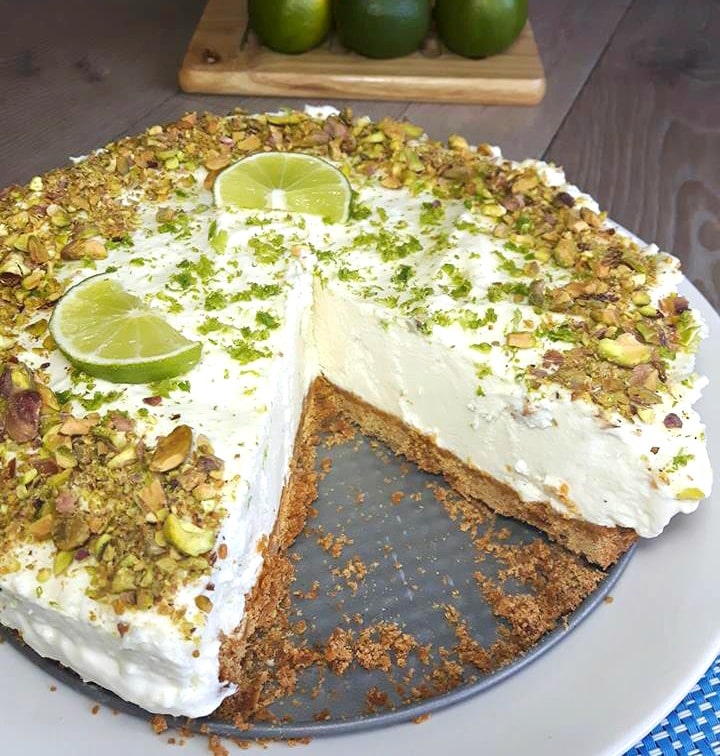
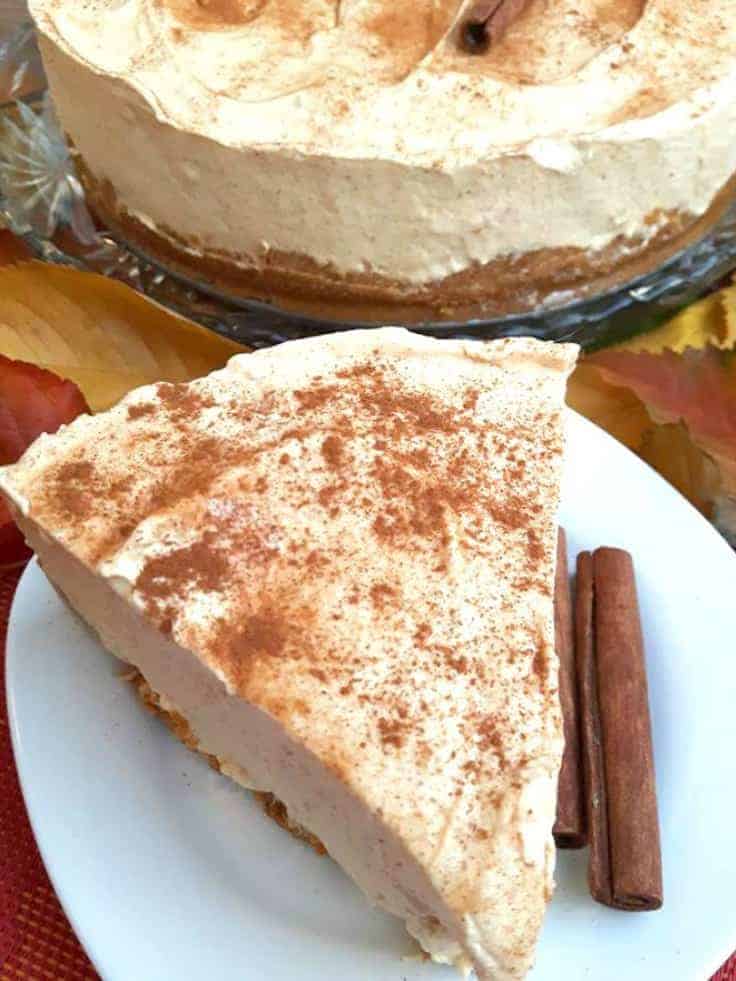
This Frozen Pumpkin No Bake Cheesecake is the perfect cheesecake recipe for those upcoming holiday get togethers such as Halloween, Thanksgiving or Christmas. Where you just want to serve something festive and different that the average pumpkin pie. 

This frozen spiced pumpkin cheesecake is just one of those recipes that everyone should have in their freezer around the holiday season.

Think Thanksgiving and Christmas or if you just love pumpkins and cheesecake then this recipe can really be enjoyed any time of the year.

Seriously it doesn’t get any more delicious than this dessert and trust me it’s pretty easy to make.

So go ahead and serve this to your guests and family and watch them beg for this recipe.

HOW TO MAKE A Frozen Pumpkin No Bake Cheesecake

TO MAKE THE FROZEN SPICED PUMPKIN CHEESECAKE CRUST:

  1. Start by making your base/crust, in a large bowl place your graham crackers, brown sugar and melted butter. Mix this together with a spoon and then use your hands to press it together so it sticks. Lightly oil your cheesecake pan and then place your graham cracker crust inside. Press firmly down to create your crust.

NO-BAKE GRAHAM CRACKER CRUST:

  1. Chill pie crust for at 30 minutes prior to filling. Prior to serving, rub the outside and bottom of the cheesecake pan with a wringed out hot cloth this helps to release the pan from the crust.
  2. Baked graham crust: Preheat oven to 325°. Bake crust for 10 minutes, cool completely before filling.
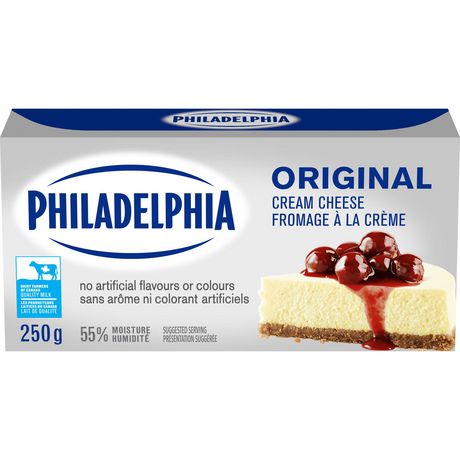
  3. Add 2 packages of cream cheese to a large bowl and with your hand held blender whisk in a can of condensed milk, whipped cream and vanilla extract. Blend till smooth, be careful to not over blend.
  4. Pour over your crust slowly then chill in the freezer anywhere from 6 to 24 hours.

FINISHING THE CHEESECAKE:

  1. Once your cake is absolutely cold, release the cheesecake from the pan slowly.
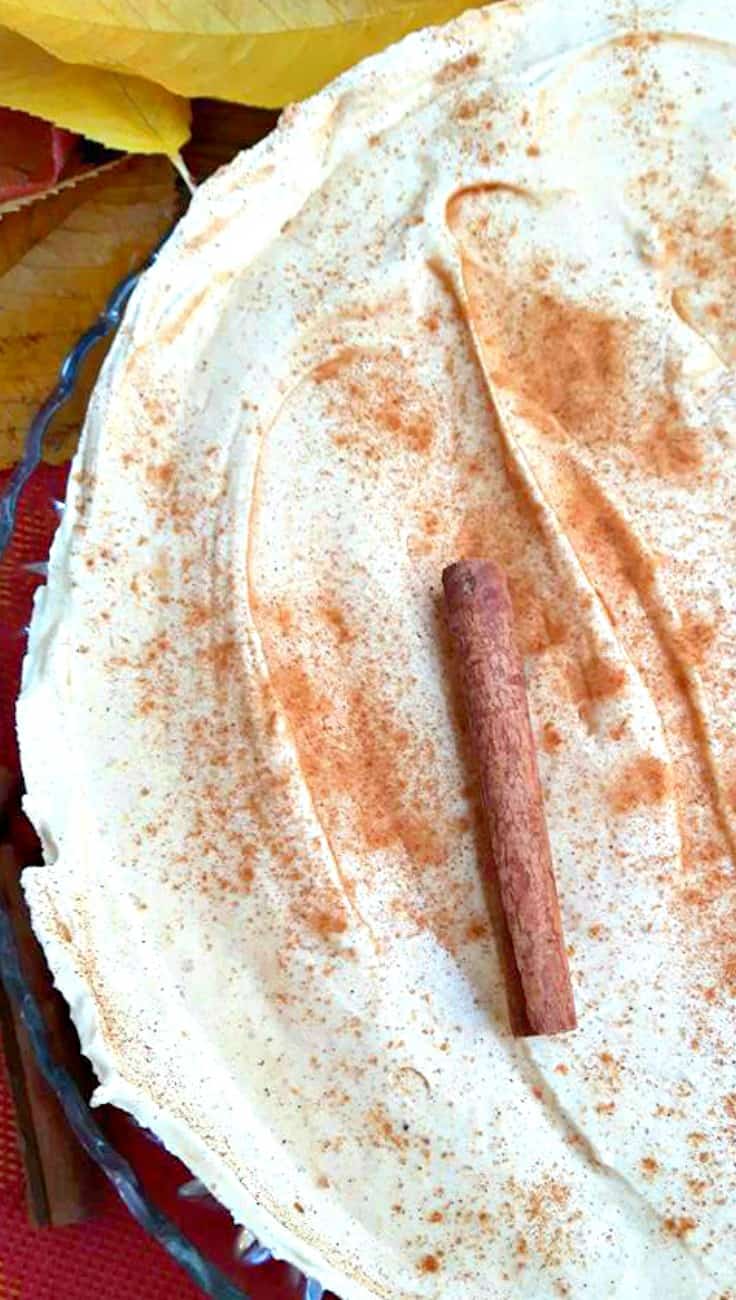
  2. Sprinkle some cinnamon sugar over top
  3. Cut and allow to defrost for roughly 20 minutes, enjoy!

What better way to celebrate fall in the kitchen than with a Spiced Pumpkin Cheesecake?

This Cheesecake will have you and those who get a chance to have a slice wanting more. And the nice thing is this 8″ inch cake can serve 12 people easily.

Since this is a no bake cake, you are going to want to prepare it the day ahead. Then allow it to set in the freezer for at least 6 hours prior to serving.

Tucker, you can serve it with a dollop of freshly whipped cream on the top prior to serving if desired.

However the rest of the Canadian Cooking Adventures team thinks it’s best with just a sprinkle of cinnamon on top, so we will leave that up to you.

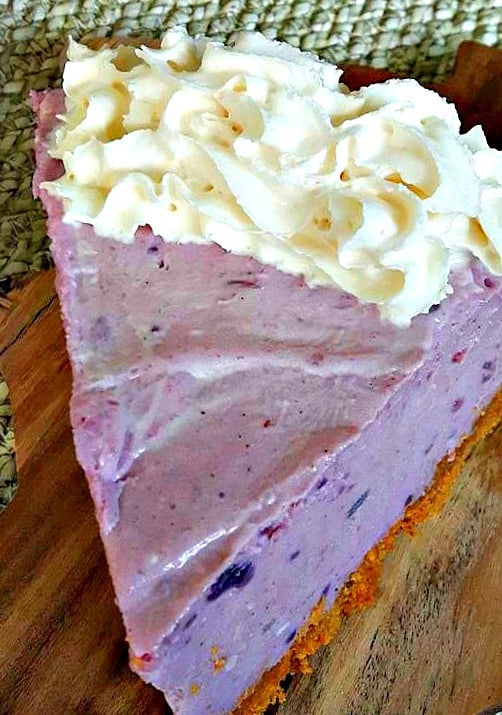
This is the most creamy and tasty cheesecake, perfect for the holidays!

Also be sure to use “pumpkin puree” not “filling”, there is big difference here.

For this recipe, I used 1 1/2 cups of graham cracker crumbs, because I really like a thin crust however most recipes will call for 2 cups which makes a slightly thicker crust.

If you prefer a thicker crust then use the 2 cups.

Note: You can put a dollop of whipped cream on top. Place your cake back in the freezer or it will melt this cheesecake is best chilled frozen.

Inspired by: Chelsea’s Messy Apron ~ Frozen Pumpkin Pie Cheesecake

I am so thrilled you are reading one of my recipes, your visits and your comments are greatly appreciated. Thank you very much for reading and until next time see ya in the kitchen. Don’t want to miss a recipe? Sign up for our NEWSLETTER delivered right to your inbox!

Christmas Cheesecake

This Christmas Cheesecake is the perfect addition to your holiday celebrations! 

The Christmas Holidays are here once again! 

And boy oh boy am I excited! The holidays mean different things to different people, but I think we can all agree that it’s a time to rest and hopefully relax spending some quality time with those we love. And I hope this cheesecake may just be that one thing that helps with that.

CHRISTMAS CHEESECAKE NO BAKE

This cheesecake here is a no bake cheesecake, just so you know!

That means the only thing that is being cooked is the gram cracker crust, the rest is frozen prior to serving! 

WHY IS IT PURPLE

You may be thinking, how did you get that cheesecake purple? And is it even healthy! The answer to that is yes, it is healthy.

And it is made with purple yams.

If you have never cooked with purple yam before, trust me it is not hard.

It is like cooking any other yam actually. 

HOW TO PURPLE YAMS TASTE

You’re probably wondering if purple yams taste good in a cheesecake right? Well I assure you they do, purple yams are often cooked in cakes in the Philippines. And are a bit sweet and make for an excellent addition in a cheesecake. 

In the Philippines this cheesecakes is actually known as “Ube”.

Purple yams are packed with vitamins, such as A, C and are a good source of copper, dietary fiber, vitamin B6, potassium and iron.

And are known to improve blood sugar regulation and some studies have discovered significant antibacterial and antifungal properties.

HOW DOES A PURPLE YAM LOOK COOKED

HOW TO MAKE CHRISTMAS CHEESECAKE

  1. Start by making your base/crust, in a large bowl place your graham crackers, brown sugar and melted butter. Mix this together with a spoon and then use your hands to press it together so it sticks.
  2. Lightly oil your cheesecake pan and then place your graham cracker crust inside. Press firmly down to create your crust. No-bake graham cracker crust: Chill pie crust for at 30 minutes prior to filling. Prior to serving, rub the outside and bottom of the cheesecake pan with a wringed out hot cloth this helps to release the pan from the crust. Baked graham crust: Preheat oven to 325°. Bake crust for 10 minutes, cool completely before filling.

FILLING:

  1. Wash and cut your yams into bite size pieces and boil in a pot of water till tender.
  2. Strain your yams and allow to cool. Once your Purple Yams have cooled, mash them in a large bowl till smooth.
  3. Then add 2 packages of cream cheese and with your hand held blender whisk together till smooth. Add in your condensed milk, nutmeg and ground cinnamon. Pour over your crust slowly then chill in the freezer anywhere from 6 to 24 hours.

FINISHING THE CHEESECAKE:

  1. Once your cake is absolutely cold, release the cheesecake from the pan slowly.
  2. Add more whipped cream around the cake to decorate!
  3. Cut and allow to defrost for roughly 20 minutes, enjoy!
  • I like to use an 8″ inch cheesecake pan for this recipe which gives you a thick cheesecake as seen in the pictures below, which can serve 12 people.
  • If you prefer a thinner cheesecake, you can then use a 9″inch cheesecake pan. Really there is not much to it, besides boiling some purple yams, preparing your crust and whip up some cream cheese, along with whipped cream to give it the perfect lightness that makes this dessert so decadent!

Be sure not to skimp on the “whip cream” here because it really makes this cake come together perfectly.

If that is not more reason to enjoy them this holiday season in a cheesecake then I don’t know what is!

Wishing you and yours Happy Holidays!

Note: Place your cake back in the freezer or it will melt this cheesecake is best kept chilled. If you like a thinner graham cracker crust, feel free to use 1 1/2 cups of crushed crackers instead of 2.

I am so thrilled you are reading one of my recipes, if you made this recipe i’d love to hear about it!  Thank you very much for reading and until next time see ya in the kitchen. Don’t want to miss a recipe? Sign up for our NEWSLETTER delivered right to your inbox!

Grilled Cheese Tomato Tortellini Soup

This Grilled Cheese Tomato Tortellini Soup is super tasty and simple to make. If you like grilled cheese sandwiches then your going to love this soup!

I grew up eating grilled cheese sandwiches, I have no idea how many I have eaten in my adolescent years. But I’m guessing hundreds if not… dare i say thousands.

I mean what kid doesn’t like a grilled cheese sandwich? Now that I am grown, I like to experiment with lets say, more sophisticated recipes. You know so that my family thinks my tastes have evolved. 

This soup really satisfies my craving for a grilled cheese sandwich, which i admit comes on now and again. If you have kids, I can only imagine how much they would love this soup!

Also keep in mind, as with all my recipes. If you want to make more or less of this soup, simple adjust the serving size in the ingredients section above and the servings will automatically adjust for you. This soup can store in the fridge for up to 3 days and or freeze for up to 3 months.

Over the years I have made this soup a few different ways and found this recipe to sure hit the spot. Actually the day I discovered “Passata Sauce” is the day I started experimenting with homemade tomato soups.

So what is Passata Sauce?

Passata Sauce is the base for all Italian tomato sauces, it is uncooked tomato puree without seeds or skins. Essentially, it is tomato sauce in its rawest form. Of course you can always use fresh tomatoes by blending them into a puree in the blender as well. Totally up to you!

Then to add a bit more of a tomato base, I will use a can of tomato paste which blends out well when added to the vegetable stock.

Serve this alongside a grilled cheese sandwich and you will be in HEAVEN!

And without further adieu the secret ingredient is Philadelphia Cream Cheese!

Liked this recipe? Try my “Tomato Soup” it is delizioso as too! 

Will you give this recipe a go? You can rate this recipe by posting a review below, I would love to hear from you. Thank you very much for reading and until next time see ya in the kitchen. 

Don’t want to miss a recipe? Sign up for our NEWSLETTER delivered right to your inbox!


I am so thrilled you are reading one of my recipes, if you made this recipe i’d love to hear about it! Thank you very much for reading and until next time see ya in the kitchen. Don’t want to miss a recipe? Sign up for our NEWSLETTER delivered right to your inbox every Month!


PIN IT FOR LATER

Red Velvet Parfaits

Hello friends, Canada day is just right around the corner and i’m so excited!! 

This is by far my favorite time of year, people are out and about enjoying the nicer weather and community events are happening everywhere. 

And the biggest celebration of the year besides New Years is about to happen. I wanted to create something special for my guests that are coming over in the next few days.

So I decided to take the typically a red velvet cake to a new level and created four of these decadent red velvet parfaits that highlight the red and white colours of our flag.

These parfaits are just perfect for Canada day, however they can also be made for Valentines day to.  A super simple to make dessert that is sure to impress any guests you may be serving this too. 

To make this you will want to start by washing and putting the cherries.

Once that is done you will want to bake the cake, cool it and cube it.

You can prepare the Whipped Cream Cream Cheese Frosting by whipping the whipped cream to stiff peaks.

Then in another bowl make the cream cheese frosting.

Once those two have been whisked you will fold both the mixtures together which will create the most tasty Whipped Cream Cream Cheese Frosting that will be placed into the parfits.

Fresh lambert cherries, red velvet cake and a decadent whipped cream cheese frosting is what makes these so special.

I used a easy to bake red velvet cake mix where i just added eggs, water and oil. Of course you can make your red velvet from scratch if you have a favorite one in mind.


Key Lime Cheesecake – No Bake

Today I’m sharing with you this amazing recipe for a Key Lime CheesecakeEverybody loves cheesecake so it’s always a dessert winner if you ask me. 

I usually add whip cream to the top of this cheesecake as well. 

However the holidays are right around the corner and I thought why not make it festive by adding some Pistachios crumbled on top instead.

Doesn’t it look so fancy? 

WHAT DOES KEY LIKE CHEESECAKE TASTE LIKE

Just like the key lime pie only in a cheesecake.

So if you love cheesecake and love key lime pie you are sure to love this recipe which combines both cakes into one amazing cake.

IS KEY LIME CHEESECAKE GOOD

Yes it is one of my favorite cheesecakes ever! Then next to this cake, would be my other favorite cheesecake which is also on this blog.

Try it if you can, Cherry Cheesecake! 

The first time I tried Key Lime pie was at one of our local restaurants a few years back, my first thought was how come I have not tried this sooner.

Maybe it’s because I live in Canada where it’s more cold than warm.

But really that is not any kind of good excuse, I was immediately a hooked the first time I tried it.

So much so that I make it quite often now and even have a great recipe for the pie on this blog too, so go check it out!

CAN KEY LIME CHEESECAKE BE FROZEN

YES, you can freeze any type of cheesecake. Just be sure to wrap it tightly with aluminum foil or freezer wrap. 

I just love no bake cheesecakes!!

If you have not tried one before, then I encourage you to give it a go.

This is a no bake cheesecake, has a graham cracker crust, and is filled with cream cheese, condensed milk, vanilla extract and a little sour cream, oh and the juice from 10 limes, can’t forget the most important part.

I used a 8 inch cheesecake pan, this is the size I like most because it gives you a more taller and thicker cheesecake which can serve 12 people.

There really isn’t much to this recipe, just follow the basic steps below and you will have the most amazing Key Lime and pistachio cheesecake ever.

The awesome part about this cake is that you won’t have to spend all day in the kitchen baking, it really takes less than an hour to prepare.

Then the rest of the time is spend in your freezer, setting.

Also make sure you defrost the cheesecake for anywhere from 20 – 30 minutes on the counter prior to slicing and serving. 

This way you will have a creamy cheesecake, he really likes it creamy.

HOW TO MAKE A KEY LIME CHEESECAKE

  • You will want to start by either making the crust from scratch or buying a pre-made one. I highly recommend doing it from scratch though as it is not only simple to do but tastes way better. 
  • Then you will want to make the filling  – (see recipe below for those institutions)
  • The then topping – (see recipe below for those institutions)
  • Once it’s on the serving tray, sprinkle around the outer edge with the crushed pistachios.
  • Set cheesecake on the counter for another 20 minutes and then slice and serve. Enjoy!

During the defrosting time you can start to decorate it with the lime zest and pistachios.

Simply leave the cheesecake in the cheesecake pan on the countertop, and zest one lime overtop, release the cheesecake half way through defrosting and be sure to keep the metal bottom on in tack.

This ensures the cake stays together during serving, simply sparkle your crumbled pistachios over the out part of the cake prior to serving.

I think this cheesecake could be a staple at any holiday event, because I have yet to find someone who doesn’t love the fresh taste of key lime in their dessert.

Don’t forget the limes and zest!

Sprinkle the crushed Pistachios around the cheesecake rim like this, add as much as you want. 

Soley remove it from the cheesecake pan, keeping the metal bottom on for serving to help keep it intact.

That’s all folks, what a fresh and creamy cheesecake, enjoy!

Notes: You can skip the pistachio topping and add whip cream if desired. This cheesecake typically will make 12 slices, ruffly this thin. If you want thicker this will easily serve 8.

If you love Key Lime flavors, then be sure to try my other key lime inspired recipes!

I am so thrilled you are reading one of my recipes, if you made this recipe i’d love to hear about it! Thank you very much for reading and until next time see ya in the kitchen. Don’t want to miss a recipe? Sign up for our NEWSLETTER delivered right to your inbox!

Cherry Cheesecake

This No Bake Cherry Cheesecake is simply my favorite way to eat a Cherry cheesecake. 

I have brought this cheesecake over to a few friends and family, and everyone says the same thing = YUM! 

I have had people begging me for the recipe, and believe me when I say.

There is no other Cherry Cheesecake that I have tried, that even compares to this nothing.

Maybe I am bias because I do love fresh cherries so much or maybe it’s true, I’ll let you be the judge of your creation.

Because you don’t live near a bakery doesn’t mean you have to go without cheesecake. ~ Hedy Lamarr

But let me tell you, no store bought or restaurant made has ever impressed me like this recipes does.

It probably has a whole lot to do with those cherries you see on top, as they do not come from a tin can.

That would be just wrong!

WHAT IS CHERRY CHEESECAKE

  • It is a basic cheescake that is topped with fresh cooked cherries. 

IS CHERRY CHEESECAKE GLUTEN FREE

No, the Graham Cracker crust has gluten. 

These cherries are fresh, making every bite unbelievably decadent.

Some people like a lot of cherries on their cheesecake, while others like very little.

I am on the “like a lot side”, I mean a lot!

HOW TO MAKE CHERRY CHEESECAKE 

If you are using frozen cherries, keep in mind that you will need to drain them well so you don’t get an overly watery topping.

As for the crust you can bake it or allow it to chill in the fridge prior to filling, both methods will be provided to you below in the recipe card. 

  • I use 3 cups of cherries for a 8 inch cheesecake.
  • if you’re wanting less cherries, then use 2 cups or you can use a 9 inch cake pan for a larger cake.
  • First, you will start by making the crust.
  • Then the cream cheese filling
  • Lastly, you will cook the cherries on the stovetop. Then allow it to cool down before topping the cheesecake with them. 

I hope you enjoy this dessert as much as we do.

Note: Place your cake back in the freezer or it will melt,this cheesecake is best chilled frozen.

I am so thrilled you are reading one of my recipes, if you made this recipe i’d love to hear about it! Thank you very much for reading and until next time see ya in the kitchen. Don’t want to miss a recipe? Sign up for our NEWSLETTER delivered right to your inbox!


Red Velvet Ice Cream

Are you as BIG of a Red Velvet Fan as me? Well then, you’re in for treat! I’m finally ready to share my family’s favorite recipe for Red Velvet ICE CREAM!! 

You cannot find this in stores guys, it only can be made in your kitchen. And your going to want to keep it under wraps, because it will be gone in no time.

Anyone who has ever tasted this ice cream has gone nuts. And rightfully so, it’s the BEST Red Velvet ice cream out there. And I’m so proud to say that I have come up with it. 

Because ice cream machines vary between 1 and 2 quarts capacity, I have create this recipe for my 2 quart machine. If your wanting only 1 quart of ice cream, just simply DIVIDE the recipe in half or use a 1 quart machine. 

The machine I used is listed below in my amazon picks, it’s the best. If you end up giving it a try I would love to know what you think, let me know in the comments below. 

If you’re having a gathering and would like to serve this to your guests, then why not bake an extra “Red Velvet Cake”. Serve each guest with one slice of cake and one scoop of ice cream. Makes about fourteen ½-cup servings.

I am so thrilled you are reading one of my recipes, if you made this recipe i’d love to hear about it! You can post a review/picture below or via Instagram and let me know how it turned out. Don’t want to miss a recipe? Sign up for our NEWSLETTER delivered right to your inbox!


Pistachio Cheesecake

What better way to celebrate the holidays than with this Festive No Bake Pistachios Cheesecake that is topped with pomegranate fruit.

Just image serving this no bake pistachio cheesecake at your next Christmas gathering!

It is not only super festive its unique and sure to be a center at the dessert time.

It has a shortbread and graham cracker crust and is filled with pistachio pudding and heavy whipping cream and of course cream cheese. 

There really isn’t much to this recipe.

Simply  follow the basic steps below and you will have the most amazing pistachio cheesecake to serve your guests this year or every year.

This Cheesecake will have you and those who get a chance to have a slice wanting more, nice thing is this 8″ inch cake can serve 12 people.

And you won’t have to spend all day in the kitchen baking, because let’s be honest it’s the holidays and time is short.

Since this is a no bake cake, you are going to want to prepare it the day ahead, then allow it to set in the freezer for at least 6 hours prior to serving.

Indie, says make sure you defrost the cheesecake for anywhere from 20 – 30 minutes on the counter prior to slicing and serving. This way you will have a creamy cheesecake, she really likes it creamy. During the defrosting time, you can start to decorate it with the pistachios and pomegranate seeds.

Simply leave the cheesecake in the cheesecake pan on the countertop, and start by placing your seeds all around the outside covering the rims with seeds.

Then crush up the pistachios with a large knife, and sprinkle all over the top. Once the cake is defrosted fully, remove the cheesecake pan and slice to serve.

This frozen cheesecake is just one of those recipes that everyone should have in their freezer around the holiday season. Enjoy!

Everybody loves cheesecake so it’s always a dessert winner.

If you like Pistachios you are going to love the taste of this cheesecake!

Because it’s packed from within and without with Pistachio flavor.

The addition of pomegranate seeds creates the best combination of flavors.

I am so thrilled you are reading one of my recipes, if you made this recipe i’d love to hear about it! You can post a review, picture below or via Instagram and let me know how it turned out. Thank you very much for reading and until next time see ya in the kitchen. Don’t want to miss a recipe? Sign up for our NEWSLETTER delivered right to your inbox!