Flax & Quinoa Dressing (Stuffing)

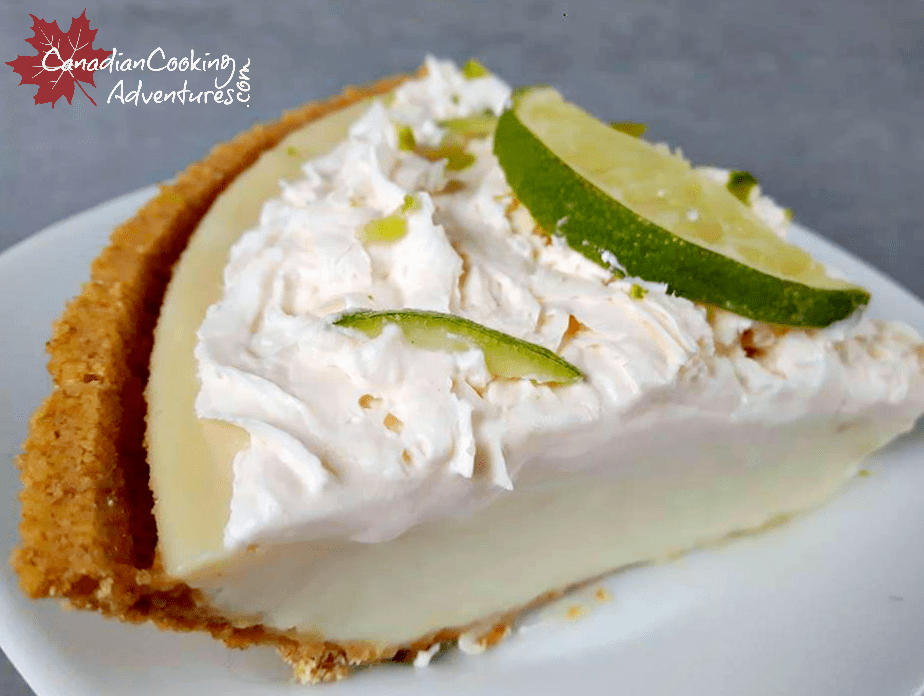
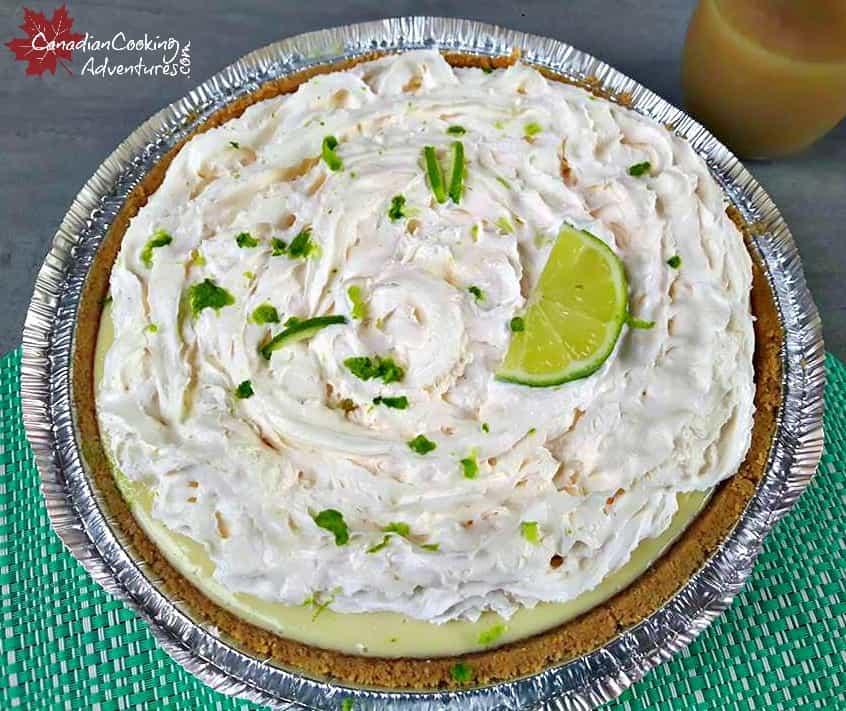
This Flax & Quinoa Dressing is vegan since we are using vegetable stock vs chicken and omitting the eggs. 

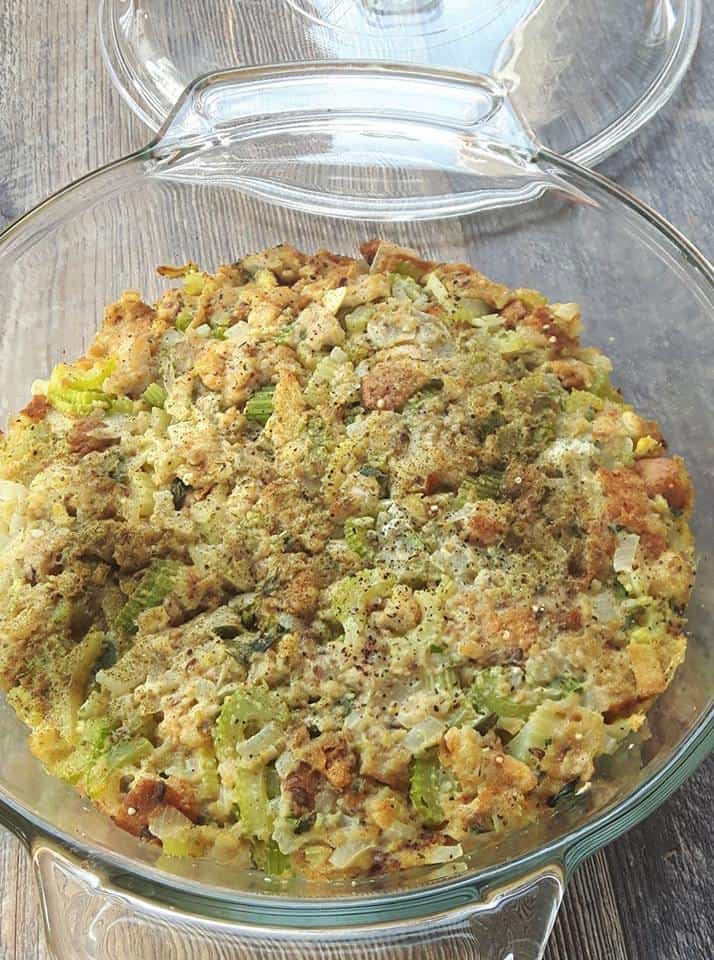
Did you know that a stuffing that is not stuffed into a bird is called dressing? Some people like to make a dressing outside the bird and some like to make it inside the bird. It is completely up to you, however keep in mind the cooking times will vary. 

Today, I’m making a dressing and on occasion I will make this same dressing and stuff it inside a bird when baking a Turkey. You may find the dressing a bit dry when baking outside the turkey and in that case you can prepare a gravy on the side and serve it alongside if desired. 

I will do this sometimes if I want to serve turkey, because I just use the turkey drippings to make a perfect gravy. I find my Turkey cooks better without it stuffed inside anyway.

This dressing is so tasty, I could eat it all to myself. Now take note the dryer the bread the more tastier it will be also using a bread with other things in it only adds extra flavor. That is why I like to use Flax & Quinoa bread, which gives it a nice nutty flavor. 

However you can use any type of bread of course, just make sure it’s dried out some before you tear it apart to ensure the stuffing is not soggy. You can also add less or more celery/onions as well, depending on your preference.

This recipe makes enough for roughly four servings, so if you want to serve more people just add a few more bread slices and adjust the other ingredients according to your taste, there really is not much to it. Enjoy!

It’s going to be so GOOD!


Note: You can add flax seeds, diced apples, cranberries or sunflower seeds to this stuffing if you desire to make it more hearty.


I am so thrilled you are reading one of my recipes, if you made this recipe id love to hear about it! You can post a review, picture below or via Instagram and let me know how it turned out. And by doing so you will be automatically entered into our seasonal CONTEST to win one of our great prizes. Winner will be notified via email within a week after the contest closes. Thank you very much for reading and until next time see ya in the kitchen. Don’t want to miss a recipe? Sign up for our NEWSLETTER delivered right to your inbox!

PIN IT FOR LATER


Easy Key Lime Pie

This Easy Key Lime Pie contains only 4 ingredients and no eggs.  

If you have never tried this delicious pie that hails from Sunny Seaside Florida, then you are in for a treat! It’s super fresh tasting, tangy and sweet.

And if you knew it was this easy to make, I’m certain you would be making it more often.

This is one of my favorite pies, next to some other berries kinds.

And with only 4 ingredients such as sweetened condensed milk, sour cream, key lime juice, and whip cream. This pie is easy to make.

And takes less than 30 minutes from start to finish! 

HOW TO MAKE KEY LIME PIE

  • Some people like to add 2 cans of condensed milk, so if you prefer you can do that too.
  • Personally I prefer it made with one can because it gives more of that tangy taste that I love.
  • Plus if you add 2 cans, you will find it makes to much filling.
  • So if you decide to do so, be prepared for some extra filling on the side. Which I guess isn’t so bad right? 

This is my favorite KEY LIME JUICE!

For my all time favorite pie recipe!

Key Lime Pie is always best the next day, so allow it to sit in the fridge overnight for the best flavor.

When your read to serve, add your whipped cream on-top otherwise it will melt all over the place.

LOVE KEY LIME PIE? Then you will want to try my other recipe below!


I am so thrilled you are reading one of my recipes, if you made this recipe i’d love to hear about it! Thank you very much for reading and until next time see ya in the kitchen. Don’t want to miss a recipe? Sign up for our NEWSLETTER delivered right to your inbox!

Skillet Lobster Mac and Cheese

This Skillet Lobster Mac and Cheese is such a delicious and comforting meal for two. 

I had something similar at a restaurant last year and had to make it for myself. This is sophisticated version of  the old fashioned macaroni and cheese that you may be familiar with. 

So why not treat yourself and someone special, to a warm bowl of mac and cheese, infused with some grilled lobster.

LOBSTER MAC AND CHEESE RECIPE

  1. Start buy cutting your lobster down the middle and then directly in half so you can remove the meat and use the tales in the dish.
  2. Cook your macaroni according to the instructions, rinse and drain once cooked.

Prepare your White sauce:

  1. On low heat, place your sliced in “half lobsters” with the meat still inside in a cast iron skillet. Allow them to cook for a few minutes on each side, and remove from heat before they are fully cooked and set aside.
  2. Allow the lobster to cool, and remove the meat with your thumbs and set the shells aside (to be cooked later with the pasta)
  3. In the same skillet melt your butter on medium to low heat and slowly add in your flour stirring constantly.
  4. Be careful not to burn your flour, watch to make sure the FLOUR is becoming a light brown color, still continuing to stir constantly. This may take 5 minutes or more. If this is not done properly you will either have under cooked flour or you will burn it.
  5. Once the butter and flour has retched a light brown color, and your sauce has cooled for 5 minutes slowly add in  your “COLD” milk and stir till combined. Next, turn down the burner to low heat and add in your thyme, old bay seasoning and nutmeg into the white sauce and whisk it all together for 2 minutes or until fragrant. Then your Worcestershire sauce, some salt and continue stirring for 5 minutes. Time to add in your “Old Shredded Cheddar Cheese” a bit at a time while stirring it over a low heat until the cheese melts into the white sauce. Now add 1/2 tsp of your Dijon Mustard and let it sit to combine.
     

Baking the Macaroni and Cheese:

  1. Now add your lobster shells to the boiling water and cook your paste, once cooked drain it off (keep the shells for baking in the oven)
  2. And in your pre cooked macaroni to cast iron skillet (add a few drops of water so its not to dry) and toss to coat with the old cheddar cheese and lobster meat. Add salt and pepper if needed, taste as you go.
  3. Now is the time to add in those lobster shells, place around the outside of the skillet (for presentation) and sprinkle your Panko breadcrumbs mixture all over the top and season with salt and pepper, once more.
  4. Bake at 4oo degrees for 20-25 minutes on the middle rack or until golden brown.
  5.  

I am so thrilled you are reading one of my recipes, if you made this recipe i’d love to hear about it! You can post a review, picture below or via Instagram and let me know how it turned out. And by doing so you will be automatically entered into our seasonal CONTEST to win one of our great prizes. Winner will be notified via email within a week after the contest closes. Thank you very much for reading and until next time see ya in the kitchen. Don’t want to miss a recipe? Sign up for our NEWSLETTER delivered right to your inbox every Month!

Best Pumpkin Pie Ice Cream

Do you like Pumpkin Pie? Well I do, so much so that I can eat a whole pie to myself. So I decided to recreate the same pie with this Pumpkin Pie Ice Cream.

Have you ever added vanilla ice cream to your Pumpkin Pie? It becomes even more AMAZING, don’t you agree?

That is what this ice cream becomes. 

I grew up eating Pumpkin pie, it was always served as the main dessert around Thanksgiving, Christmas and sometimes on Halloween.

As a kid I never could get enough of it. And so I wanted to recreate this pie and make it into an ice-cream. 

My family loves Pumpkin pie too, so I made this inspired ice-cream, and boy oh boy this stuff is delicious.

Don’t believe me? 

Well then you’re just gonna have to try it yourself!

Maybe you will even skip the actually pie this year and serve this up and your next family gathering. I’m sure your guests won’t mind! 

I am so thrilled you are reading one of my recipes, if you made this, I want to see! Follow Canadian Cooking Adventures Instagram, snap a photo, and tag and hashtag it with @canadiancookingadventures and #canadiancookingadventures

Stay connected and follow along on FacebookPinterest, and Instagram for all of my latest recipes!