Frozen Pumpkin No Bake Cheesecake

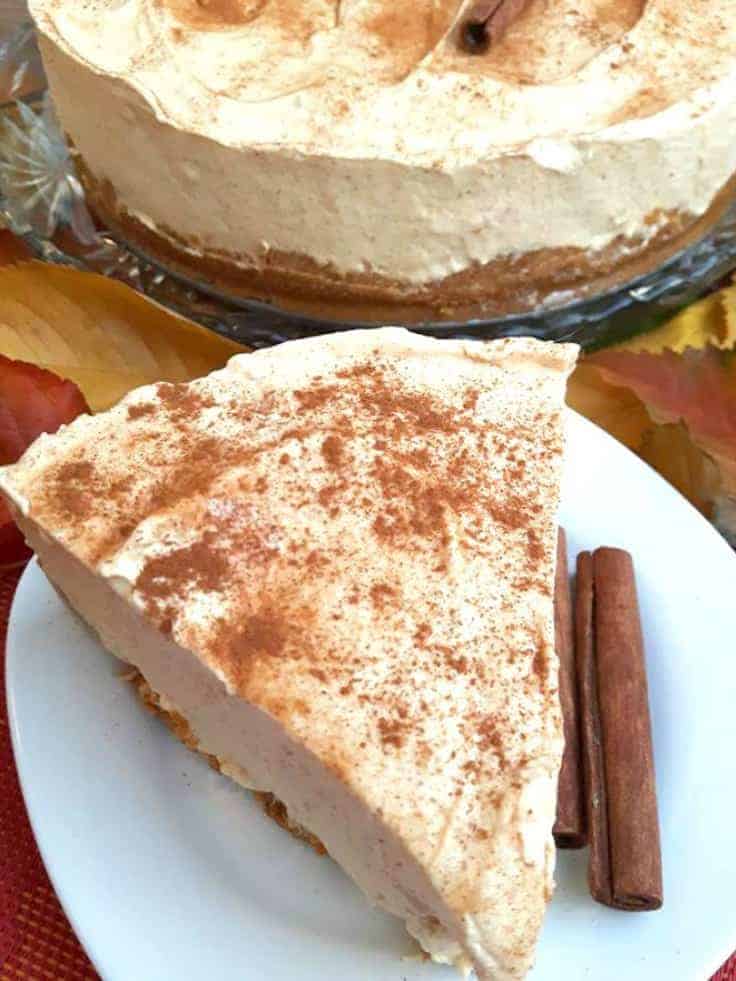
This Frozen Pumpkin No Bake Cheesecake is the perfect cheesecake recipe for those upcoming holiday get togethers such as Halloween, Thanksgiving or Christmas. Where you just want to serve something festive and different that the average pumpkin pie. 

This frozen spiced pumpkin cheesecake is just one of those recipes that everyone should have in their freezer around the holiday season.

Think Thanksgiving and Christmas or if you just love pumpkins and cheesecake then this recipe can really be enjoyed any time of the year.

Seriously it doesn’t get any more delicious than this dessert and trust me it’s pretty easy to make.

So go ahead and serve this to your guests and family and watch them beg for this recipe.

HOW TO MAKE A Frozen Pumpkin No Bake Cheesecake

TO MAKE THE FROZEN SPICED PUMPKIN CHEESECAKE CRUST:

  1. Start by making your base/crust, in a large bowl place your graham crackers, brown sugar and melted butter. Mix this together with a spoon and then use your hands to press it together so it sticks. Lightly oil your cheesecake pan and then place your graham cracker crust inside. Press firmly down to create your crust.

NO-BAKE GRAHAM CRACKER CRUST:

  1. Chill pie crust for at 30 minutes prior to filling. Prior to serving, rub the outside and bottom of the cheesecake pan with a wringed out hot cloth this helps to release the pan from the crust.
  2. Baked graham crust: Preheat oven to 325°. Bake crust for 10 minutes, cool completely before filling.
  3. Add 2 packages of cream cheese to a large bowl and with your hand held blender whisk in a can of condensed milk, whipped cream and vanilla extract. Blend till smooth, be careful to not over blend.
  4. Pour over your crust slowly then chill in the freezer anywhere from 6 to 24 hours.

FINISHING THE CHEESECAKE:

  1. Once your cake is absolutely cold, release the cheesecake from the pan slowly.
  2. Sprinkle some cinnamon sugar over top
  3. Cut and allow to defrost for roughly 20 minutes, enjoy!

What better way to celebrate fall in the kitchen than with a Spiced Pumpkin Cheesecake?

This Cheesecake will have you and those who get a chance to have a slice wanting more. And the nice thing is this 8″ inch cake can serve 12 people easily.

Since this is a no bake cake, you are going to want to prepare it the day ahead. Then allow it to set in the freezer for at least 6 hours prior to serving.

Tucker, you can serve it with a dollop of freshly whipped cream on the top prior to serving if desired.

However the rest of the Canadian Cooking Adventures team thinks it’s best with just a sprinkle of cinnamon on top, so we will leave that up to you.

This is the most creamy and tasty cheesecake, perfect for the holidays!

Also be sure to use “pumpkin puree” not “filling”, there is big difference here.

For this recipe, I used 1 1/2 cups of graham cracker crumbs, because I really like a thin crust however most recipes will call for 2 cups which makes a slightly thicker crust.

If you prefer a thicker crust then use the 2 cups.

Note: You can put a dollop of whipped cream on top. Place your cake back in the freezer or it will melt this cheesecake is best chilled frozen.

Inspired by: Chelsea’s Messy Apron ~ Frozen Pumpkin Pie Cheesecake

I am so thrilled you are reading one of my recipes, your visits and your comments are greatly appreciated. Thank you very much for reading and until next time see ya in the kitchen. Don’t want to miss a recipe? Sign up for our NEWSLETTER delivered right to your inbox!
Christmas Cheesecake

This Christmas Cheesecake is the perfect addition to your holiday celebrations! 

The Christmas Holidays are here once again! 

And boy oh boy am I excited! The holidays mean different things to different people, but I think we can all agree that it’s a time to rest and hopefully relax spending some quality time with those we love. And I hope this cheesecake may just be that one thing that helps with that.

CHRISTMAS CHEESECAKE NO BAKE

This cheesecake here is a no bake cheesecake, just so you know!

That means the only thing that is being cooked is the gram cracker crust, the rest is frozen prior to serving! 

WHY IS IT PURPLE

You may be thinking, how did you get that cheesecake purple? And is it even healthy! The answer to that is yes, it is healthy.

And it is made with purple yams.

If you have never cooked with purple yam before, trust me it is not hard.

It is like cooking any other yam actually. 

HOW TO PURPLE YAMS TASTE

You’re probably wondering if purple yams taste good in a cheesecake right? Well I assure you they do, purple yams are often cooked in cakes in the Philippines. And are a bit sweet and make for an excellent addition in a cheesecake. 

In the Philippines this cheesecakes is actually known as “Ube”.

Purple yams are packed with vitamins, such as A, C and are a good source of copper, dietary fiber, vitamin B6, potassium and iron.

And are known to improve blood sugar regulation and some studies have discovered significant antibacterial and antifungal properties.

HOW DOES A PURPLE YAM LOOK COOKED

HOW TO MAKE CHRISTMAS CHEESECAKE

  1. Start by making your base/crust, in a large bowl place your graham crackers, brown sugar and melted butter. Mix this together with a spoon and then use your hands to press it together so it sticks.
  2. Lightly oil your cheesecake pan and then place your graham cracker crust inside. Press firmly down to create your crust. No-bake graham cracker crust: Chill pie crust for at 30 minutes prior to filling. Prior to serving, rub the outside and bottom of the cheesecake pan with a wringed out hot cloth this helps to release the pan from the crust. Baked graham crust: Preheat oven to 325°. Bake crust for 10 minutes, cool completely before filling.

FILLING:

  1. Wash and cut your yams into bite size pieces and boil in a pot of water till tender.
  2. Strain your yams and allow to cool. Once your Purple Yams have cooled, mash them in a large bowl till smooth.
  3. Then add 2 packages of cream cheese and with your hand held blender whisk together till smooth. Add in your condensed milk, nutmeg and ground cinnamon. Pour over your crust slowly then chill in the freezer anywhere from 6 to 24 hours.

FINISHING THE CHEESECAKE:

  1. Once your cake is absolutely cold, release the cheesecake from the pan slowly.
  2. Add more whipped cream around the cake to decorate!
  3. Cut and allow to defrost for roughly 20 minutes, enjoy!
  • I like to use an 8″ inch cheesecake pan for this recipe which gives you a thick cheesecake as seen in the pictures below, which can serve 12 people.
  • If you prefer a thinner cheesecake, you can then use a 9″inch cheesecake pan. Really there is not much to it, besides boiling some purple yams, preparing your crust and whip up some cream cheese, along with whipped cream to give it the perfect lightness that makes this dessert so decadent!

Be sure not to skimp on the “whip cream” here because it really makes this cake come together perfectly.

If that is not more reason to enjoy them this holiday season in a cheesecake then I don’t know what is!

Wishing you and yours Happy Holidays!

Note: Place your cake back in the freezer or it will melt this cheesecake is best kept chilled. If you like a thinner graham cracker crust, feel free to use 1 1/2 cups of crushed crackers instead of 2.

I am so thrilled you are reading one of my recipes, if you made this recipe i’d love to hear about it!  Thank you very much for reading and until next time see ya in the kitchen. Don’t want to miss a recipe? Sign up for our NEWSLETTER delivered right to your inbox!

Cherry Cheesecake Cups (no bake)

These (no bake) Black Cherry Cheesecake Cups are absolutely delicious and easy to make. They are also the perfect dessert recipe for the holidays! Image serving these to your guests after dinner!

Ho ho ho! Keep calm they say the holidays are near. However with all this planning and preparing to get there it can be less than calm for some.

Would it not be nice to be able to prepare a dessert for 8 or so people in under 1 hour and have them thinking you spent all day? Well look no further, if you are short on time then you are going to love this recipe.


Now let me ask you a serious question, do you know anyone that doesn’t like cheesecake? Well I don’t. 

o trust me when I say, that these cheesecake cups are sure to put a smile on everyone’s face this Holiday Season.

These cups are so good that people may just ask for seconds, or thirds.

You serve them chilled, which allows you to skip on the baking part and saves you a whole lot of hassle.

Giving you plenty of time to do whatever else it is that may be on your to do list.

You will be shocked at how easy this recipe truly is and I promise you it does not skimp on flavor at all. People are going to be asking you how you did it? But let’s leave that little secret to us kitchen warriors.


A simple way to preparing these Cherry Cheesecake Cups 

With boiled down cherries or canned!

I am so thrilled you are reading one of my recipes, if you made this recipe id love to hear about it!  Thank you very much for reading and until next time see ya in the kitchen. Don’t want to miss a recipe? Sign up for our NEWSLETTER delivered right to your inbox!

Blueberry Frozen Yogurt

Ohhhh Blueberries i love you. I must admit, when i was a kid i hated fruit. But now that i am an adult i love it. Maybe it is because almost all my desserts are made with it!! Or maybe its because i finally have found an excuse to eat frozen yogurt and ice-cream more often. When making Frozen Yogurt i often choose one with a fruit base, and this is certainly one of my favorites. Plus it’s super easy to make and is so healthy for you its very hard for my guests to say NO to even if on a diet. Because once i tell them whats in it and that Blueberries are the King of Antioxidants, which are packed full of fiber, potassium, folate, vitamin C, vitamin B6 and more there sold. And for me its more than enough reasons alone to eat this every night.


Kitchen Essentials:


To make 2 quarts of Blueberry Frozen Yogurt:

  1. Add your frozen blueberries to your food processor, pulse till blended.
  2. Now lets make the frozen yogurt base, start by adding your cold yogurt, milk, condensed milk, lime juice and blueberries into a large bowl and mix with a spatula till blended.
  3. Once your mixture is blended, pour the mixture into your frozen Cuisinart maker and process for 25 minutes or according to manufacturer’s instructions.
  4. Now comes the fun part, grab a large plastic container will a lid (you will be using this to freeze your frozen yogurt in) after letting it sit for 30 mins in the (Cuisinart machine which makes it easier to remove) then you can start by pouring all of your frozen yogurt mixture in your container.
  5. Freeze for 2 hours and serve.
  6. Before scooping, enjoy!

If you don’t have an Cuisinart frozen yogurt maker, check this post out

Note: Set outside the freezer 10-20 minutes prior to scooping.


I am so thrilled you are reading one of my recipes, if you made this recipe id love to hear about it! You can post a review, picture below or via Instagram and let me know how it turned out. And by doing so you will be automatically entered into our seasonal CONTEST to win one of our great prizes. Winner will be notified via email within a week after the contest closes. Thank you very much for reading and until next time see ya in the kitchen. Don’t want to miss a recipe? Sign up for our NEWSLETTER delivered right to your inbox!

Matcha Green Tea and Coconut Frozen Yogurt

Do you like Pina Colada’s and dancing in the rain? Well then, you might just like this recipe for Matcha Green Tea and Coconut Frozen Yogurt better! I remember where and when i tried this first, it was last summer on a patio somewhere in downtown Vancouver, and to my surprise it was absolutely delicious and hit my sweet tooth. Shortly after i picked up some match powder and came up with my own version. Matcha is packed full of antioxidants and health benefits, so you just can’t go wrong with indulgence in this dessert every other day. I like to make this a couple times throughout the summer months, as its just another delicious excuse to get in all those amazing healthy benefits  that matcha Green powder offers.
Kitchen Essentials:

To make the Matcha Green tea and Coconut Frozen Yogurt: 

  1. In a food processor combine your greek yogurt, full fat coconut milk, milk, condensed milk, and matcha powder.
  2. And blend together until smooth.
  3. Pour into your pre frozen ice cream maker and let it do its magic for about 25 minutes.
  4. Scoop out and serve soft, or place inside a sealable airtight container and place in the freezer anywhere from 2-24 hours and enjoy!

If you don’t have an ice cream maker, check this post out
Note: Make sure the yogurt your using Greek yogurt otherwise it won’t turn out as creamy. Also if you want a stronger green tea flavor add 1- 2 more tbsp of matcha.
I am so thrilled you are reading one of my recipes, if you made this recipe id love to hear about it! You can post a review, picture below or via Instagram and let me know how it turned out. And by doing so you will be automatically entered into our seasonal CONTEST to win one of our great prizes. Winner will be notified via email within a week after the contest closes. Thank you very much for reading and until next time see ya in the kitchen. Don’t want to miss a recipe? Sign up for our NEWSLETTER delivered right to your inbox every Month!